Did you forget to save the original photo before adding filters? It happens even to the best of us! Sometimes, these filters alter your photos in ways that make you less than happy with them, but thankfully, you will not have to start from scratch. Below is a guide on how to remove filters from your photos and restore your original images with some really simple methods.
How to remove filters from photos online
You do not need to download any software to remove filters from photos. With the help of online tools, it is possible to return your pictures to their real view with just a few clicks. Here are two good options.
Fotor
Fotor is renowned for photo editing and has made it very easy for you to restore authenticity to your photos with its powerful filter remover. Powered by AI-driven tools, unwanted filters are removed in just a few clicks, while enhancing natural colors. Whether on a computer or mobile, Fotor makes it super easy to revive your photos and get them to look as you would want.
Steps to remove filters from photos using Fotor:
- Go to Fotor’s Filter Remover.

- Upload the photo that contains the filter.
- Click the”remove” button to automatically remove that unwanted filter.
- You can manipulate the image to achieve the look that you desire.
- Review and download your filter-free photo.
PhotoKit
PhotoKit is one of the best photo editing tools with powerful image-enhancing ability, coupled with the removal of unwanted filters. You can take your photo to its actual color through the feature known as remove-color to give it a more realistic look. Supporting batch editing, coupled with ease in usage and commanding features, PhotoKit will serve all your editing needs, from being a beginner to an expert editor.
Steps to remove filters using PhotoKit:
- Access the Remove Color Tool of PhotoKit.
- Upload an image to edit.
- Under the “Filter” tab, click the “Remove Color” option to remove any unwanted filters.
- Depending on any over-filtering that might have occurred, adjust settings appropriately for desired results.
- Preview and download the edited photo.

How to remove Snapchat filter from photo
If you’ve used a Snapchat filter on a photo but now want to remove it, you can do so within the app, as long as the photo is still in your Snapchat memories. While Snapchat doesn’t allow direct filter removal after saving, there’s a workaround to revert to the unfiltered version if the photo is still in the editing stage.
- Open Snapchat and go to your “Memories” by tapping the small circle below the capture button.
- Find the photo with the filter you want to remove.
- Tap on the photo to open it.
- Select the “Edit” button (pencil icon).
- Remove or adjust the filter manually by tapping the filter icon and choosing none or resetting to the original version.
- Save the photo without the filter.
Tip:
If you don’t have the photo in Snapchat memories, you may need to rely on a third-party tool to remove the filter.
How to remove lens from Snapchat
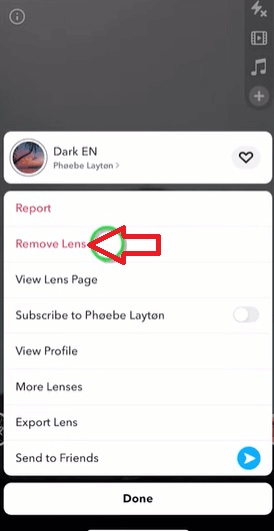
Snapchat offers many lenses to beautify pictures, but at times, you get a finer look without them, so you want to remove them. Snapchat allows users to adjust the photo or remove the lenses for a more decent and clear version without any effects. Here is how you can easily remove a lens from your photo.
- Open Snapchat and select the photo or video with the lens. Hold the camera view to lock the lens into position at the desired placement.
- Swipe through from either side of the screen until you land in the Lens Studio. Tap the smiling face with the scissors icon to go to the settings of the lens.
- Once inside the lens settings, tap the option to remove the lens. Tap on the “Remove Lens” button, and it will remove the lens from your image or video.

How to remove filters from photos on Instagram
Yeah, you can remove the filters from the photos on Instagram! Whether you’ve made your photo look even more amazing with a filter or wish to go back to how it was initially, Instagram allows you to edit these. Here’s how you can remove a filter from a photo on Instagram:
- Open the Instagram app on your smartphone and navigate to the photo you want to edit.
- Tap the triple dots in the top-right corner of the photo to open the options menu.
- Select “Edit” from the pop-up menu.
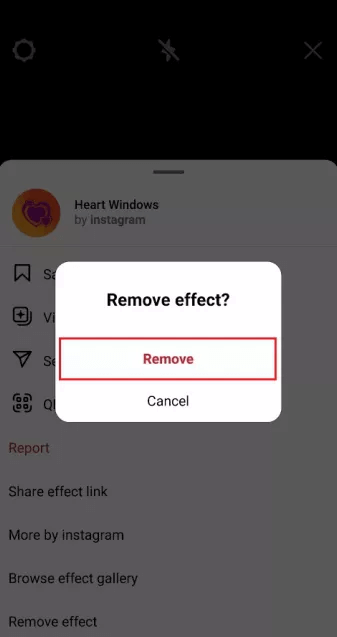
- Once you have entered the editing interface, notice that a filter has automatically applied. Scroll down and choose Remove to remove the filter.
- Tap “Done” to save your changes, updating your photo.

How to remove filters from photos on iPhone
Not using Instagram or Snapchat, but still wanting to remove filters from photos taken on your iPhone? You can do this directly in the Photos application. Here’s how you’d remove a filter using the built-in editing tools:
- Open up the Photos app on your iPhone and select the photo you’re looking to edit.
- Tap Edit in the top right corner of the screen to enter into photo editing mode.
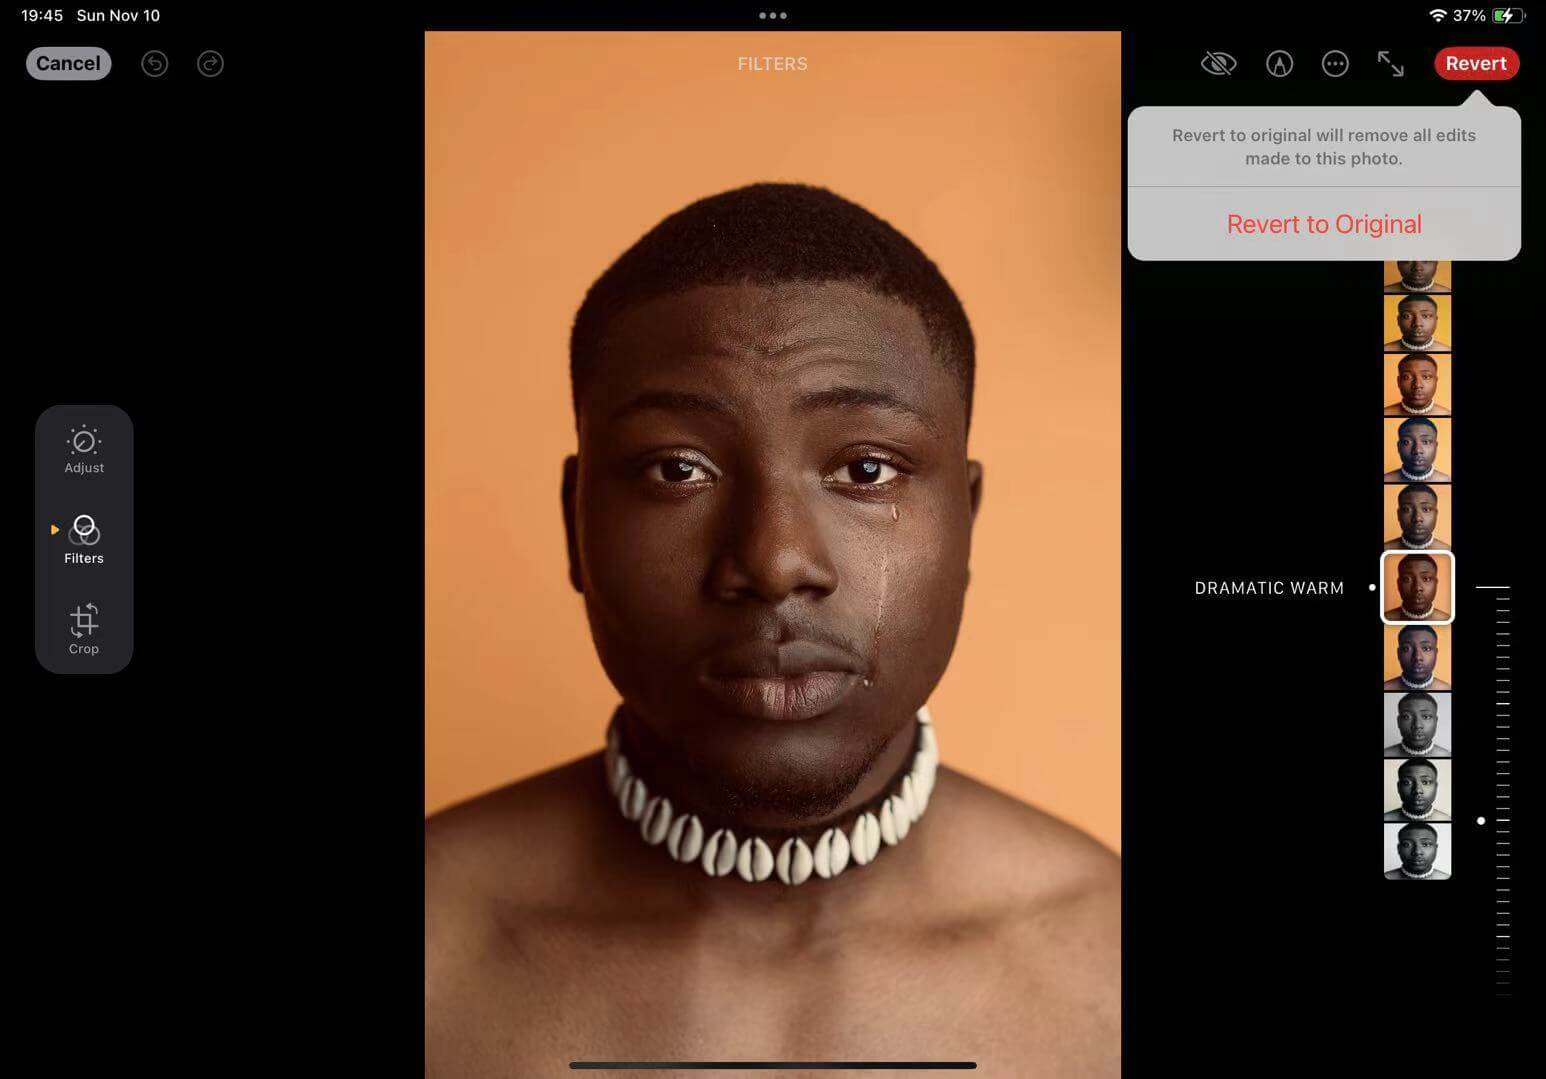
- If the photo has a filter applied, all you do is tap the Revert button and then select Revert to Original. This will remove all edits that have been done, including any filters applied.
- If you want to revert to an original photo but only remove or make adjustments to the filter, tap the filter icon-it looks like a magic wand and tap None to remove the applied filter. You can also adjust other settings for exposure, contrast, and brightness if needed.
- Tap Done when you’re through making the adjustments. It will save the changes to your photo.

Bonus: How to remove unwanted objects from photos
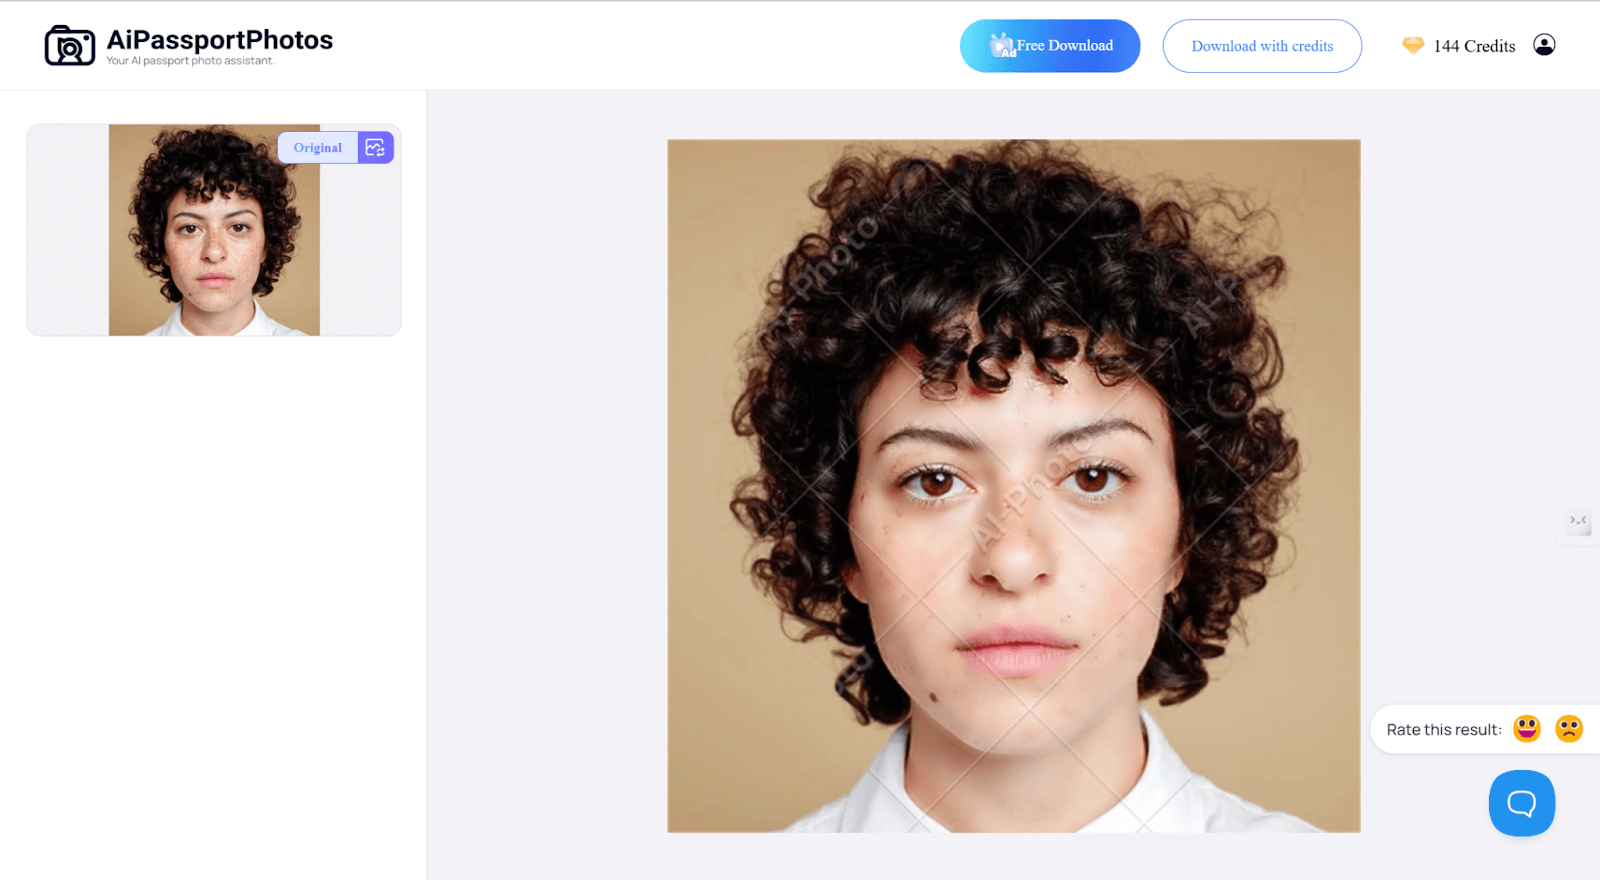
Filters are really helpful in making our photos look good, but you can also enhance your snaps with an effortless AiPassportPhotos photo retouching. This online platform can automatically detect and remove blemishes, acne, wrinkles and any other unwanted objects from photo. It smoothes face skin and brightness to give your photos a look that is fresh and natural. Be it a selfie or professional portrait snapping, photo quality can instantly be enhanced without installing any advanced editing software.
Retouching portrait photos in only three steps:
- Go to AI Portrait Retouching and upload your photo.
- It will automatically remove blemishes, acne, and wrinkles and automatically adjust brightness and skin tone to make it a perfect photo.
- Once satisfied with the retouch, click to download and save your perfect photo.

🔎Read Also: How to Remove Scribbles on a Screenshot
FAQ
How do I remove the blur filter from a picture?
Blur filters can be removed from photos using some online apps that specialize in photo enhancements, such as Fotor, Remini, AiPassportPhotos, and many more. These tools use AI to analyze the system for blurry areas, sharpening them to enhance image clarity. Simply upload your photo and let the AI process the photo for you.
How do I remove an emoji filter from a photo?
These can be a little tricky to eliminate, as they obscure significant areas of the image. Inpainting or object-removal tools, such as Media.io or Snapseed, can be used to remove emoji from photo online. You will need to highlight the area of the emoji and hope the tool fills up the open space with pixels surrounding it, although results can vary.
How do I remove a mask filter from a photo?
In the case of masks or face filters, the ideal photo editing tools you can make use of would include things like content-aware or face recognition technologies, such as Photoshop or advanced online editors. Then, select the area with the mask filter, use the “content-aware fill” or “healing” tools, and adjust until it looks natural. Sometimes, though, removing complex filters distorts the original features.
Conclusion
In summary, removing filters from photos online or within popular apps like Snapchat, Instagram, and iPhone Photos is possible with the right tools and techniques. Whether you’re restoring a photo to its natural look or removing unwanted objects, these methods offer flexibility for different photo editing needs. From simple in-app adjustments to AI-powered online tools like Fotor, PhotoKit, and AiPassportPhotos, there are many accessible ways to regain the original charm of your images.