
As time passes by, photos would inevitably suffer from humidity, or improper preservation, resulting in crimped corners, tears, stains, faded colors, etc. Damaged old photos mean memories of the past are losing, too. It is necessary to repair old photos and pass the precious moments on from generation to generation. People used to seek help from skilled artists. Nowadays, as technology develops, there are more and more alternatives to turning old photo to new photo.
When it comes to the best way to restore old photos, we have to consider manual or automatic editing, ease of use and cost. Photoshop is known as a powerful graphic processing application. However, the tools are hard to understand for beginners. Moreover, the subscription plan could be a little expensive for non-professionals. Perfect restoration not only recovers common defects like creases, tears, scratches and stains but also colorizes the retro pictures, which is difficult to achieve in manual operation, especially for novices. Therefore, in this passage, we are going to explore some user-friendly and effective photo restorers, covering traditional GIMP and advanced AI photo restoration tools. Finally, we will make a comparison between them, helping you choose the best one.
Open-Source Photo Restorer – GIMP
GIMP refers to GNU Image Manipulation Program. As a popular alternative to Photoshop, it is mainly used to retouch photos, edit photos, edit pixel images and combine multiple pictures. That is what photo restoration needs.
It keeps updating since it was launched in 1996. This open-source program is compatible with Windows, macOS, and most Linux. You can download it on its official website free of charge and install it on your computer. In this session, we will introduce how to restore old photos with GIMP.
Step 1: Digitalize Old Photos
First of all, you have to convert your old photo into a digital version. You can either scan the pictures or take a shot of them. To maintain the original quality, it is suggested to scan them with printers or tablet scanners. The higher resolution of the photo is, the less difficult it will be to repair.
Step 2: Duplicate Layer
Before starting to restore photos, it is recommended to duplicate the image which helps to preserve the original copy. Whenever necessary, you can return to the unprocessed photo conveniently. To achieve the duplication, please go to “Layers > Background > Duplicate Layer”. Next, you can create a new layer for each step and all operations could be done on separate layers, which ensures that all repairing steps are overlaid and not influenced by each other.
Step 3: Crop and straighten
Folded Corners and rough edges look unpleasant. You can use cut them out with the “Crop Tool” or arouse the tool with the shortcut: Shift + C. Sometimes the scanned photo is slanting. You can straighten it with the “Rotate Tool” or arouse the tool with the shortcut: Shift + R.
Step 4: Adjust Brightness and Color Contrast
The old photo usually looks dull, so the primary step is to brighten it. Go to “Colors > Brightness-Contrast” to improve the overall appearance. The sliders can adjust the level of brightness and contrast.
Step 5: Repair Imperfections
Now it’s time to repair details. To deal with small areas of imperfections, such as scratches, creases, spots and stains, you can turn to the “Heal Tool” or the “Clone Tool”. Arouse the tool and click on the damaged areas. It will be recovered according to nearby colors and patterns.
Step 6: Remove Noise
Noise refers to a grainy veil that obscures the photo. Old photos are featured with random pixels. It could be removed by going to “Filters > Enhance > Noise Reduction”.
Step 7: Recolor
In order to bring old photos back to life, you have to correct the color cast or faded colors which result from humidity or direct light. This can be done by adjusting color balance, hue & saturation and curve which are available in the “Colors” panel.
Step 8: Sharpen the Image
Sharpening is a technique to increase the definition of details. It is not a mandatory step to restore old photos, but it does improve your photo quality which can be done through “Filters > Enhance > Unsharp Mask”.
Step 9: Save
After finishing all restoration and getting a satisfactory result, you can export it by clicking “File > Export As”. Remember to name your picture and choose the file format as well as where you would like to save it.
AI Picture Restore
If you find it difficult to learn about GIMP or time-consuming to manually repair old photos, here comes some AI photo restoration alternatives. Strong self-learning capabilities allow them to exactly locate imperfections and retouch photos to the best effects automatically. In this session, we are going to introduce some AI-supported old photo restorers, including offline applications and online tools.
Remini
Remini is a popular application compatible with both iOS and Android. It is a wonderful solution to transform faded and blurry old photo to new photo. Moreover, the “before and after” feature lets you see how much it has been improved. When it comes to how to restore old photos with Remini, just follow these steps:
Step 1: Download and install the app on your phone.
Step 2: Open the app and upload the existing digital photo or scan the paper photos and start processing them right away.
Step 3: Click the “Enhance” button and it will start working automatically.
Step 4: Save the recovered photo.

Fotor
Supported by advanced AI technology, Fotor can repair old photos within a few seconds. It can remove spots, scratches, and creases. Moreover, black-and-white photos are recolored by machine learning. All operations are done automatically without any manual analysis or adjustments. Photos with scratches, creases, blurred faces, black-and-white photos, yellowed photos and sepia-toned photos are all acceptable. Here is how it works.
- Go to the Fotor’s online program.
- Click the “Open Image” button or drag your images to the dashed box to upload the photo.
- Click the “Start” button and it will start analyzing and restoring on its own.
- Download and save the recovered photo.
- Click the “Open Image” button on the top to restore another one.

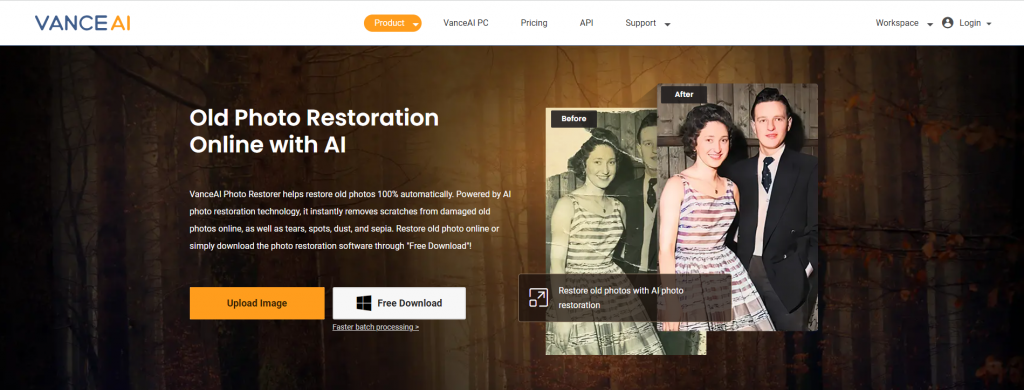
VanceAI Photo Restorer
VanceAI Old Photo Restorer is an AI-supported online tool that combines both manual and auto repair. It will intelligently analyze where to recover, remove noises and spots and fill in the missing parts caused by scratches. Moreover, if you are not satisfied with the results, you can use the “Edit” feature to further retouch it. Here are the users’ instructions.
Step 1: Go to VanceAI and click the “Upload Image” button.
Step 2: Choose target old photos and click the “Start to Process” button at the bottom right corner.
Step 3: Preview the results. If you are happy with it, just move on to download it. If not, click “Edit” to manually repair old photos.
AipassportPhotos
AiPassportPhotos is an online AI old photo restorer that combines photo restoration, colorization and enhancement. It requires one-click operation and no techniques or experience. It is compatible with both individual and family photos. Additionally, you can also remove and replace backgrounds with this tool. Here is how to use it.
- Step 1: Go to AiPassportPhotos old photo restorer.
- Step 2: click the “Restore Photo Now” button and upload pictures.
- Step 3: Preview the results and click the “Get photo now” button to download it.
Comparison with GIMP & Some AI Photo Restoration Tools
Now that you have learned about GIMP and AI picture restorer, let’s make a comparison between them, so you can decide which one is better for you.
| Tools | GIMP | Remini | Fotor | VanceAI | AiPassportPhotos |
| manual or automatic restoration | manual | automatic | automatic | automatic | automatic |
| Processing time | A few minutes-hours (depending on damaged condition) | A few seconds | A few seconds | A few seconds-minutes (depending on the amount of tasks) | A few seconds |
| cost | Free of charge | Limited free trials per day | Limited free images | Limited free images | |
| online use or applications? | application | application | online | online | online |
| For computer or mobile device? | computer | mobile | both | both | both |
| advantages | open-source Free of charge customized restoration effect comprehensive & powerful functions | restore old photos at any time & anywhere on the phone “before and after” feature | AI photo restoration in bulk fine tunes exposure, highlights, shadows | combination of manual & AI repair | excellent face recognition suitable for all kinds of portrait photos |
| disadvantages | require photo editing knowledge time-consuming§ not efficient for bulk operation | AI feature only available on mobile limited tools for free trials | can’t repair broken or missing corners/large areas of obvious stains/group photos/full body shot of a distant view are not acceptable | limited free images limited photo size and formats wait in queue | not for photos without persons fine-tune feature not available |
Summary
It has long been an important thing for a family to restore old photos which helps to preserve the precious memory of the past. With proper tools, damaged corners and edges are recovered. Spots, stains, creases and scratches are removed. Faded colors are brought back. Even black-and-white photos return to vitality based on the AI tools’ strong self-learning capability. In this passage, we introduce some common and useful photo restorers. If you are patient and skillful enough to manually repair old photos, you can choose GMIP. If not, you should turn to AI photo restoration. Each of them is featured with pros and cons, so please consider your real needs and take advantage of free trials before moving on to dig out more surprising functions.