
If you are a frequent photo editor user, you may have come across many effects like a bokeh effect. It is an effect that can add to your photos with some dreamy and enchanting look. Using a camera to achieve this kind of effect can be hard, but now with some tools, it is much easier. So, in this article, we will introduce the easiest ways to help you apply a bokeh effect. Read on to learn more.
What is the bokeh effect?
The bokeh effect’s “bokeh” comes from Japan. It means blurry, which gives the vibe to people a sense of the dreamy, out-of-focus background when taking the photo. This kind of effect, instead of distracting people from the main subject, actually makes the subject stand out more in the picture. The whole vibe is soft, blurred background, and pleasingly rendered shapes.
How to capture bokeh with a camera?
It is a bit of a hassle to achieve the bokeh effect with a camera. You should change the settings:
- Adjust your lens to a low f-stop number (like f/1.8 or f/2.8) to create a shallow depth of field.
- Using a lens with a longer focal length (like 50mm or more) can enhance the effect.
- Look for small light sources in the background, like fairy lights or street lamps, to create beautiful, glowing orbs of light to blur the background.
With these above tips, you can now create bokeh effects on your own with your camera.
Top x Bokeh background editor
To help you achieve the perfect bokeh effect without a professional camera, we’ve tested some top bokeh background editors. Here are the best options.
Befunky
Befunky is an online photo editor and graphic design tool. It offers multiple features like cropping and resizing photos, turning photos into art styles, background remover, retouching portraits, versatile effects, etc. And the bokeh effect is one of its tons of effects. Also, it provides 6 bokeh effects, and you can easily adjust the opacity to achieve the desired look. It has an intuitive interface which makes it easy to use for everyone. Here are the steps.
Steps:
Step 1. Click on Get Started button and choose edit a photo.
Step 2. Click on Open > Computer to upload your photo.
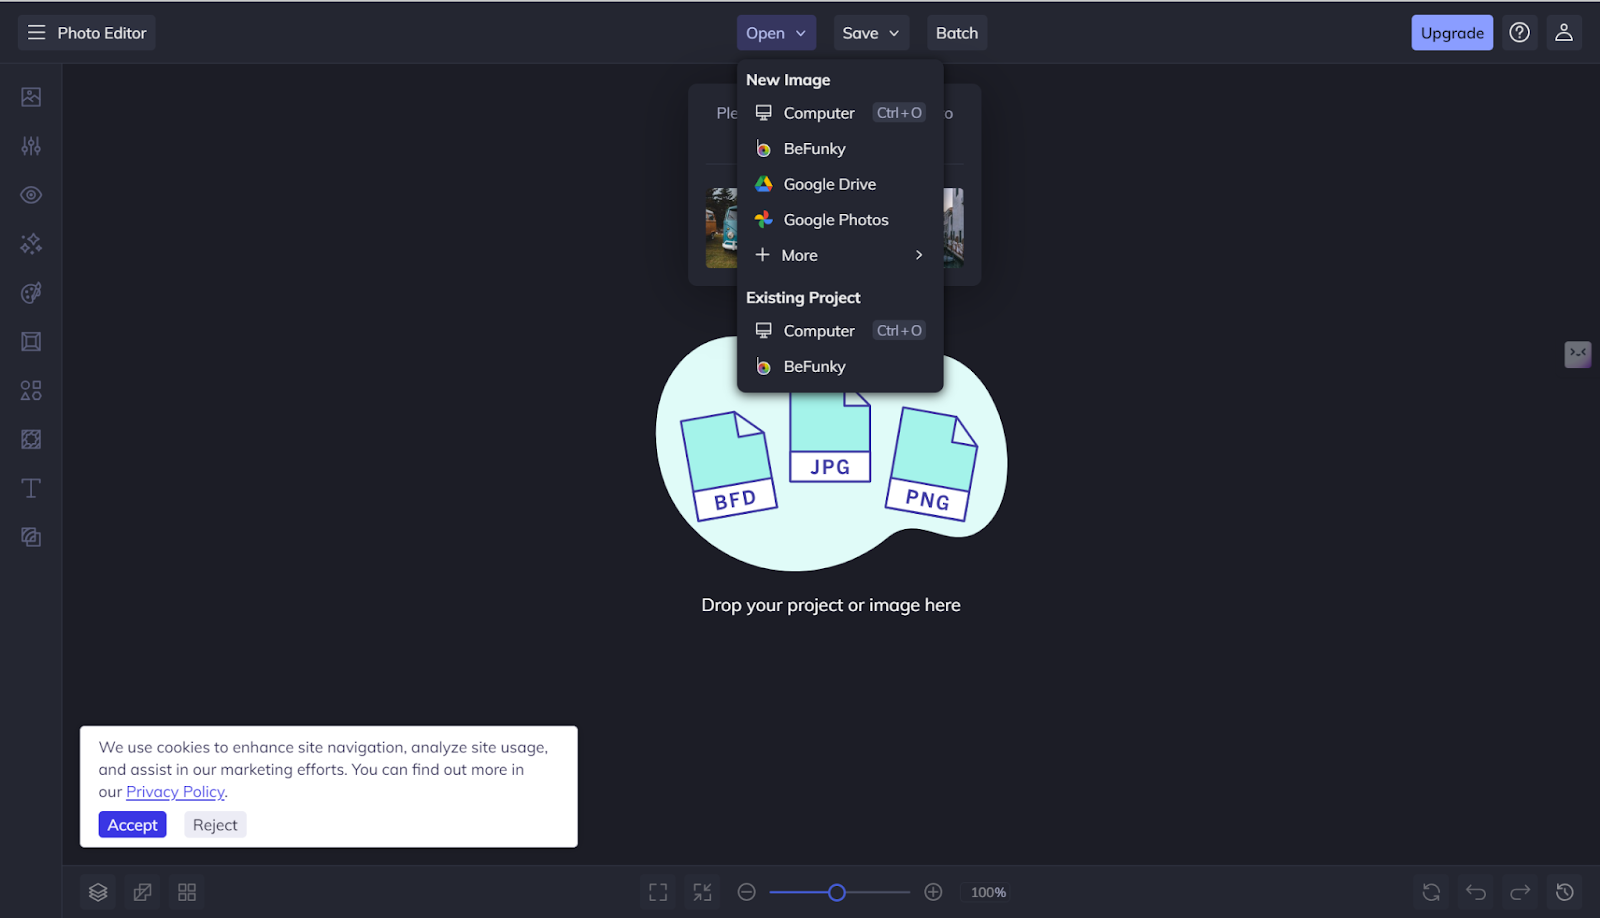
Step 3. Click on Texture button on the left panel bottom.
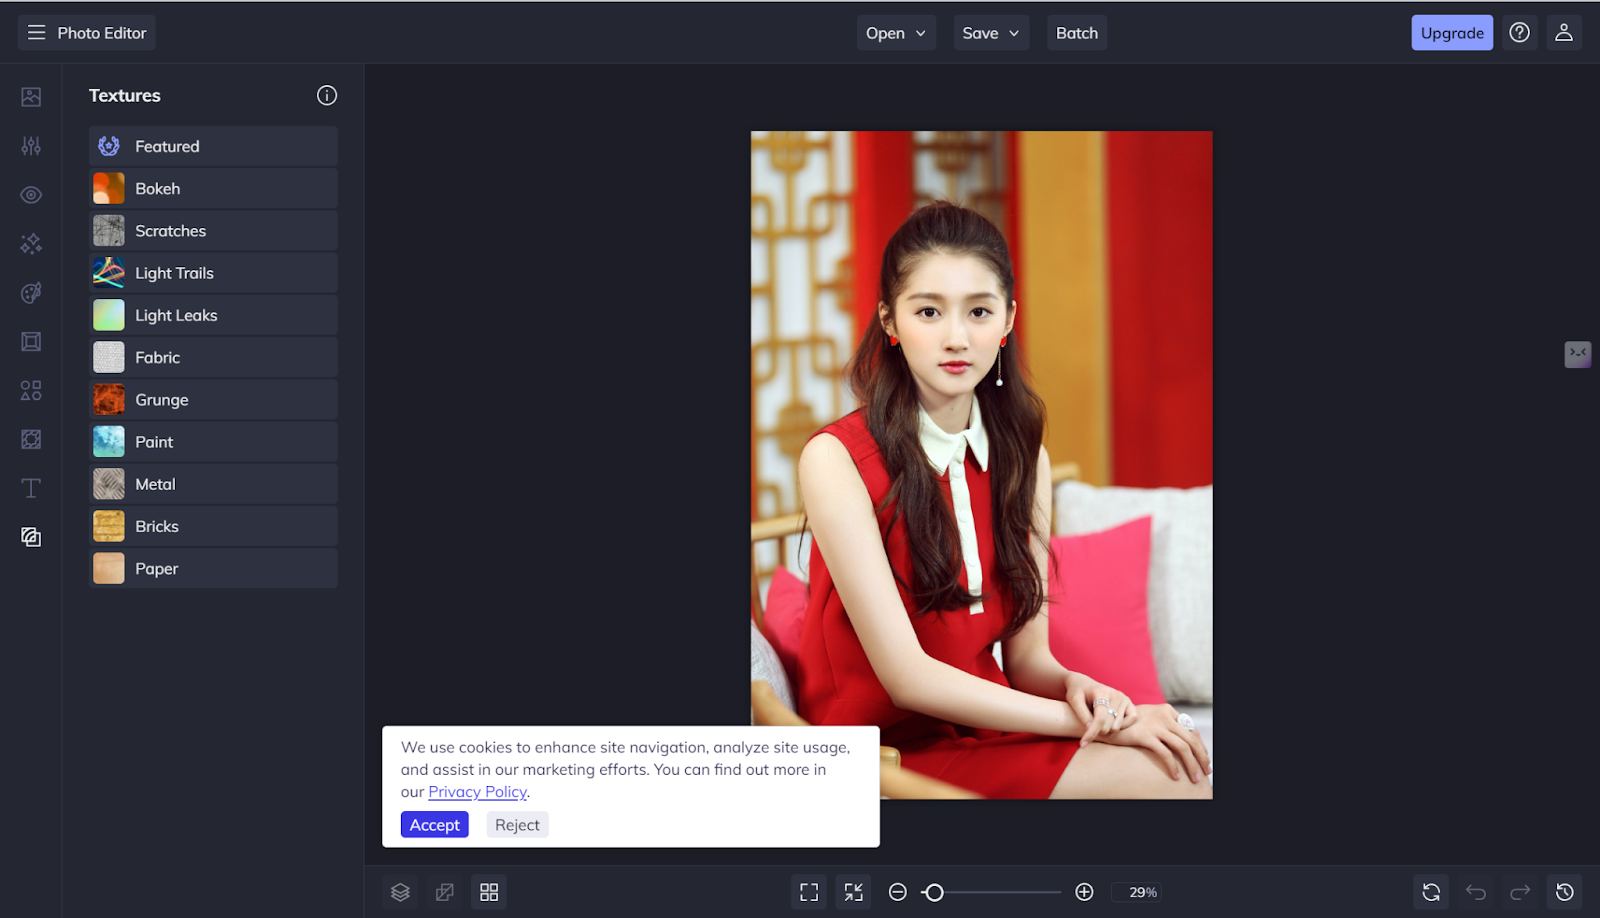
Step 4. Apply one bokeh effect and save the result.

Price: Free to use this feature.
Pros:
- Easy to use.
- Quick results.
- Variety of effects.
Cons:
- Some features require a subscription.
AiPassportPhotos Background Blur
AiPassportPhotos is a professional photo editor, especially for passport photos and ID photos. It has many extra features, like automatically restoring old photos online, retouching portrait photo, making face cutouts, it can also blur the background in one click. While it can’t create starry bokeh effects like some competitors, it does an excellent job with Gaussian Blur to give your photos a stunning look. Here is how to use it.
Steps:
Step 1. Upload your photo on AiPassportPhotos.
Step 2. Choose the blur background option on the left panel.
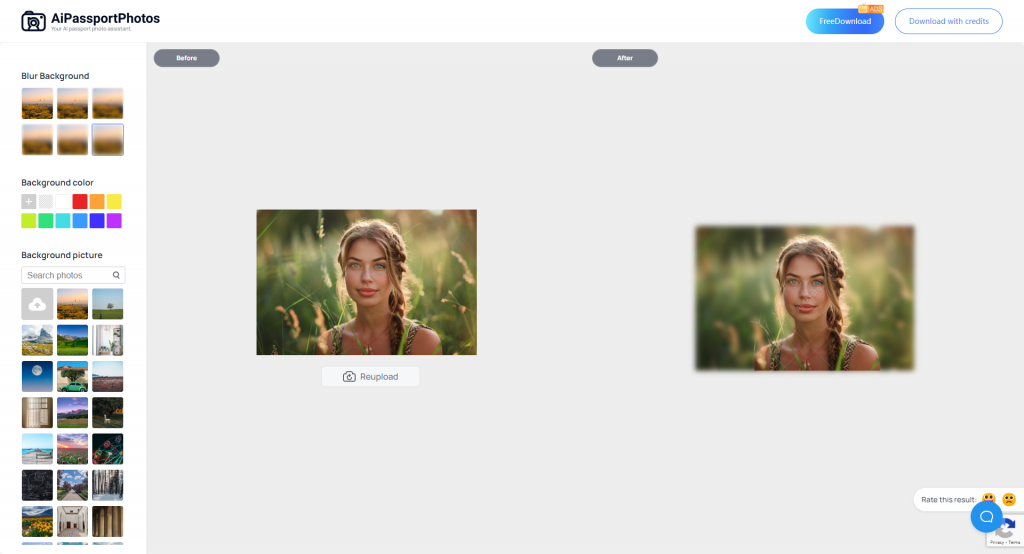
Step 3. Save your photo.
Price:
- A Free account.
- Free credits with ads.
- premium options (lowest price starts at $0.001 / credit).
Pros:
- Easy to use.
- Effective Gaussian Blur that allows you to adjust the intensity
- High-quality output.
Cons:
- Limited effects.
Pixlr
Pixlr is an online photo editor too, offering multiple editing tools, like all kinds of effects, parameter settings, masks, and so on. The bokeh effect is one of its effects, creating a product of a shallow “depth of field” effect. Here is how to use it.
Steps:
Step 1. Click on the Open Image button to upload your photo.
Step 2. Click on Filter then choose Focus/Bokeh option.
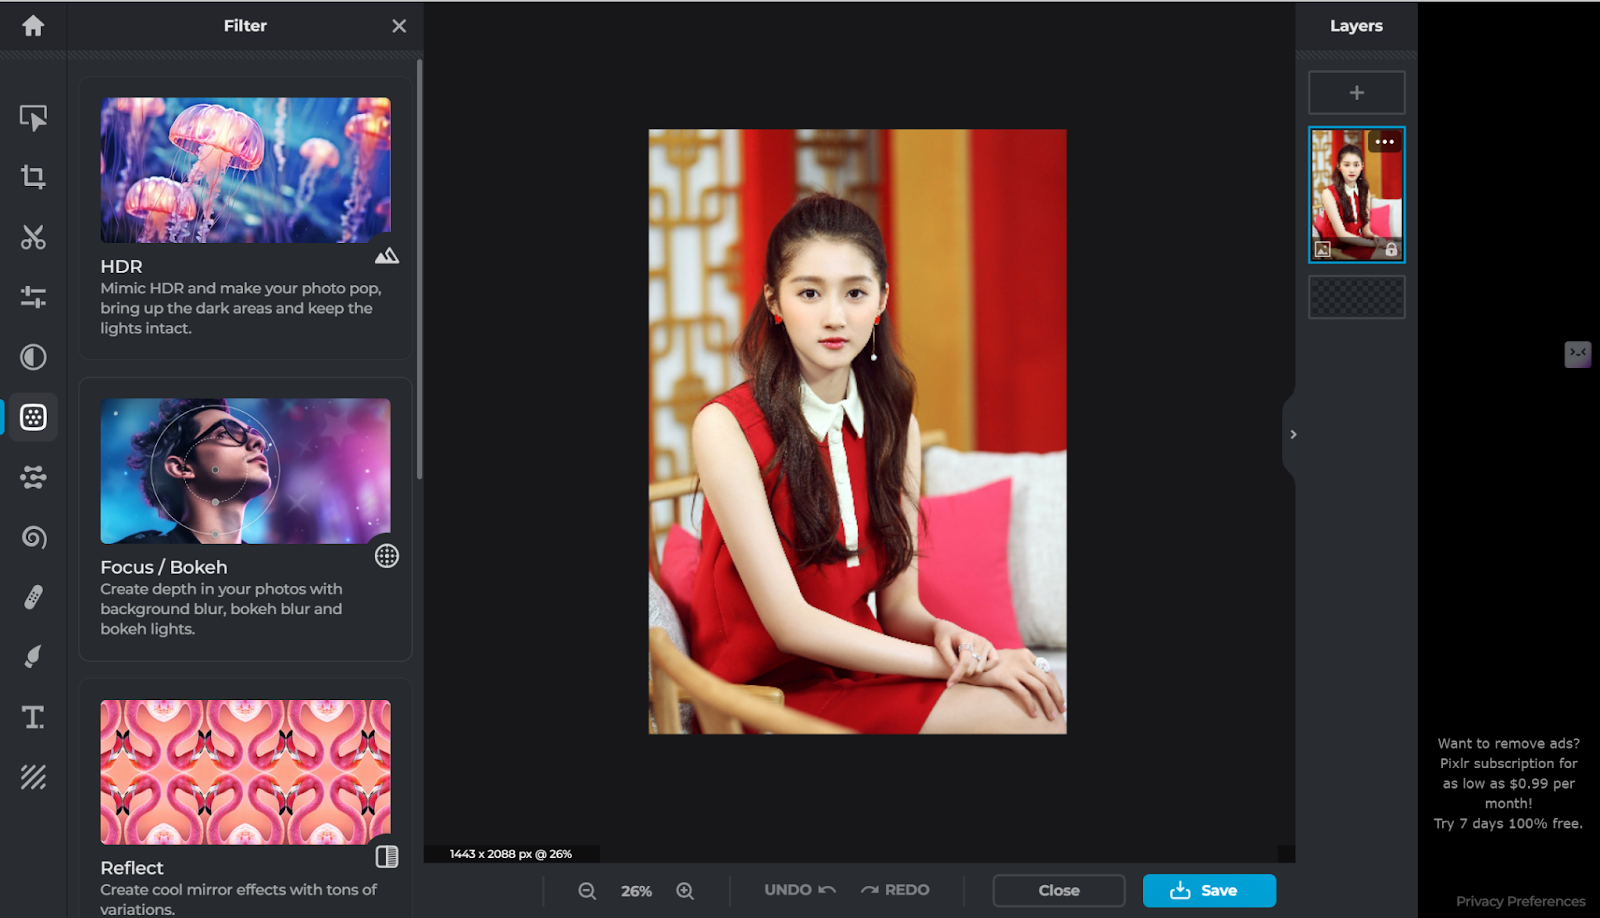
Step 3. Adjust the settings to your preference.

Step 4. Apply and save your photo.
Price:
- Free with ads.
- Premium version available (lowest price starts at $0.99/month).
Pros:
- Versatile editing tools.
- Easy to navigate.
- Customizable effects.
Cons:
- Ads in the free version.
- Some advanced features require payment.
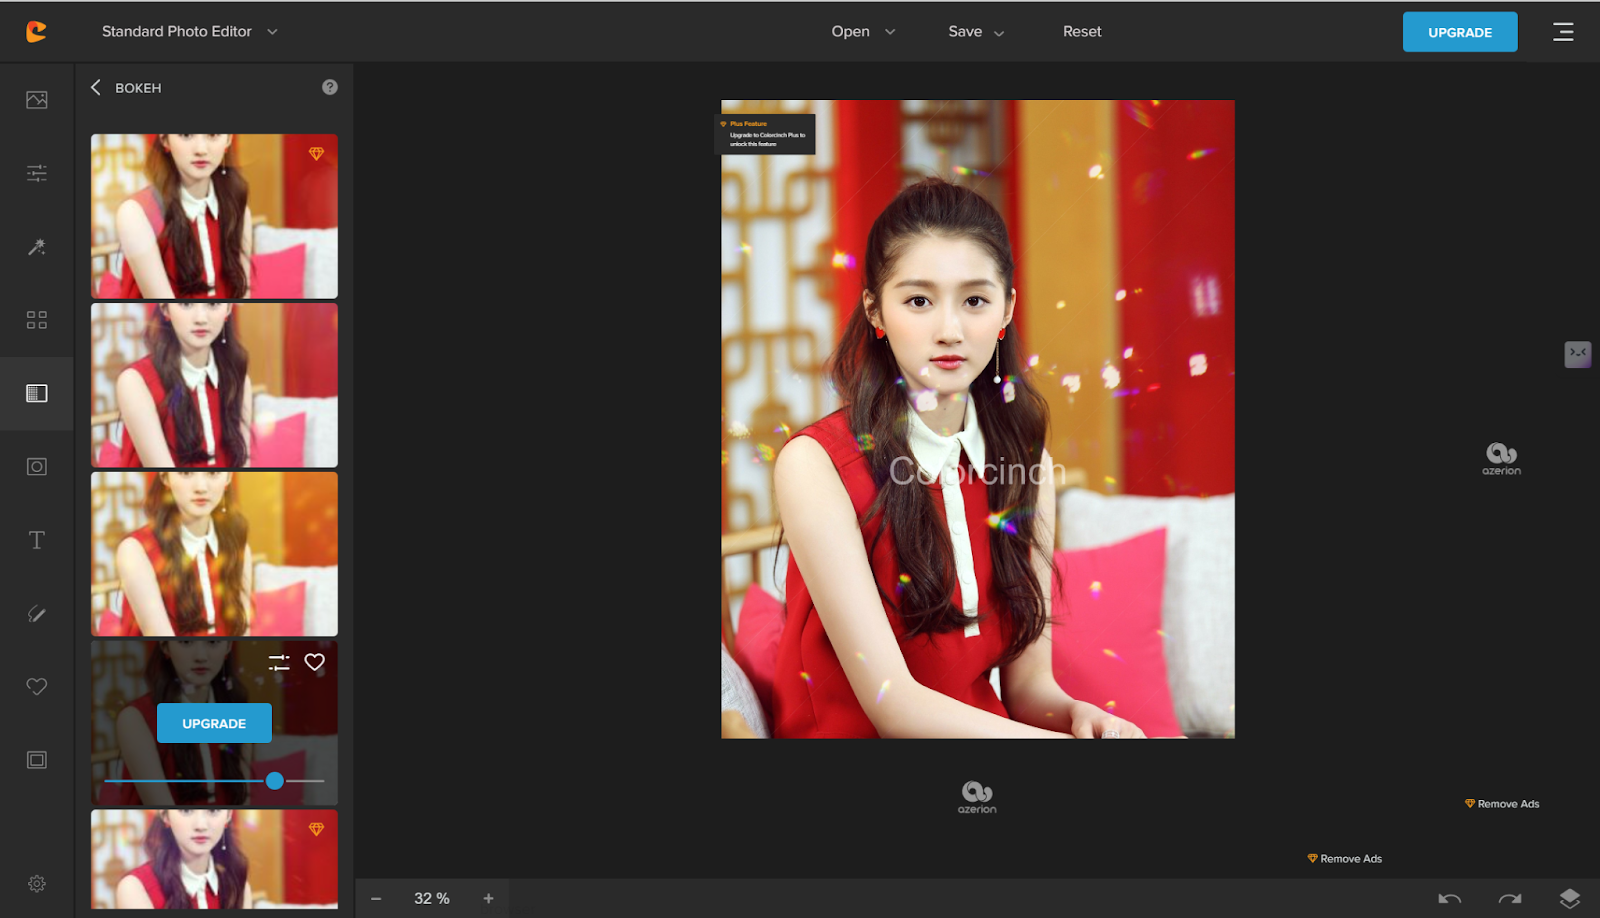
Colorinch
Colorcinch is an easy-to-use online photo editor as well that offers you a bunch of tools, including the bokeh effect. This effect allows you to create stunning bokeh backgrounds that add a soft, blurry aesthetic to your photos with different patterns, like stars, misties, etc. It has an intuitive interface. Just feels quite seamlessly using it.
Steps:
Step 1. Upload your photo.
Step 2. Click the Bokeh effect from the left panel.
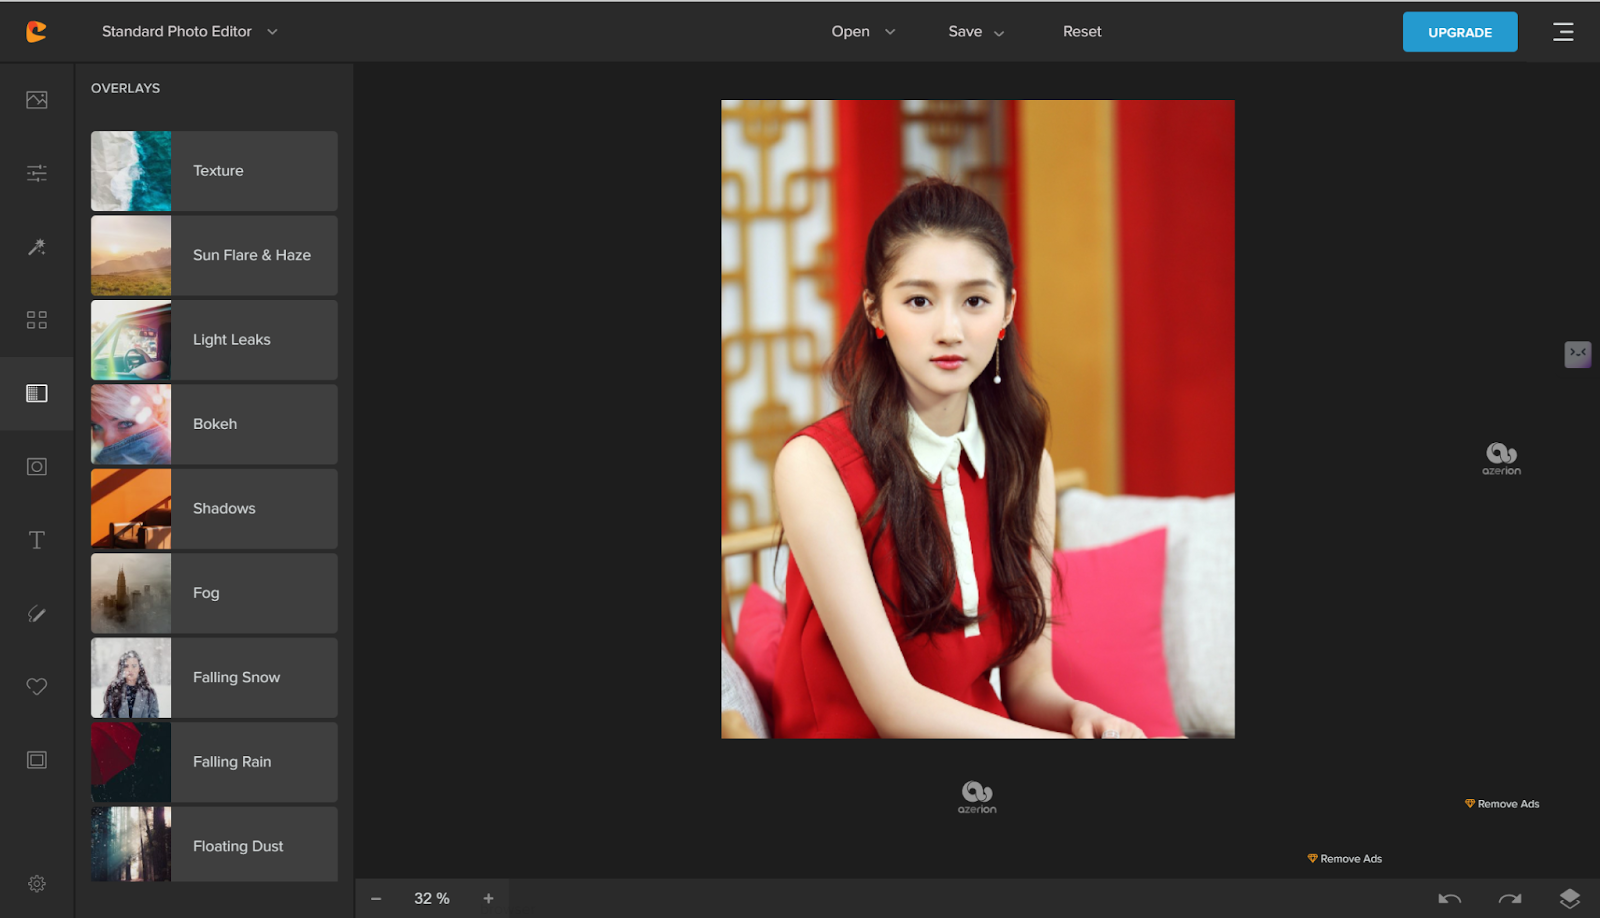
Step 3. Customize the effect to your liking. Please note some effects you need to pay.
Step 4. Save your edited photo.
Price:
- Free trial.
- Premium upgrades available (starting at $4.99/month).
Pros:
- User-friendly interface.
- High-quality effects.
- Quick and easy to use.
Cons:
- Limited free features
- Premium upgrades can be expensive
🔎Read also: How to Blur Faces in Photos 2024
How to make a bokeh effect background in Photoshop?
OK, we already have introduced 5 online tools for creating captivating bokeh effect backgrounds effortlessly. However, for those wishing to use more powerful software to get more customization and control over their editing process, we have you covered. Here is a detailed step-by-step guide on how to use Adobe Photoshop to create a beautiful bokeh effect. Let’s take a look.
Step 1. Open your image in Photoshop.
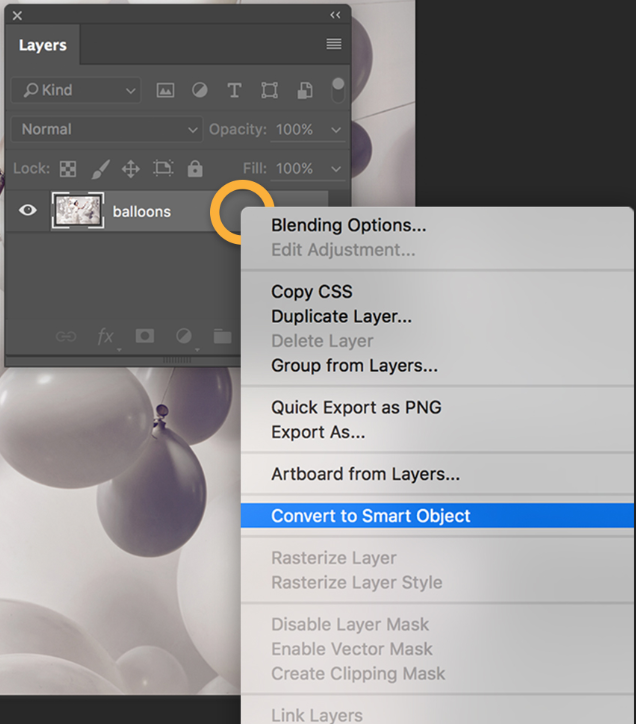
Step 2. Convert your image to a Smart Object.
Right-click on the layer of the photo, and choose Convert to Smart Object to make the changes more flexible so that any changes will not alter the original layer permanently.
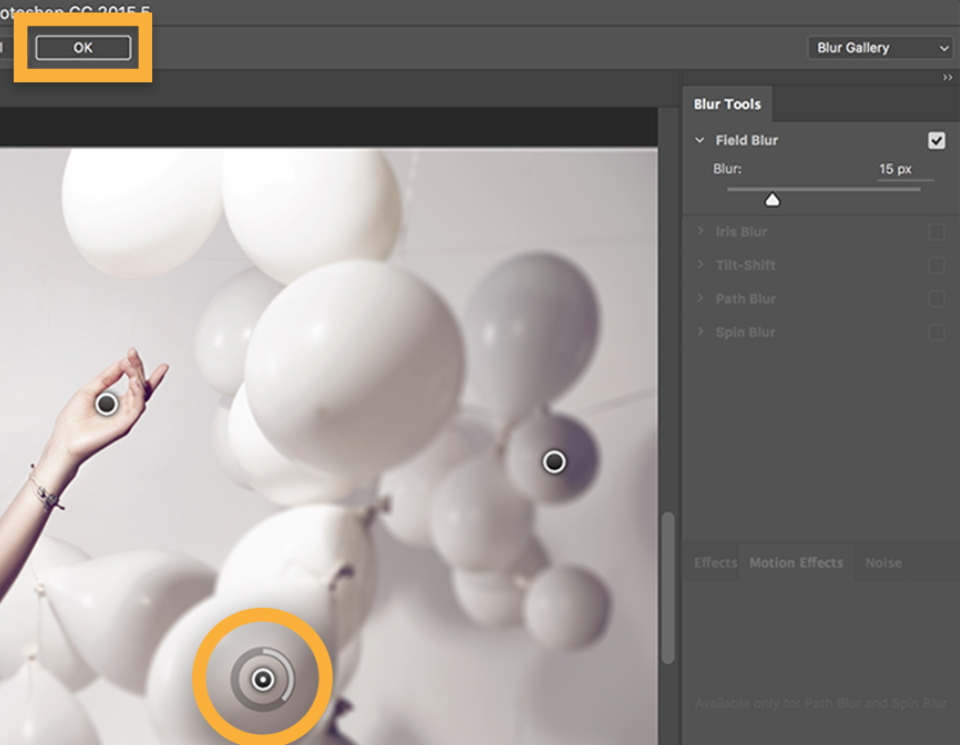
Step 3. Blur the background
Now, you should blur the background to play with depth of field. Go to Filter > Blur Gallery > Field Blur. You can see your cursor becomes a round pin in the picture. Click on the part that you want to make this part to be blurry. You can also adjust the value of the Blur. Just repeat this clicking and adjusting until you are satisfied.
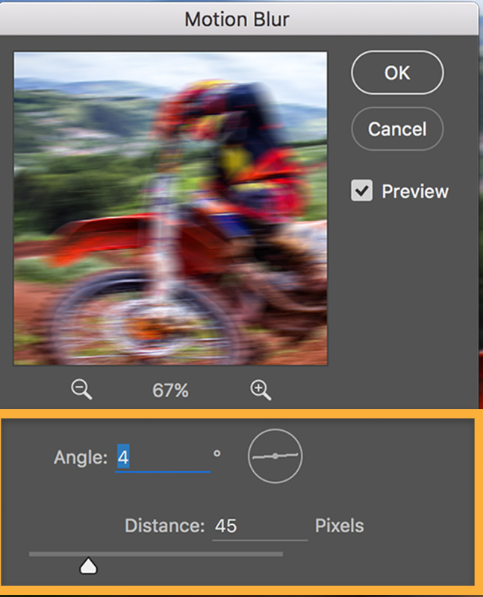
Step 4. Add a motion blur
Now you need to make the blur look more vibrating. Go to Filter > Blur > Motion Blur. Adjust the Angle to match the direction of the subject. Change the value in the bottom to decide to what extent it is blurred.
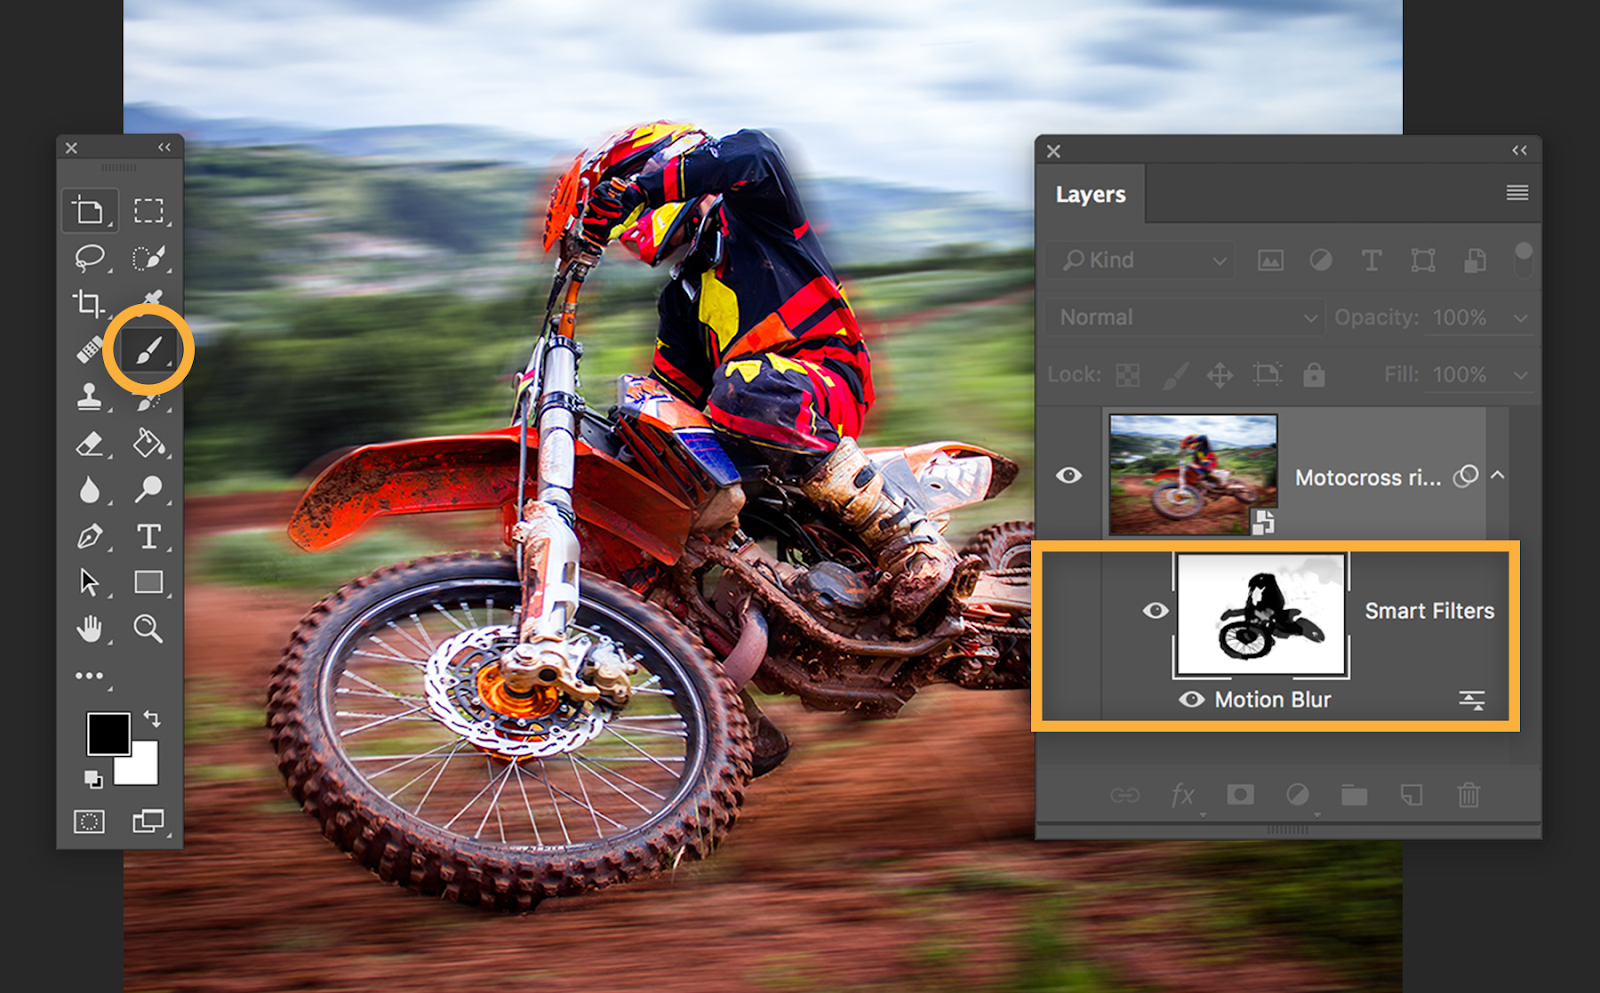
Step 5. Refine and define
Now, make the blur more delicate. Use a mask tool to make the blur effect more isolating from the subject. Go to the Layers panel, click the Smart Filter mask thumbnail. In the left panel choose the brush, and then draw the part that you don’t want to make it blur.
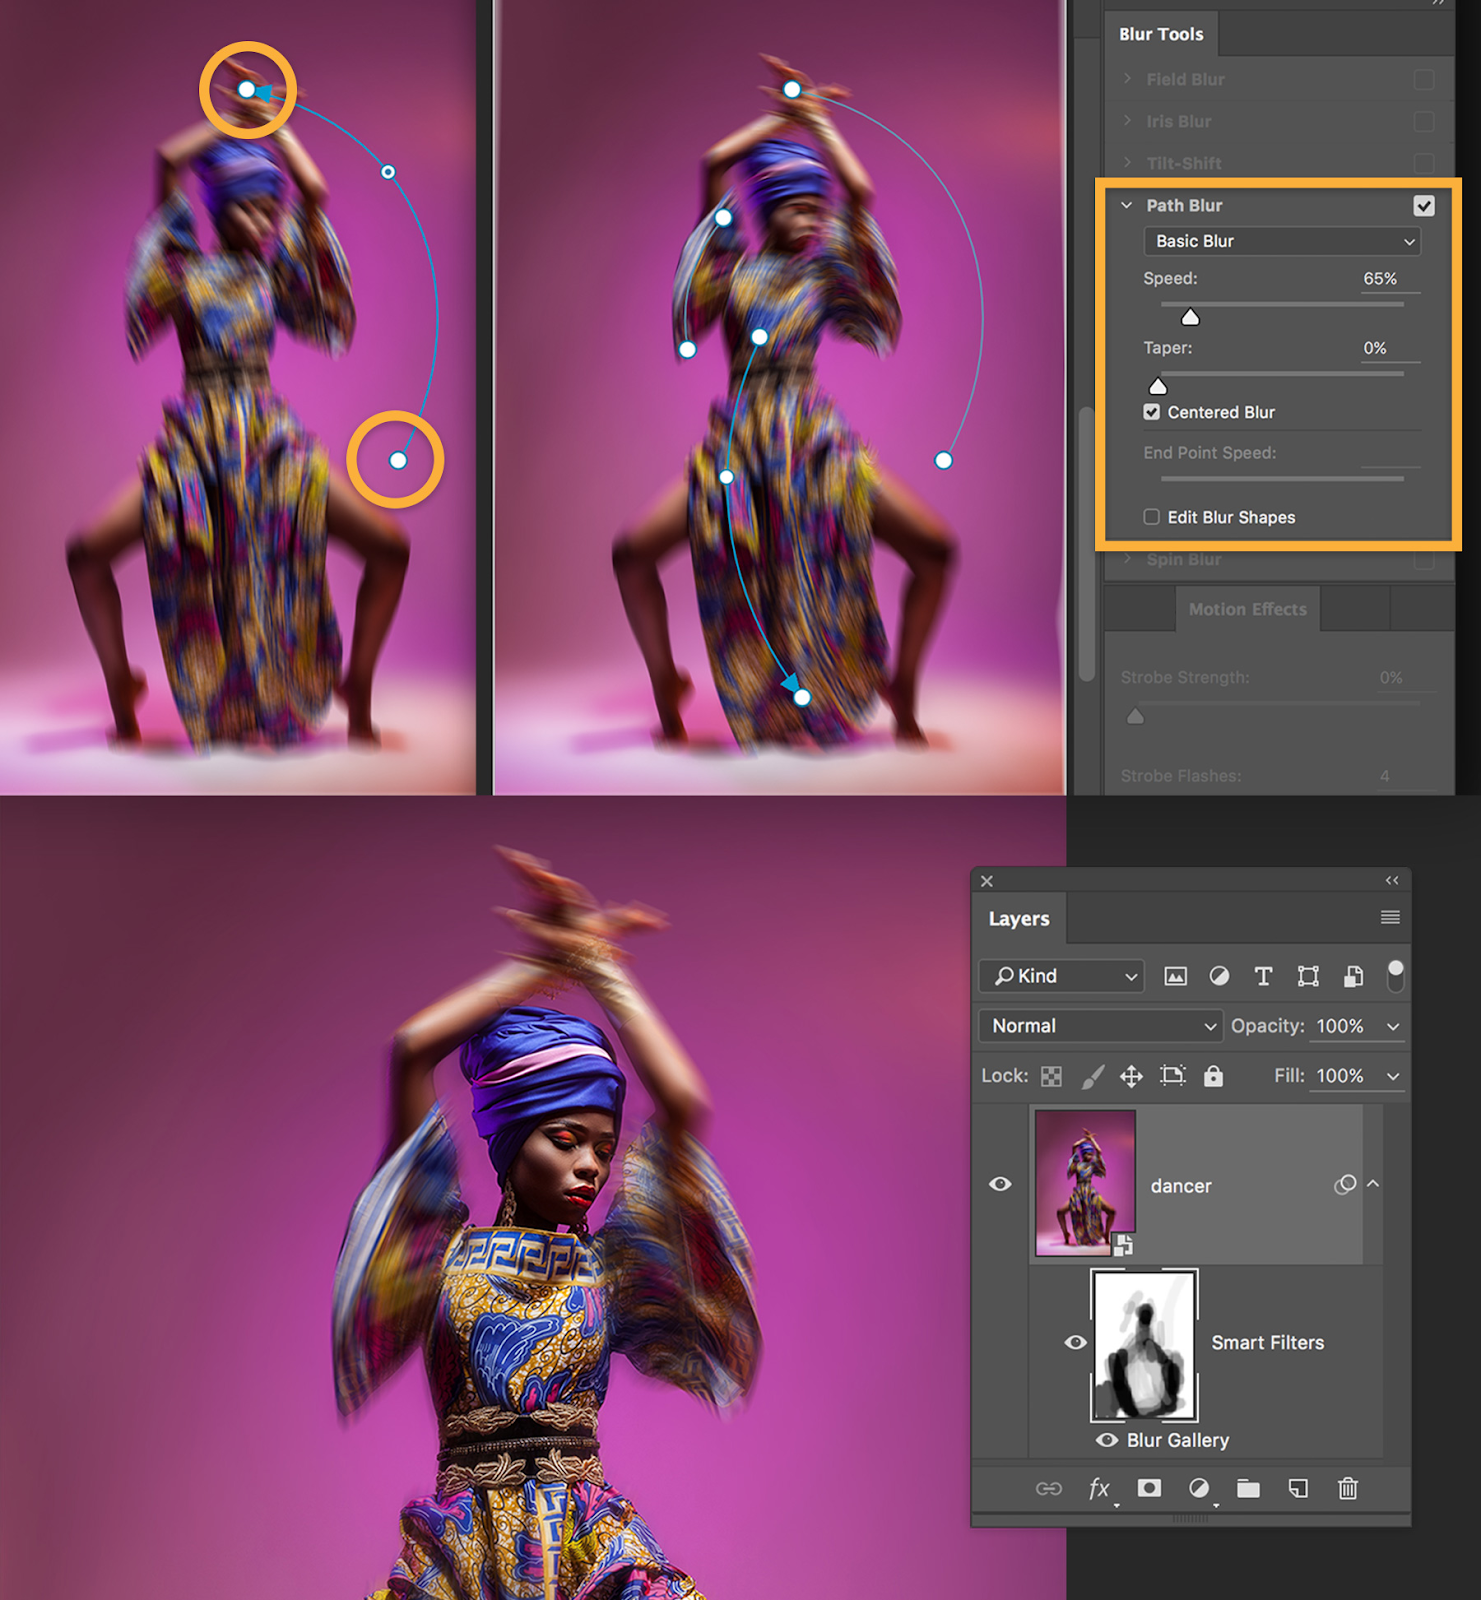
Step 6. Add motion along a path
For more dedicated effect if you want, you can add some motion along a path. For example, make the blur effect comply with the moving path of the people in the picture. Go to Filter > Blur Gallery > Path Blur. Drag your cursor to create blur, and remember the path should comply with the movements.
Note: Not every step is needed as long as you are satisfied.
FAQ
What is the difference between blur and bokeh?
Blur and bokeh’s main differences lie in their visual effects and mechanisms behind them. Blur is a bigger concept that contains bokeh. It is a general softening idea, which is the lack of sharpness across an image. It can be made on purpose or accidentally by the angle or factors like camera or subject movement. However, bokeh is normally made by manual editing, to create a vibe that divides the subject from the surroundings by the clear and blurry. So, blur can be uniform or selective, bokeh is distinct for its aesthetic appeal.
How many types of blur are there?
There are a total of 16 types of blur effects:
- Gaussian Blur
- Motion Blur
- Radial Blur
- Lens Blur
- Box Blur
- Zoom Blur
- Surface Blur
- Smart Blur
- Average Blur
- Motion Average Blur
- Zoom Radial Blur
- Spin Blur
- Shape Blur
- Tilt-Shift Blur
- Iris Blur
- Path Blur
How to do bokeh on the phone?
There are a lot of ways you can do it. For example, you can use the built-in Portrait Mode feature, which automatically blurs the background to create a shallow depth of field effect. You can also try AfterFocus or Snapseed, or Photoshop Express and Pixlr. You can download one of these apps on your phone to apply the bokeh effect to your photos.
Conclusion
In conclusion, creating a captivating bokeh effect background has never been easier with the plethora of tools and techniques available. Whether you’re using online editors like Befunky, AiPassportPhotos, Pixlr, or Colorinch for quick and easy edits, or diving into more powerful software like Adobe Photoshop for greater customization and control, there’s something for everyone. With simple steps and intuitive interfaces, you can effortlessly enhance your photos and add that dreamy, enchanting touch. So, unleash your creativity, experiment with different tools and techniques, and transform your photos into works of art with mesmerizing bokeh backgrounds.