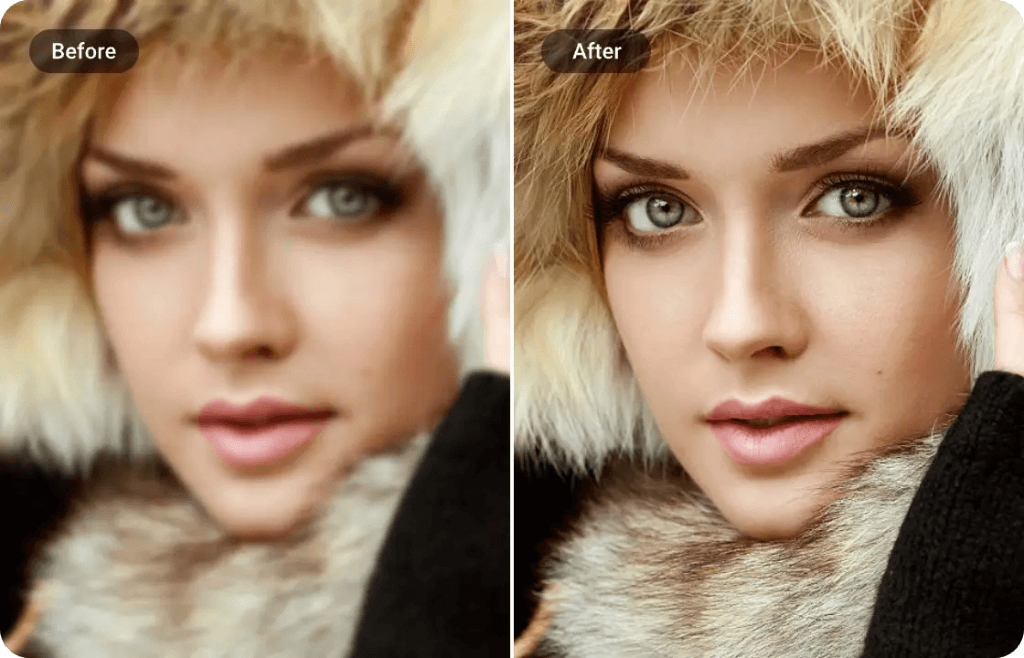
Blur photos can be such a disappointment, but with the help of available technology, you can definitely turn blurred images into high-definition visuals. In this article, we will show you effective ways to sharpen your photos, from online HD photo converters to professional software, that will make every shot clear and sharp.
HD Photos: Definition & Dimensions
HD (high-definition) photos are much clearer with great details as compared to regular resolutions. Knowing the parameters of an HD photo may help in making sure that your picture is of high quality.
- Resolution: Normally, HD is 1280 by 720 pixels or otherwise called 720p. It’s the basic minimum when it comes to HD. The full HD would be 1920 by 1080 pixels or 1080p, while 4K resolution is 3840 by 2160 pixels.
- PPI(Pixels Per Inch): Similarly, for print quality, the measurement for images is normally in PPI. This will be usually considered high resolution if it is 300 PPI or more. This will ensure that your prints are sharp and clear.
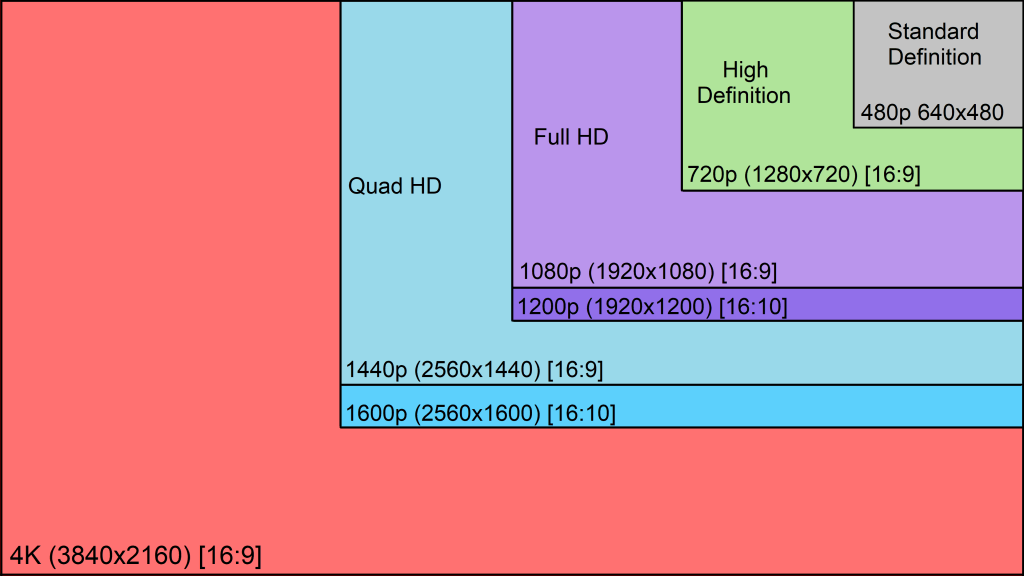
So, in short, on digital screens, it is considered HD if 720p and above, while on printed displays, it has to be at least 300 PPI to remain clear as HD.
How to Convert Blur Photo in HD
There are many ways and tools to make blurred photos in high definition. Every method works according to the amount of blur and how good the original photo was. Here’s a complete guide on how to do that.
How to Convert Blur Photo in HD Online
Thanks to the wonders of today’s AI-powered online HD photo converters, converting blurry photos into blazingly sharp and high definition is easier than ever. Among them, one of the standouts is AiPassportPhotos – an HD photo converter that enhances clarity and detail, transforming blurry images into clear, high-quality photos. This tool not only improves image quality but also includes features for comprehensive photo enhancement.
👉Steps to Use AiPassportPhotos:
Step 1. Upload a blurry photo.
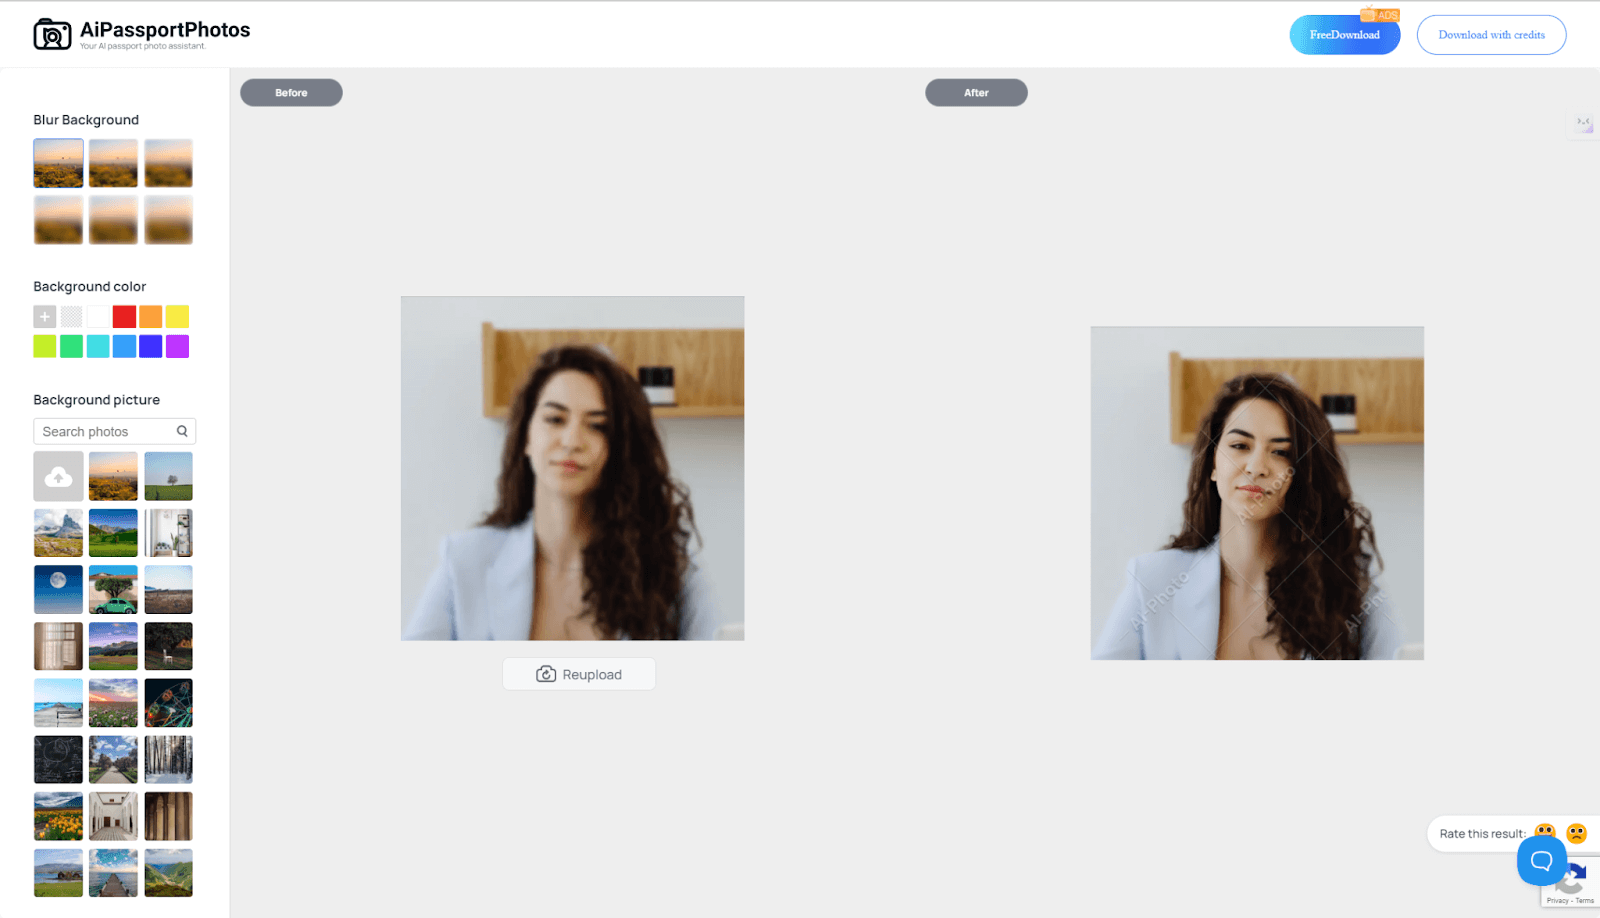
Step 2. Wait a while, the AI will process your photo.
Step 3. You can see the original blurry photo vs the high-quality version after AI processing. The result shows a great improvement in clarity. AiPassportPhotos also supports a handful of other editing features. You can access them separately from the platform.

Step 4. Click on the download button to save the image on your computer. Note that you can get free credits by watching ads.
In addition to its user-friendly interface, simple steps, and quick processing, AiPassportPhotos also stands out with its:
- Advanced AI Technology: Utilizing sophisticated algorithms and machine learning, AiPassportPhotos can analyze and enhance your photos with precision, providing a seamless experience, requiring no manual adjustments or technical expertise to convert them to HD
- Blurriness Removal and Quality Enhancement: The tool removes blurriness and improves the quality of the photos dramatically to a high-resolution guaranteeing clear and sharp HD images for you.
- Photo Upscaling: Enlarge your photos up to twice their original size without loss of resolution. Great for large printouts or enhancing your digital displays to 4K photos.
- Noise Reduction and Clarity Improvement: This AI tool, especially for photos taken in low-light conditions or at night, drastically reduces noise and improves clarity incidentally, delivering very clear images.
How to Convert Blur Photo Using an App
If you prefer to process pictures on your phone, use some HD photo converter apps. Unblur – Enhance Photo Quality is a recommendation. It is compatible with iOS, converting blurred photos to HD by sharpening the photos and fixing them in an instant while increasing detail & resolution. It now offers a free trial.
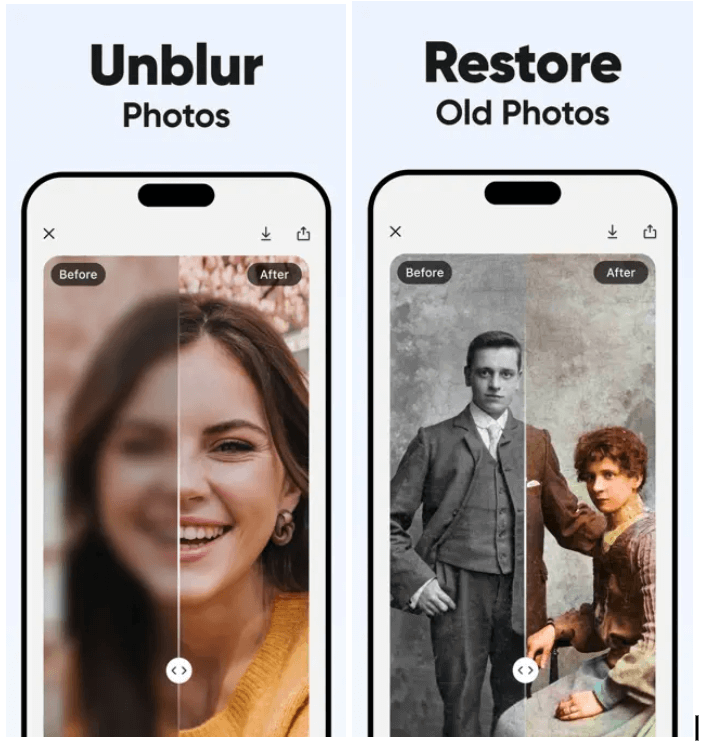
To use this, follow this step-by-step guide:
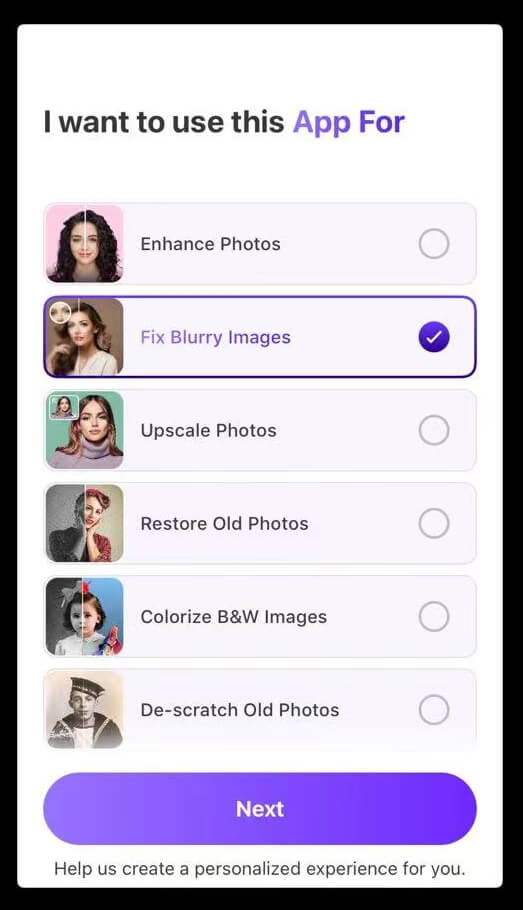
Step 1. Launch the app and choose fix blurry images.
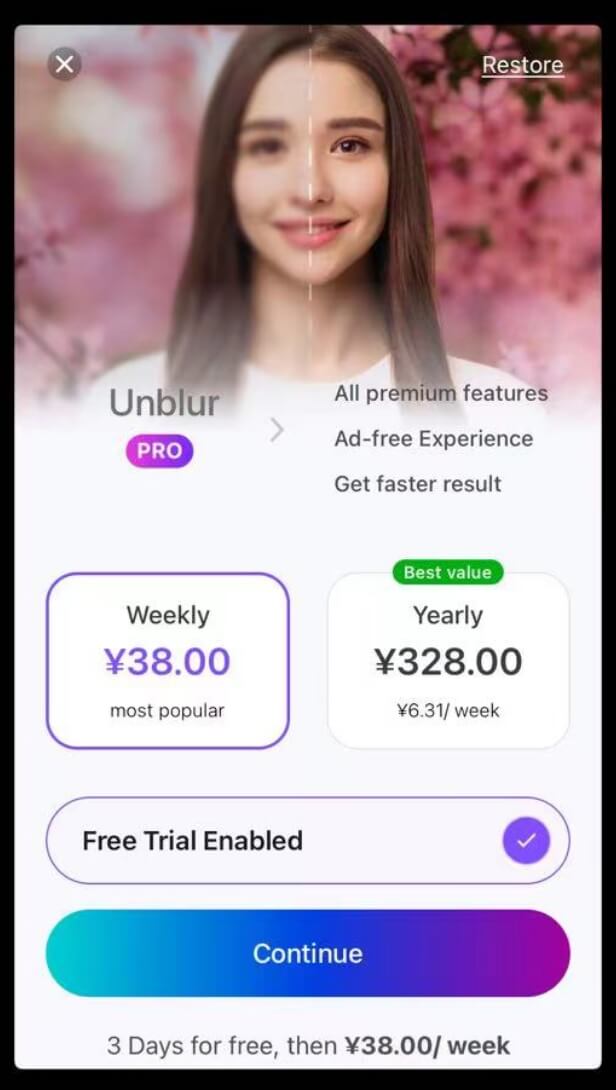
Step 2. Tap on Free Trial Enabled and then continue.
Step 3. Click on the Enhance button to start to convert blurred photos. Choose a blurry photo from your phone gallery.

Step 3. Tap on the Enhance button.

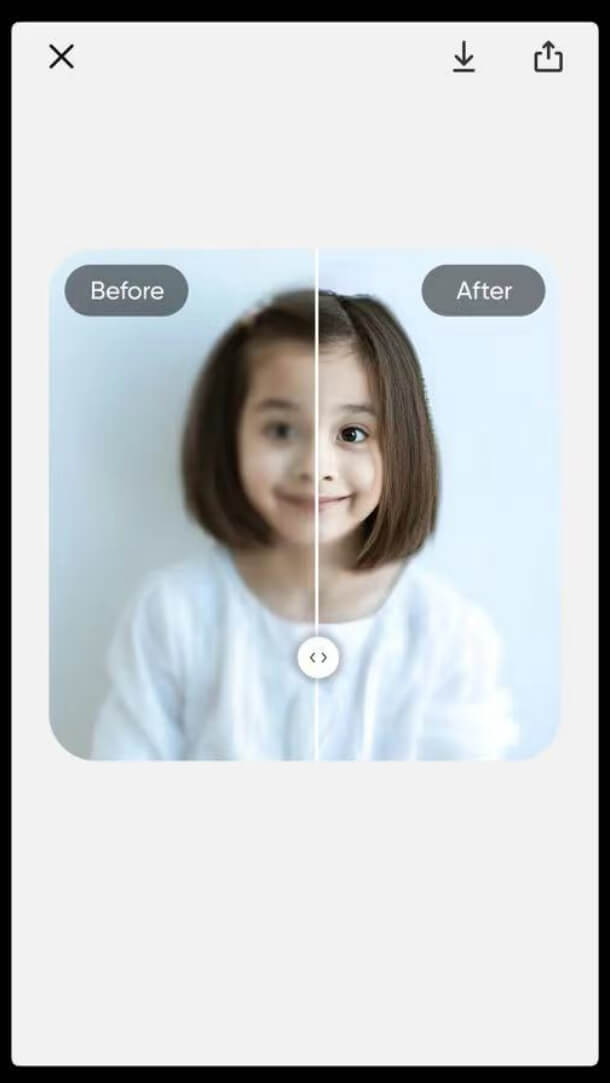
Step 4. Get the result with a comparison of before and after. Tap on the down-arrow button to save the photo on your phone.
How to Convert Blur Photo in HD Using Photoshop
While online tools or mobile apps provide quick fixes and convenience, Adobe Photoshop offers more control and customization in increasing the sharpness of images due to its powerful functionalities. Now, learn how to take a blurry photo and turn it into a high-definition masterpiece using Photoshop.
Step 1. Open Adobe Photoshop and open the blurred image you want to enhance.
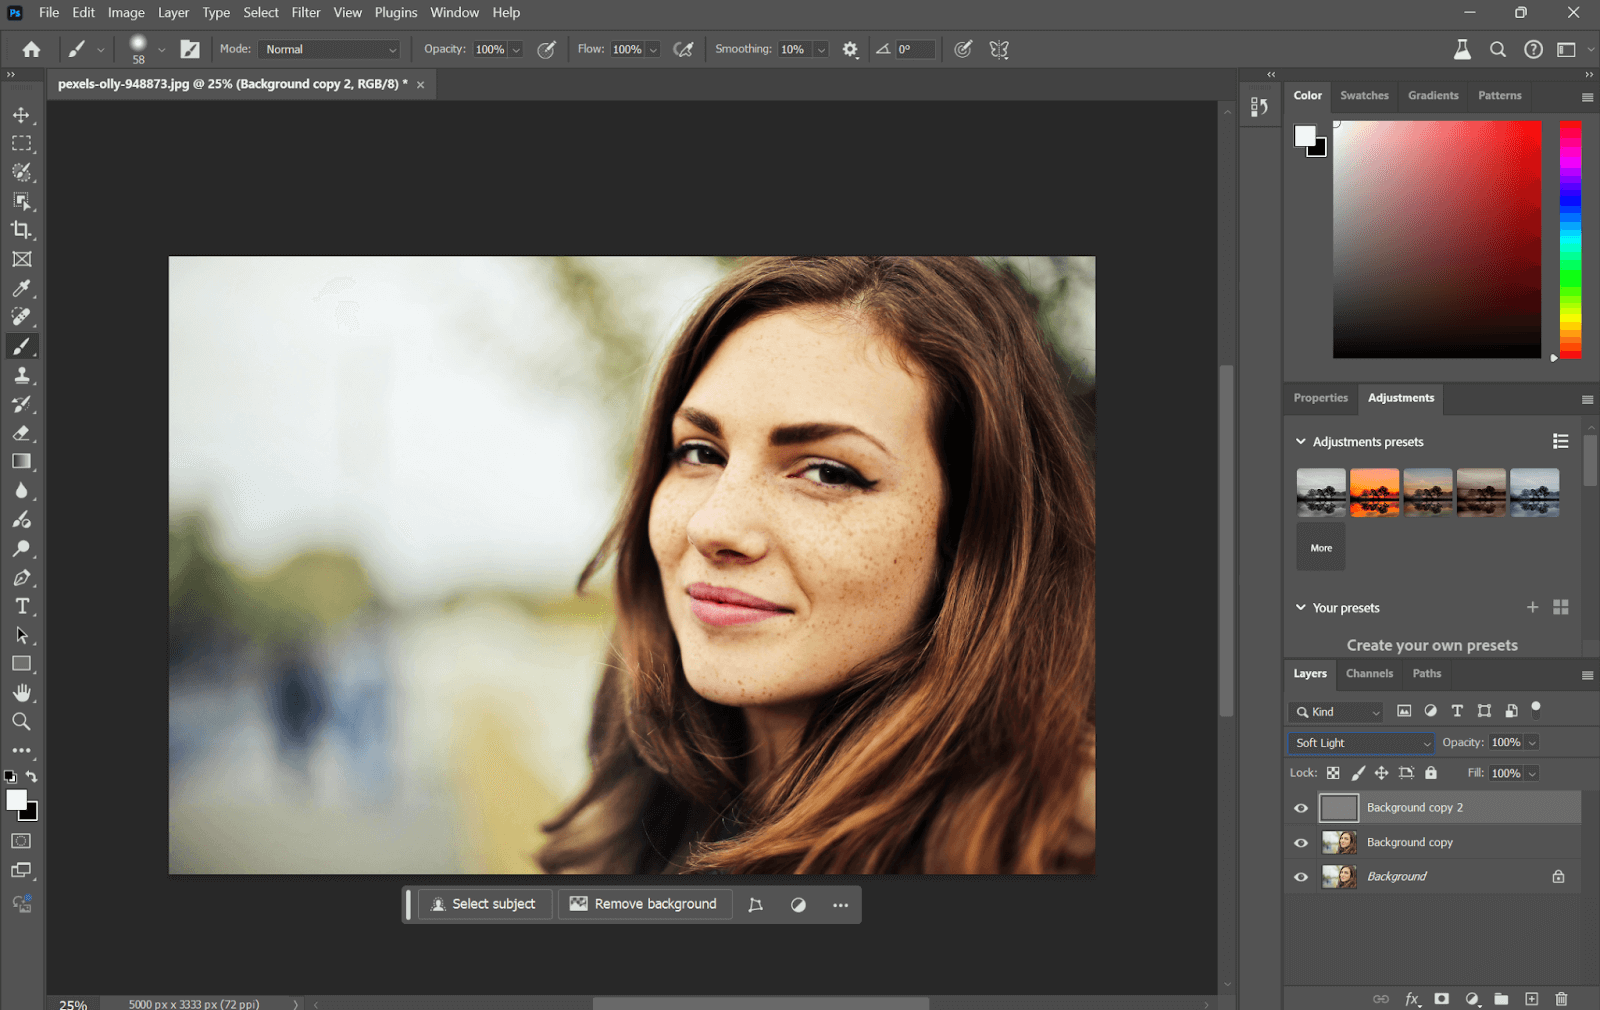
Step 2. Duplicate the background layer to protect the original image by right-clicking on it and then clicking “Duplicate Layer”.
Step 3. Go to Image > Filter > Sharpen > Smart Sharpen. In the Smart Sharpen dialog box, adjust the settings. Set Amount to around 150% and Radius to 3.0 pixels. Be sure that “Remove Gaussian Blur” is selected.
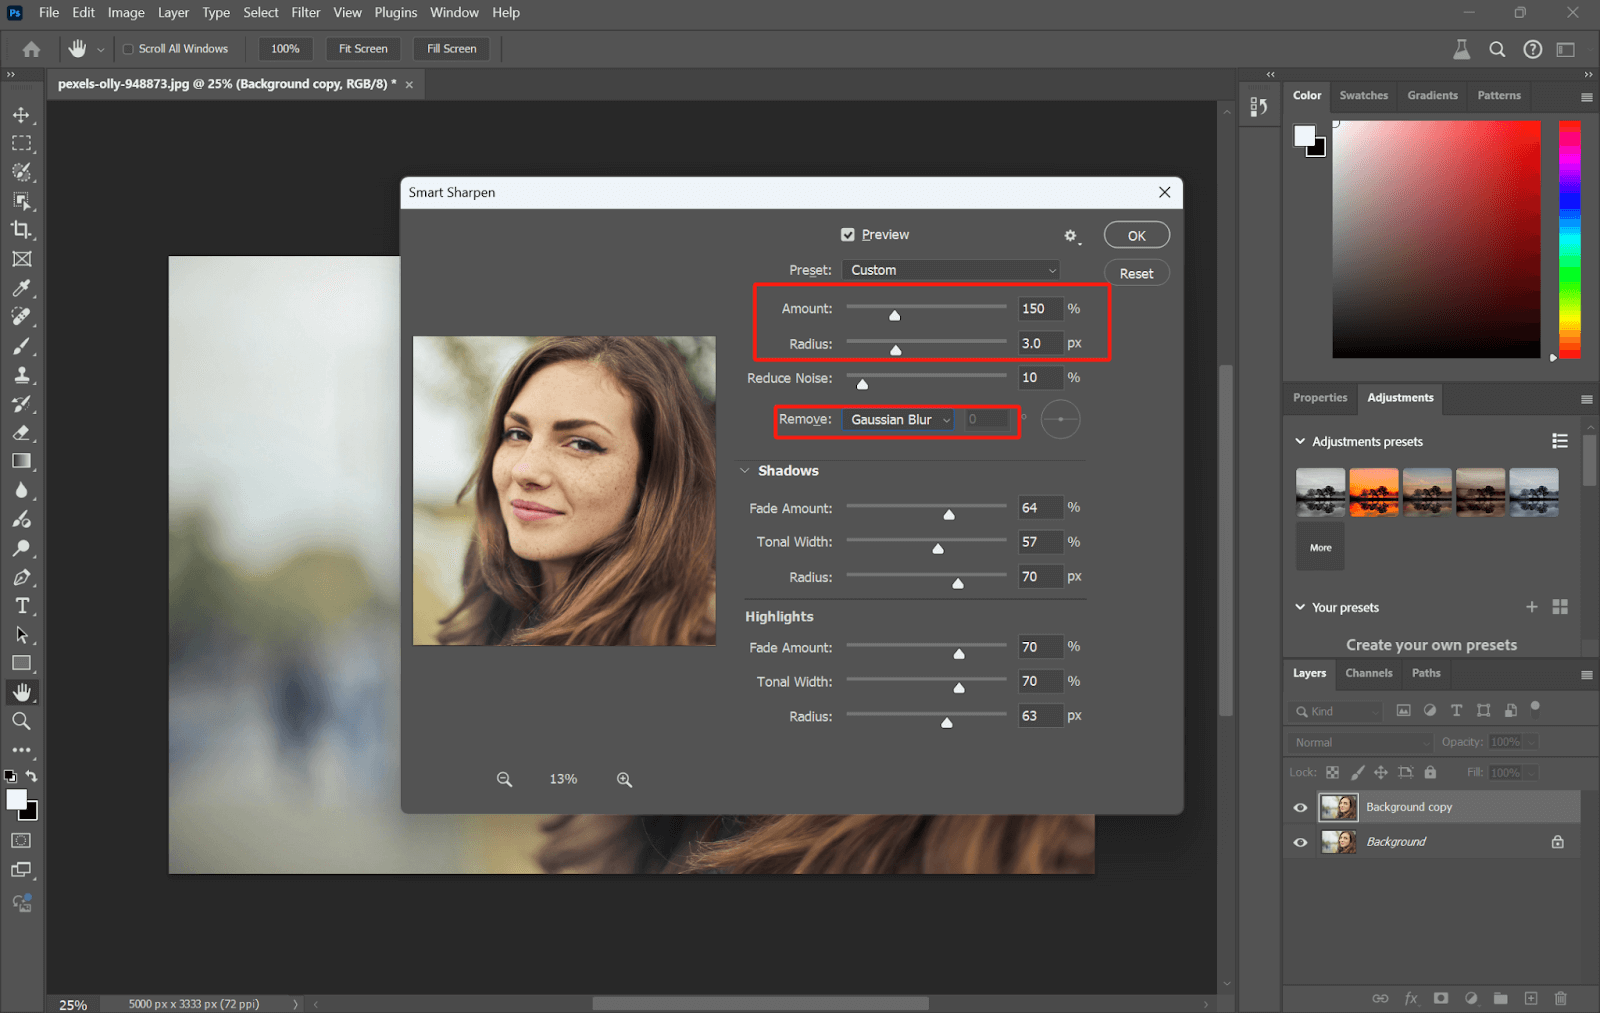
Step 4. Adjust Shadows and Highlights. The sliders for “Shadows” and “Highlights” can be used to further adjust exposure and contrast, which may be useful to create an impression of more sharpness.
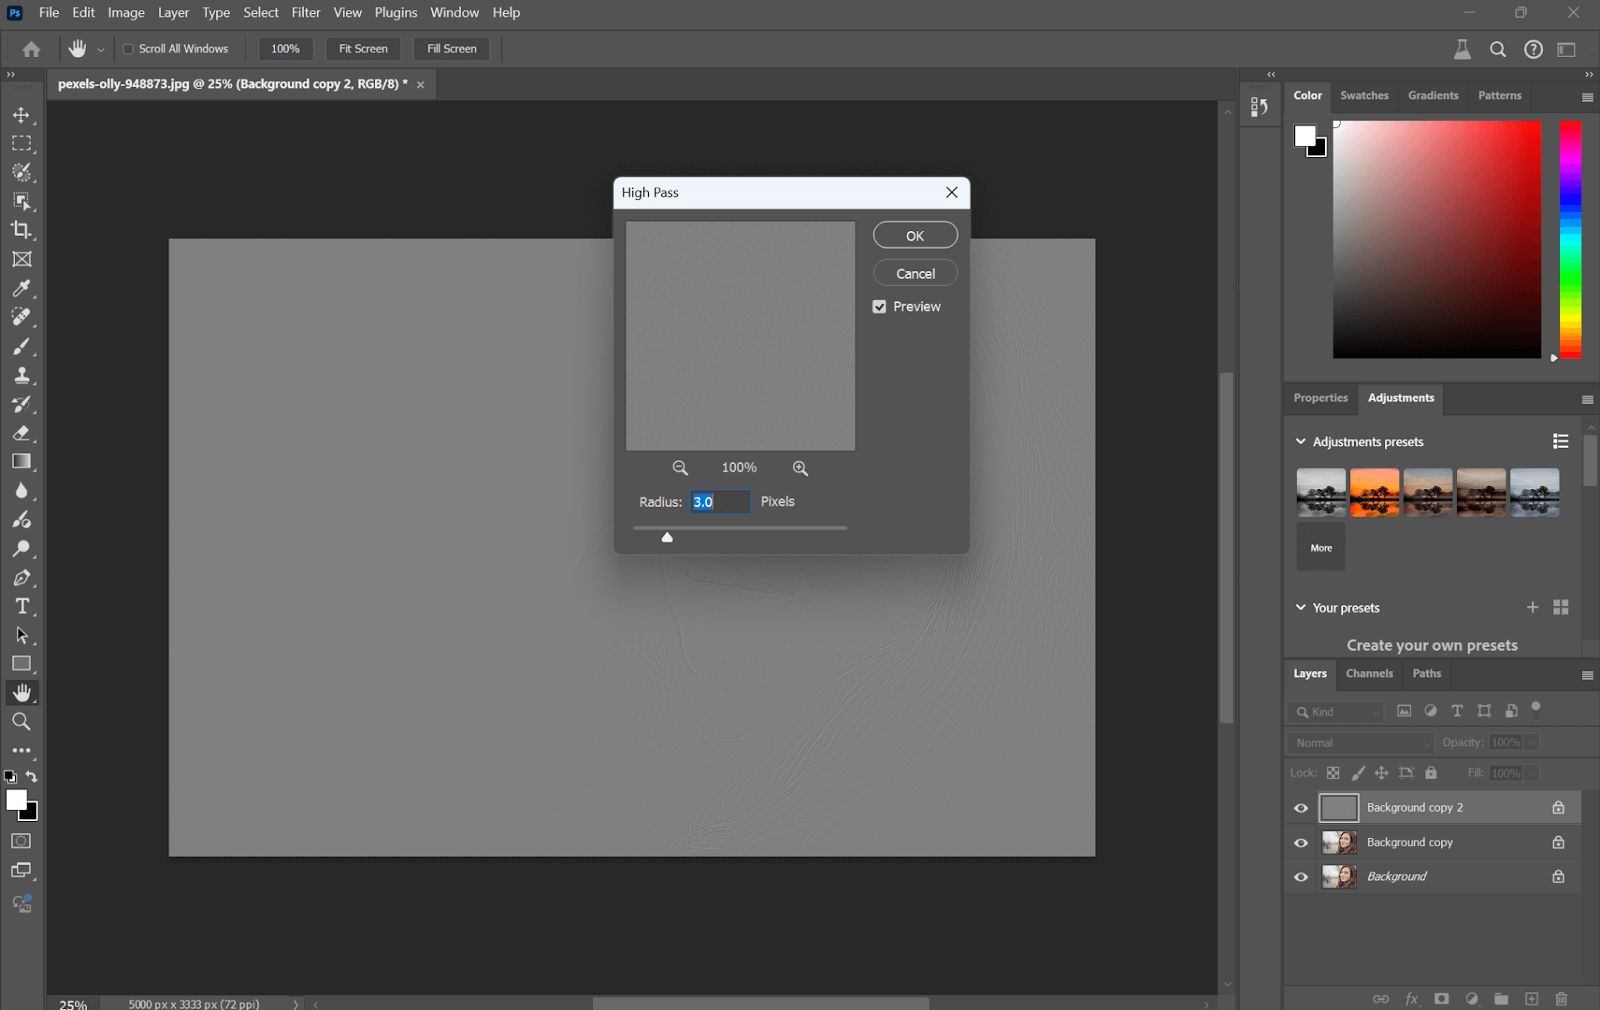
Step 5. For some additional sharpness, duplicate the sharpened layer and go to Filter > Other > High Pass. Set Radius to around 1.0-3.0 Pixels and click OK.

Step 6. Now set the Blending mode of the layer to “Overlay” or “Soft Light” to compose the Sharpening effect.

How to Convert Blur Photo in HD Using Lightroom
You can also make blurred photos high-definition in Lightroom. You can do this with its Super Resolution feature. This technique works quite well in bringing out the details and clarity of your image. Here’s how to do it.
Step 1. Open Lightroom and import the photo you want to enhance.
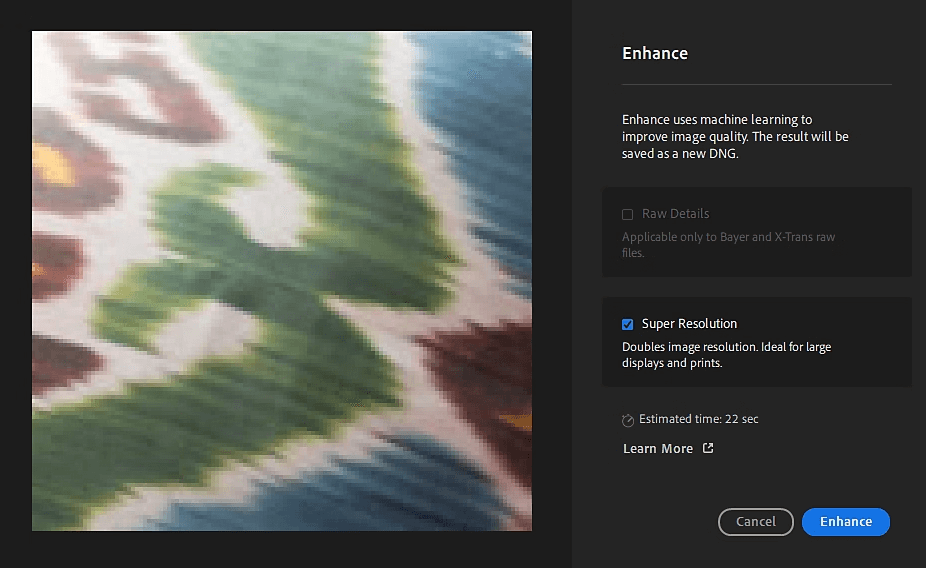
Step 2. Right-click the photo, then select Enhance from the context menu.
Step 3. In the Enhance dialog, select the Super Resolution checkbox. This will double the resolution, providing enhanced detail and sharpness in the image.
Step 4. Now, click on Enhance to apply the Super Resolution. Lightroom will process the image again to produce a new DNG file with enhanced resolution.
Step 5. Now that you have applied Super Resolution, other tools in the Develop module can further adjust sharpness, reduce noise, or change other settings.
Step 6. Once the enhancements are satisfactory, export the image in any format of your choice with the desired resolution.
Practical Tips for Taking HD Photos
In order to get sharpened and high-definition pictures, shooting techniques and proper camera settings are necessary. Clarity and sharpness do not come from just having a high resolution on the camera, it also necessitates attention during the shooting process. Following are some effective strategies on how to capture and save high-definition images.
- Use a high-resolution camera when taking pictures.
- Make sure to clean off the camera lens as this can easily get smudgy, which in turn will affect image quality.
- Proper lighting is important. Clarity and noise in your photos can be amplified with natural light or well-placed artificial lights.
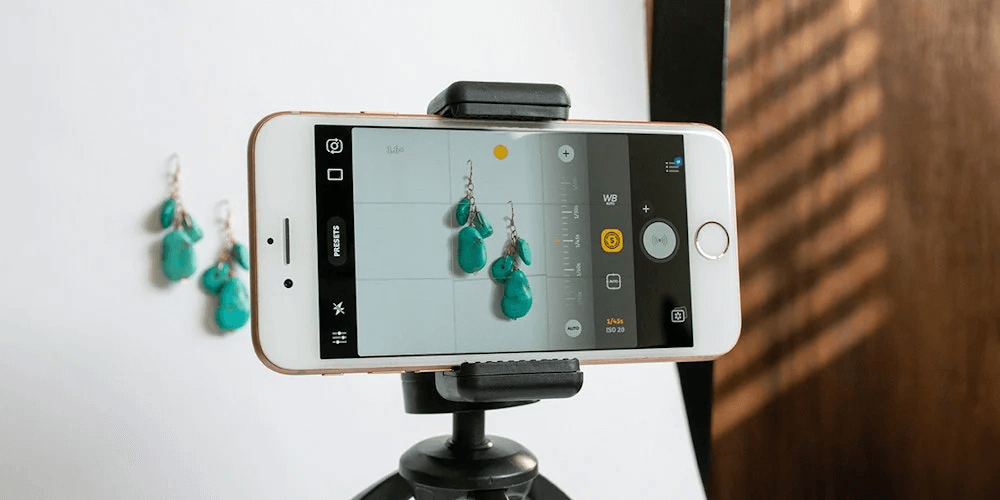
- Use a tripod or put your camera or phone on a stable interface to avoid taking shaky and blurry pictures.
- Put your camera in the highest resolution mode and lower ISO (less noise, more detail).
- Always shoot in RAW Format. The primary advantage of shooting raw over JPEG is it saves the original unprocessed image captured by your camera, which leads to far more comprehensive and finer quality as you compare both of them.
- Make sure that your subject is sharp. Get the best clarity by auto-focusing, or manually focusing.
- Rather than twist your lens’ distance ring any further to zoom, move closer or use the optical zoom for high-res pictures.
FAQ
📌How to convert normal photos to HD?
You can do this using Photoshop:
- Open Photoshop and load your photo.
- Go to Image > Image Size.
- Check the Resample box, and set the resolution to 300 PPI or higher for print quality, or adjust pixel dimensions for digital screens.
- Click OK to apply the changes.
📌How to convert your photo into HD without using Photoshop?
If you don’t want to utilize Photoshop, then AiPassportPhotos’ HD Photo Converter is a perfect choice. This feature employs the advanced algorithms of AI to optimize the pictures by increasing the quality and the resolution of images. It immediately enhances pictures for higher definition by sharpening the images, enlarging the picture without any distortion, and smoothing noises. It is a simple-to-use tool good at helping users get high-definition outcomes with very little time and effort invested.
📌How to convert blurry photos into 4K resolution?
To convert blurry photos into 4K resolution, you’ll need tools that support 4K settings. For example:
- Topaz Gigapixel AI – Upscales images up to 6x with high clarity.
- Let’s Enhance – Uses AI to upscale images to 4K.
- VanceAI Image Enlarger – Allows for upscaling up to 8x, including 4K resolution.
- Photoshop – Use the Super Resolution feature to enhance images to 4K.
📌How to convert blurry photos into 1080P resolution?
Similar to converting blurry photos into 4K resolution, to convert blurry photos to 1080P resolution, use advanced enhancement tools like Topaz Sharpen AI.
Conclusion
By understanding the definition and dimensions of HD photos and applying the right techniques, you can significantly convert any blur photos into HD. Embrace these proven methods and tools to turn your blurred snapshots into sharp, vibrant visuals, ensuring that every picture captures the detail and brilliance you desire.