Do you play Minecraft? This game features a pixelated blocky style and fires worldwide. But the charm of pixel art goes quite a bit further than just games. It’s really cool to make unique and outstanding avatars. Some people are into unique pixel-styled avatars to draw people’s attention. In this post, we will introduce some tools and ways to make pixel avatars just like Minecraft pixel art. If you are a pixel stuff fan, definitely do not miss this.
What Is a Pixel Art Avatar?
A pixel art avatar is the digital representation of an individual or character in the design of pixel-based artwork. This style, popularly blocky and grid-like in appearance, draws inspiration from early video games and retro digital art used in social media, online gaming, or branding. This art brings a bit of fun and nostalgia to your digital footprint and is the beauty of pixel art.
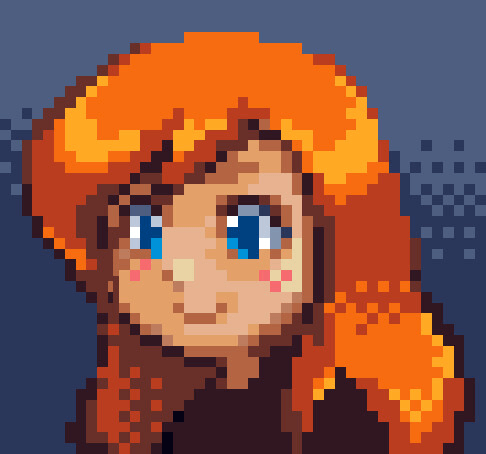
How to Make a Pixel Avatar for Beginners
Now, Let’s go into some user-friendly tools that can quickly get you into the pixel world. No matter if you are a complete newbie or just in search of faster ways of creation, you can find the one you need.
AiPassportPhotos
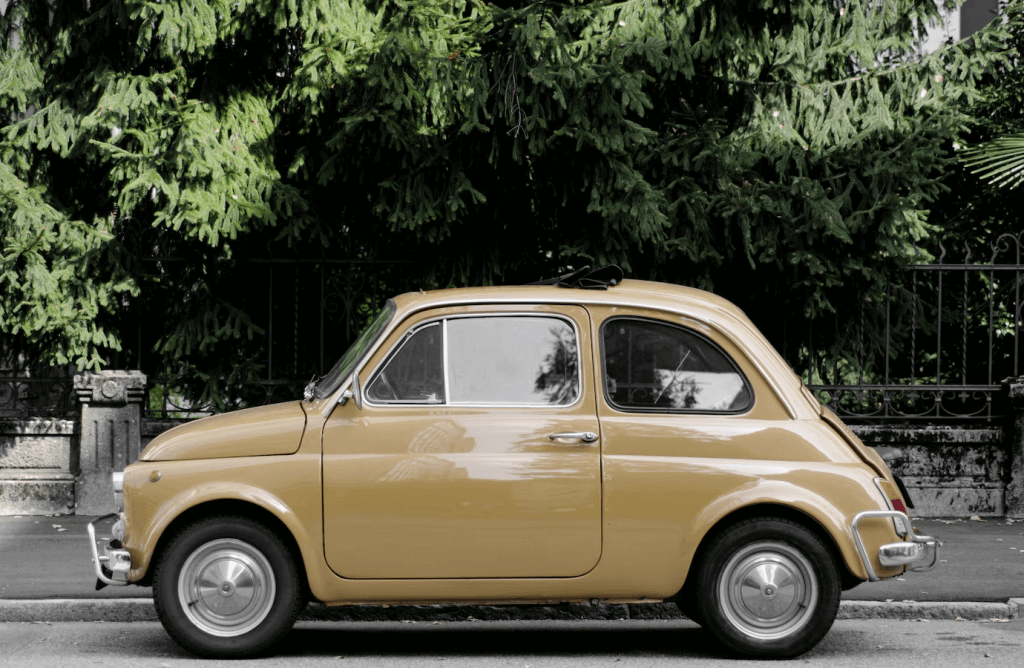
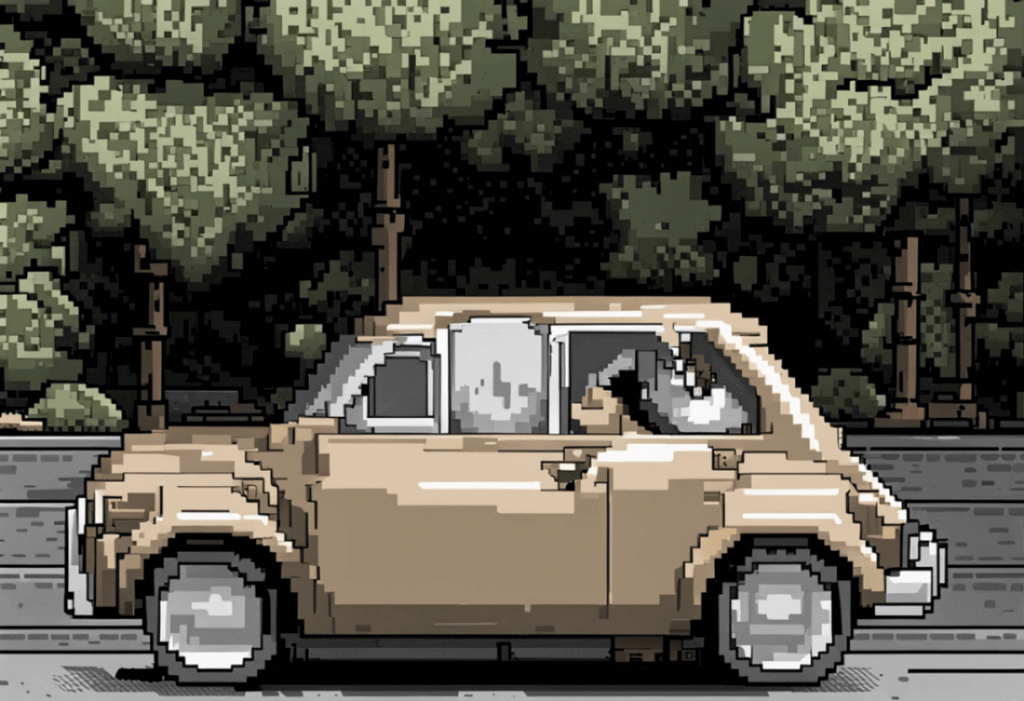
AiPassportPhotos provides a quick and easy way to make a pixel avatar This is a completely automated process. All you have to do is upload your image and click on the pixel filter, and AI will do the rest. Whatever purpose you want, such as for a social network profile, games, or any other personal projects, simple yet efficient to make unique pixel art characters!
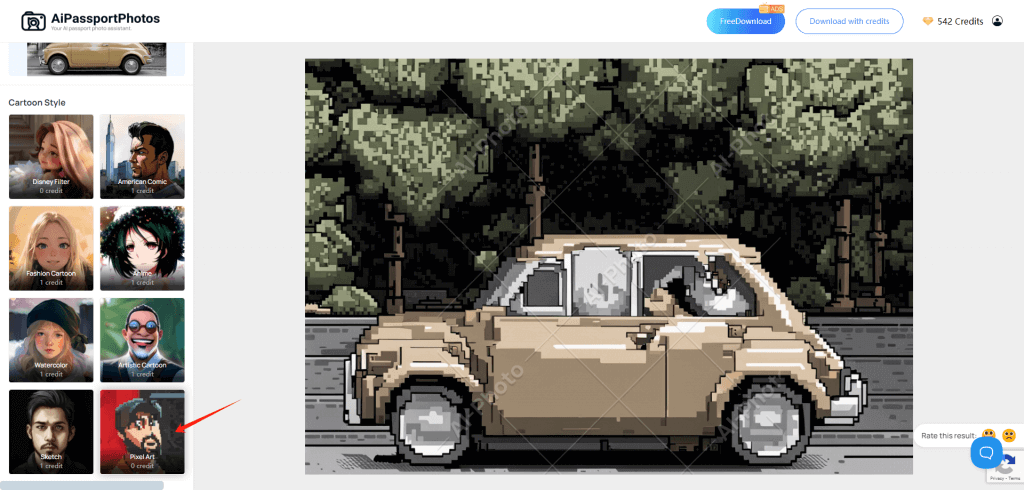
✨Key Features:
- AI automatic processing.
- No requirements of any former experience in creating pixel avatars.
- Security of privacy guarantee
- Completely free.
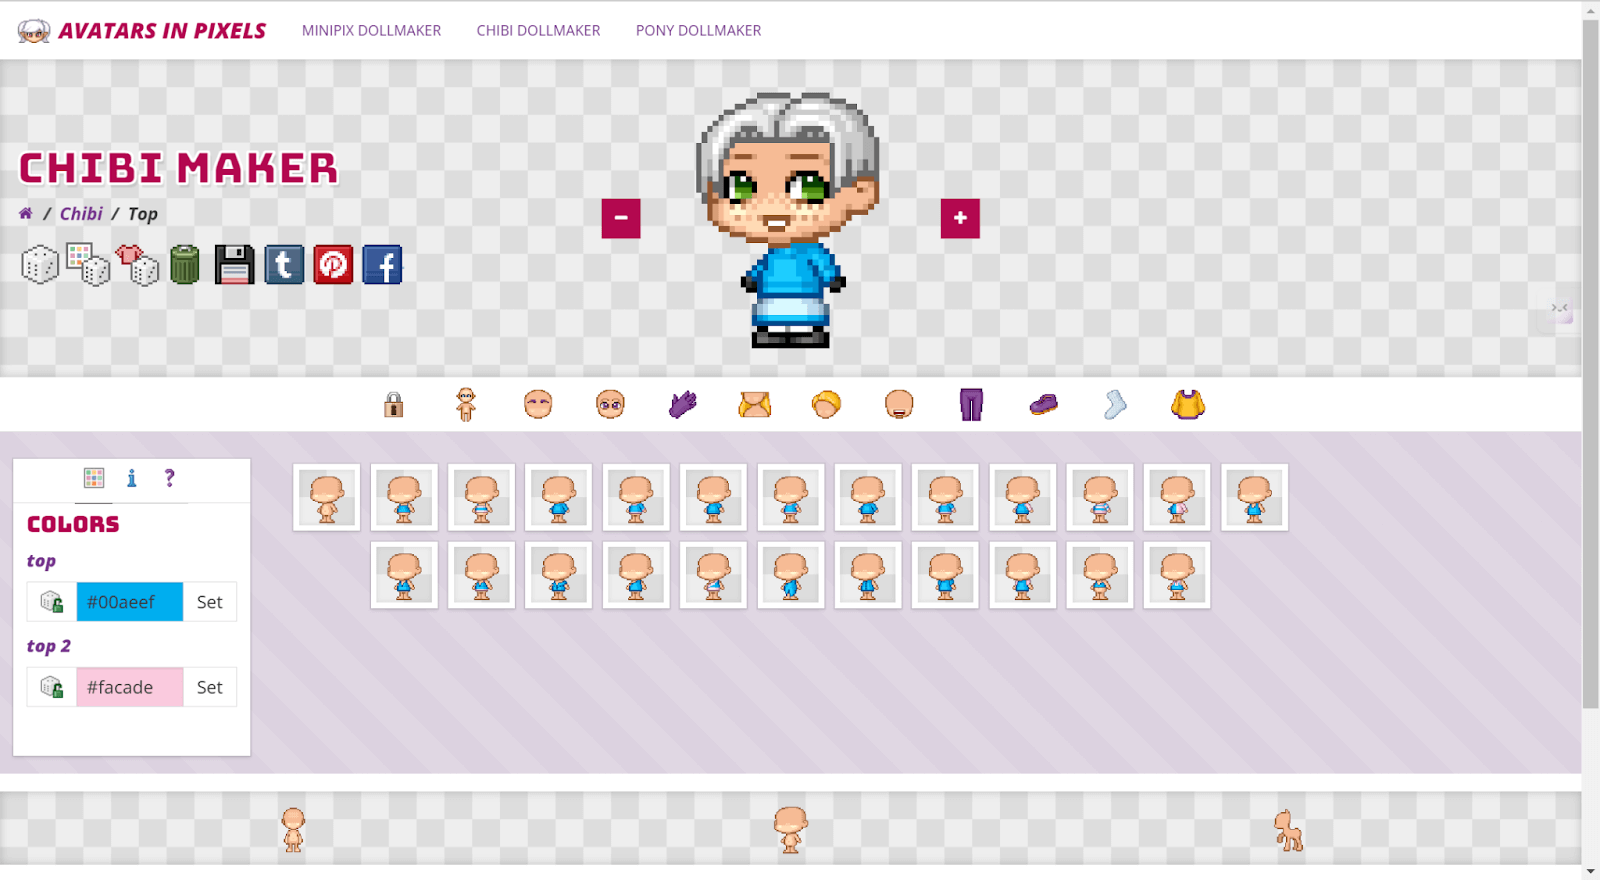
Avatars in Pixels
Another great option to make a pixel avatar is Avatars in Pixels. Unlike AiPassportPhotos, which allows you to upload a photo, this platform uses pre-designed materials like different heads, hair, eyes, and clothing to help you assemble a pixel avatar. This, while very customizable, unfortunately, locks you into using only the assets provided by the platform, meaning you can’t use your own photos or images directly. But if you want something quick and fast, though, for creating a pixel character, it would be a solid choice.
✨Main Features:
- Enables users to create pixel avatars by assembling pre-designed parts of heads, hair, eyes, and even clothes.
- Various elements to choose from.
- Simple interface.
Yeschat
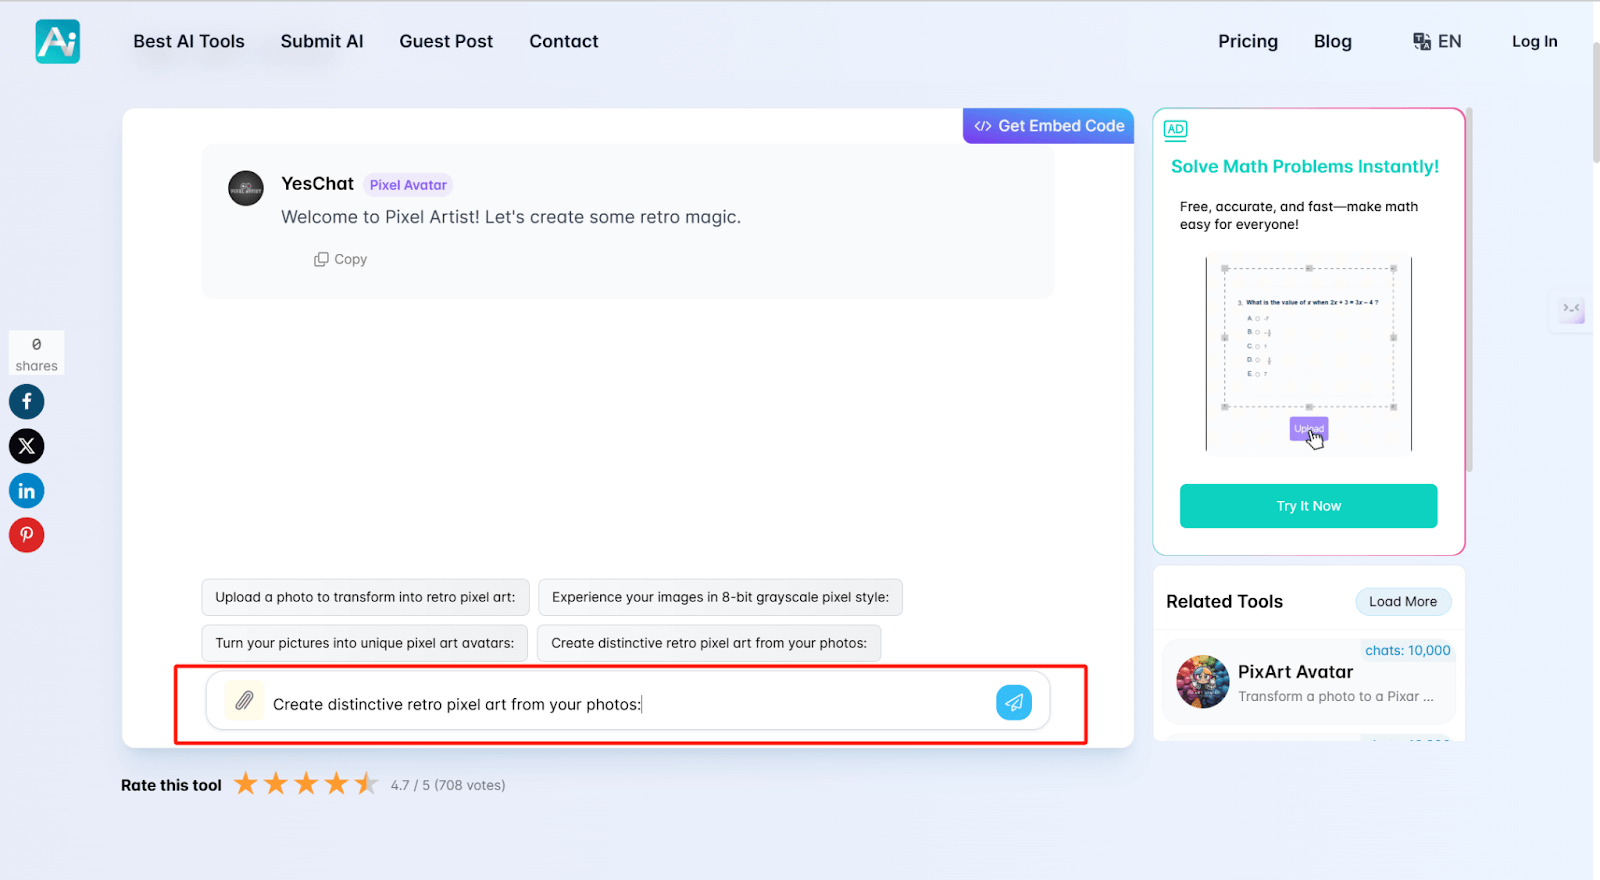
Yeschat is an AI platform and its Pixel Art Generator is a rather specialized AI tool designed to create pixel art with a peculiar retro style. It will generate images of pixelated texture and work with a limited color palette, which is really great for game developers, digital artists, and graphic designers who want to achieve a retro, old-school feel in digital art. However, currently, the tool cannot directly process uploaded images. But, it can guide you to use other tools like Photoshop on how to process your image. Currently, this generator is ideal to use when making simpler pixel art icons or small designs.
✨Main Features:
- Specializes in generating retro-like pixel art images using a limited color palette.
- Great for creating retro games and digital project assets.
- Text prompts to create personalized ideas.
PixelMe
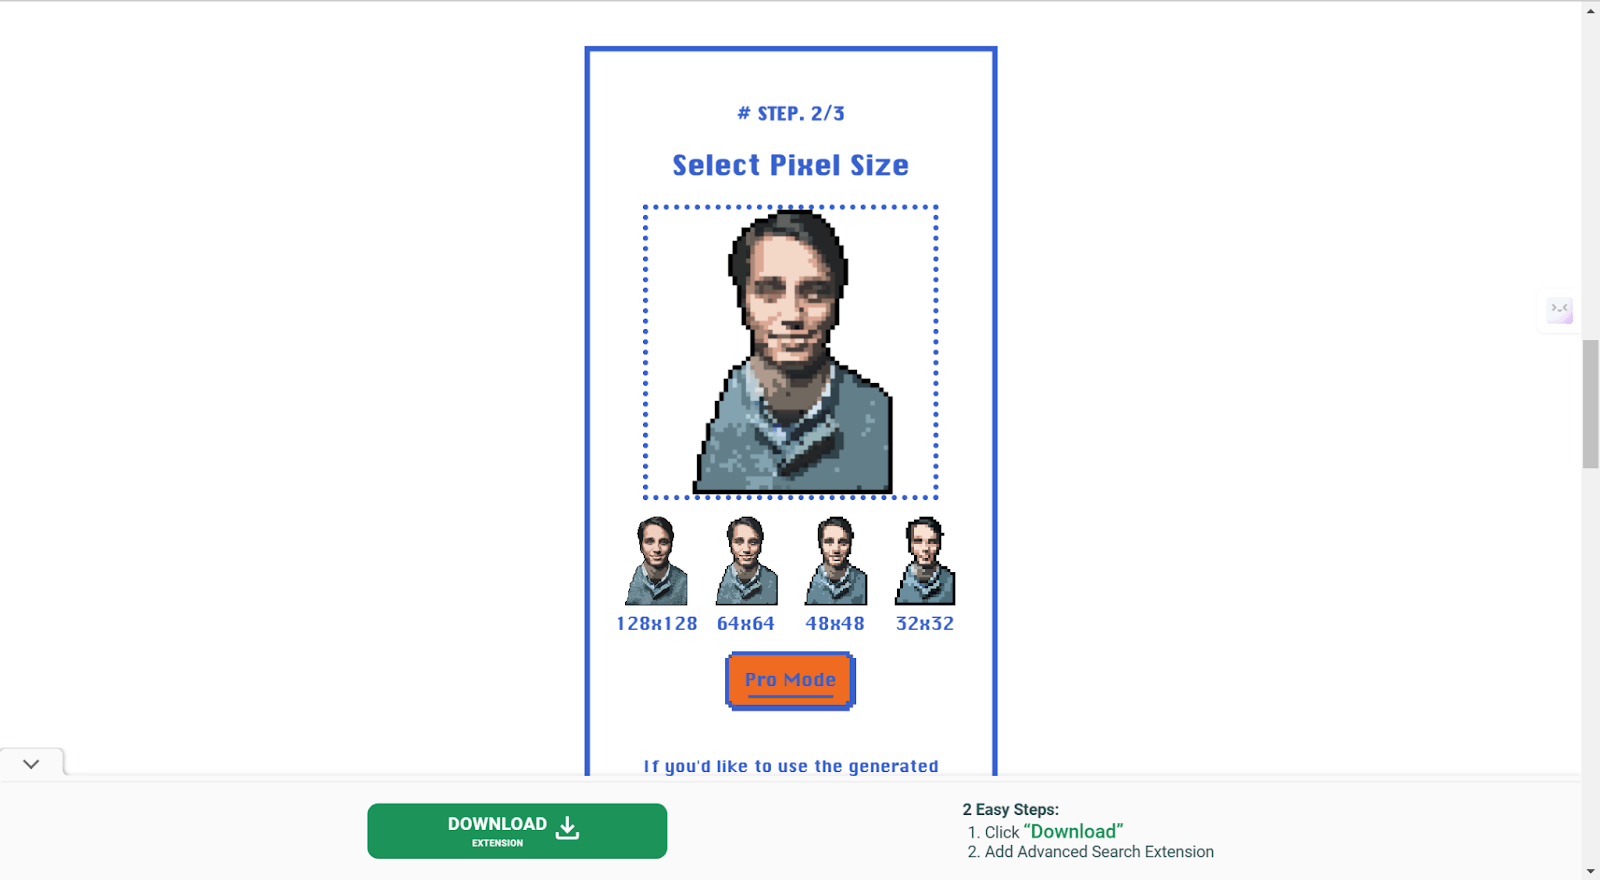
PixelMe is a platform that effortlessly lets you convert your photo into pixel art. In only a few steps, you could transform an image into a retro and pixelated version of the same image, making it just perfect for profile pictures or in game characters, etc., for any digital art projects. The website provides a smooth and effortless process, both for the amateur and the professional, and offers extra features for users who would like to make unique pixel art patterns or icons. Plus, PixelMe is available on Google Play and the App Store for added convenience.
✨Main Features:
- Turn your photos into retro-style pixel avatars or icons within seconds.
- Also available via the PixelMe app, launched on both Google Play and the App Store.
- Easy to use.
8biticon
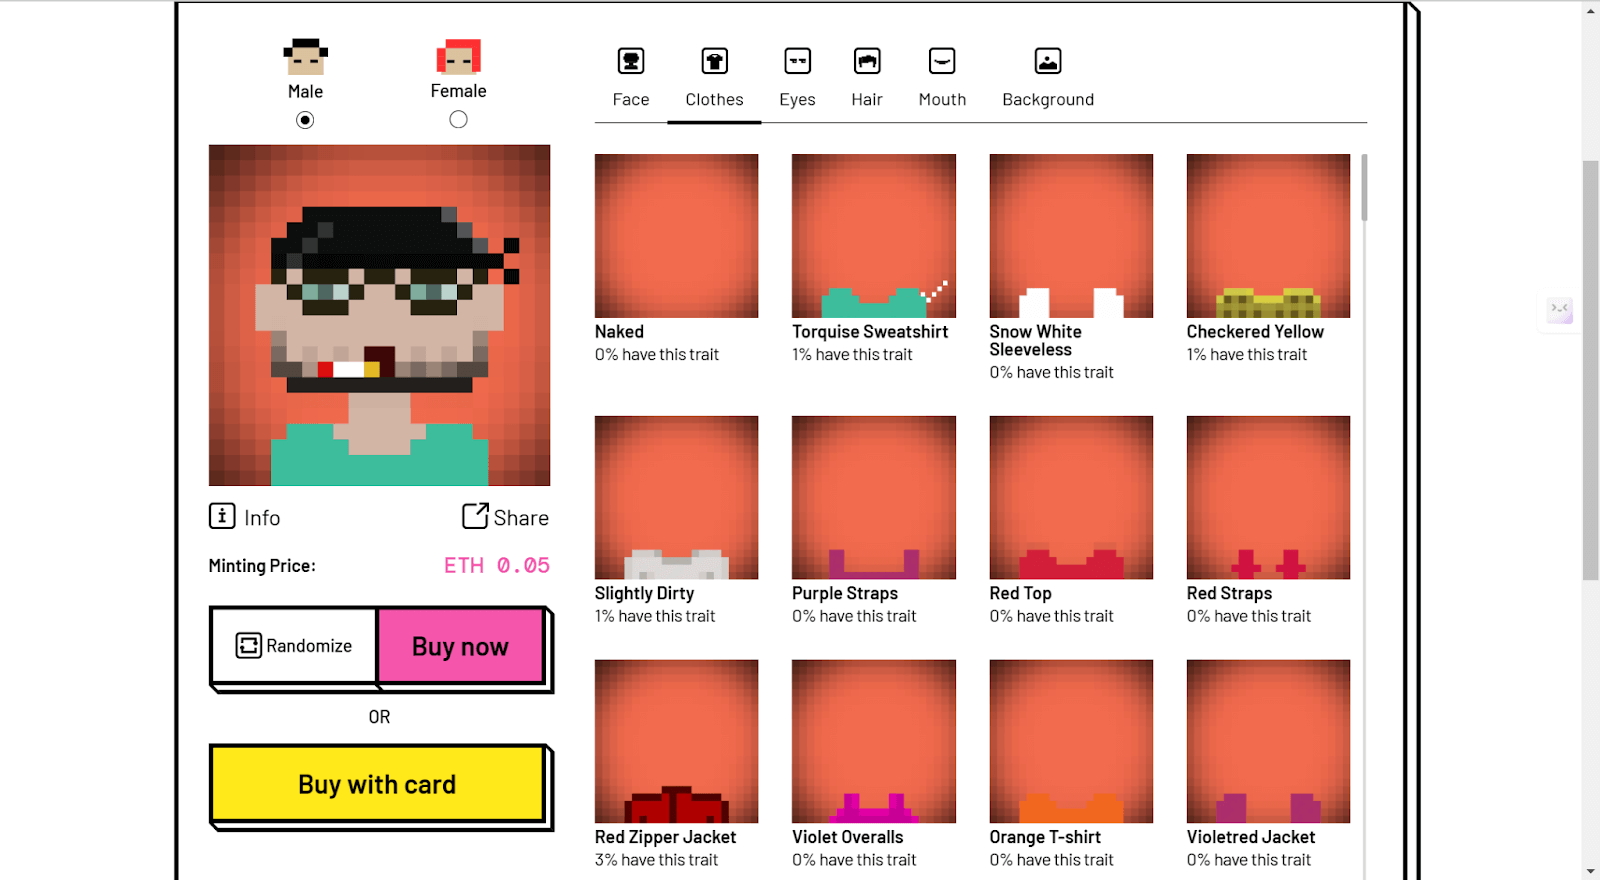
8biticon is the world’s first pixel art avatar maker. It gives you a special platform to design your own 8-bit avatars. Since 2012, it has been in the lead concerning pixel art, but now it finally allows you to create pixel avatars and mint them as NFTs. You have a really big selection of adjustable design elements, so you can make your truly unique avatar. When designed, your pixel art avatar gets automatically minted as an NFT, which makes it part of an exclusive collection on-chain.
✨Main Features:
- Able to generate unique 8-bit avatars.
- Each avatar is minted as an NFT by default, making your design part of an exclusive collectible on a chain.
- Multiple elements are there to design a truly unique avatar, including common, rare, and unique attributes.
- Community events will give access to airdrops and allow access to the rarest of elements to use in avatars.
How to Make a Pixel Avatar Like a Pro with Photoshop
Designing a pixel avatar using Photoshop is an enjoyable and creative process in which even the smallest detail of the character can be decided upon. Whether it’s a simple profile picture or a character for a video game, learning this type of pixel art can become one of the most rewarding skills. A step-by-step guide to creating a pixel avatar from scratch in Photoshop is provided below.
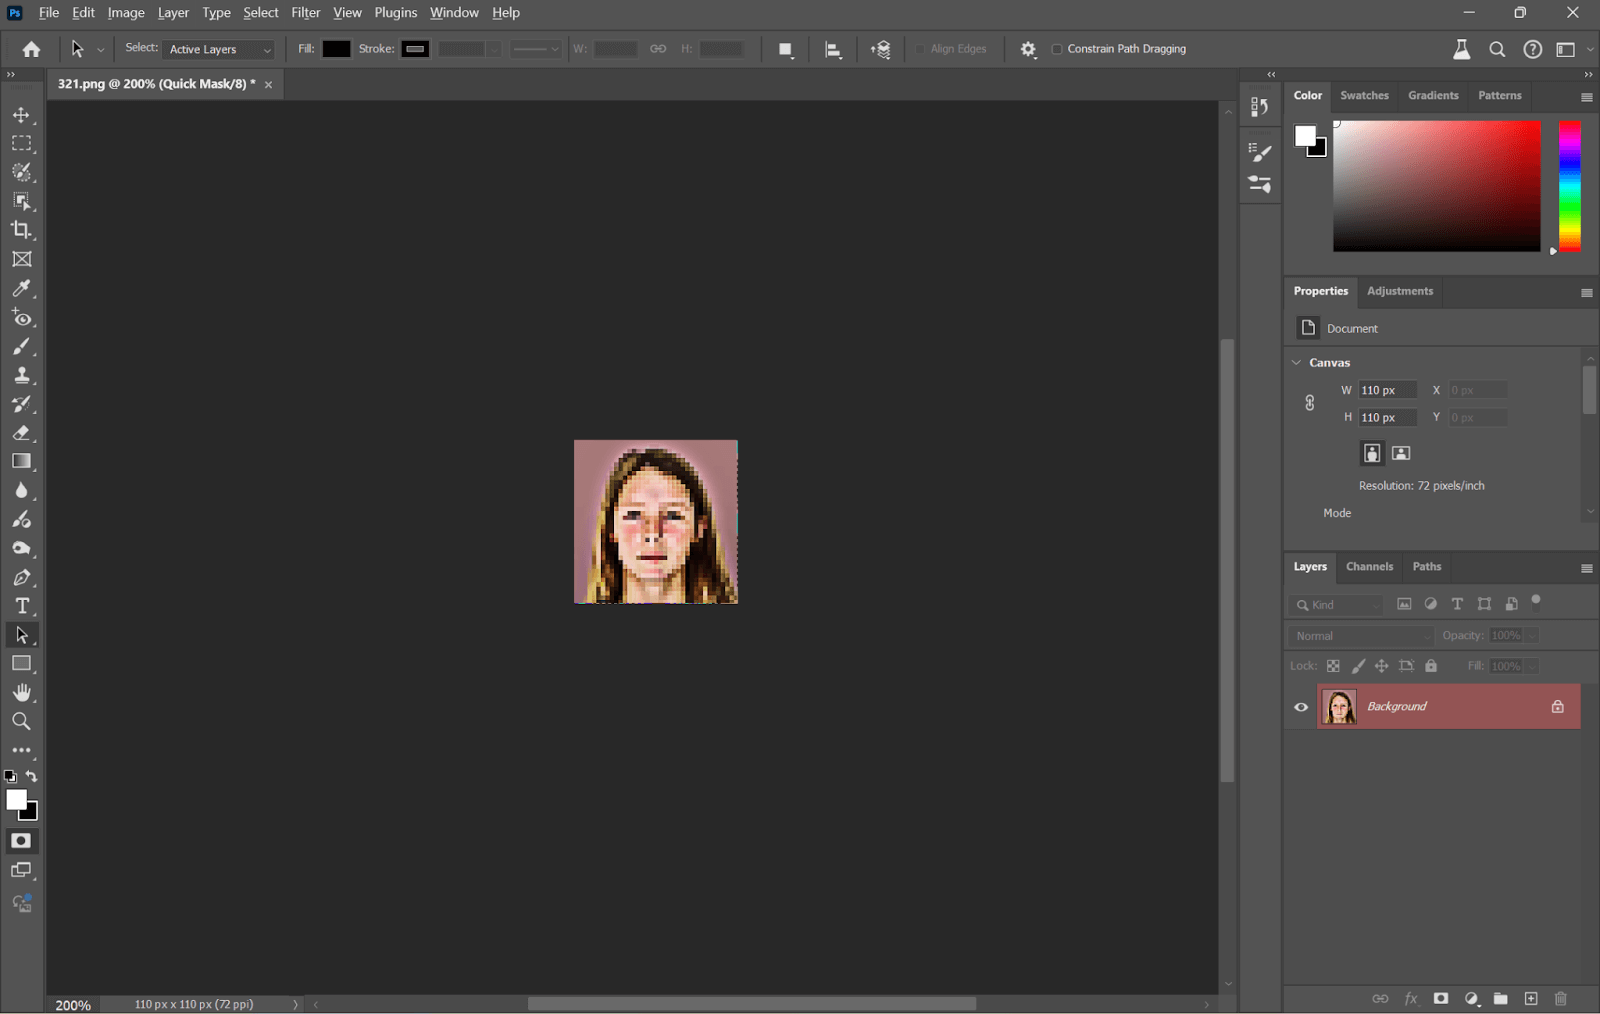
Step 1: Open and Prepare the Image
Open Photoshop and select File > Open to load the photo you want to convert.
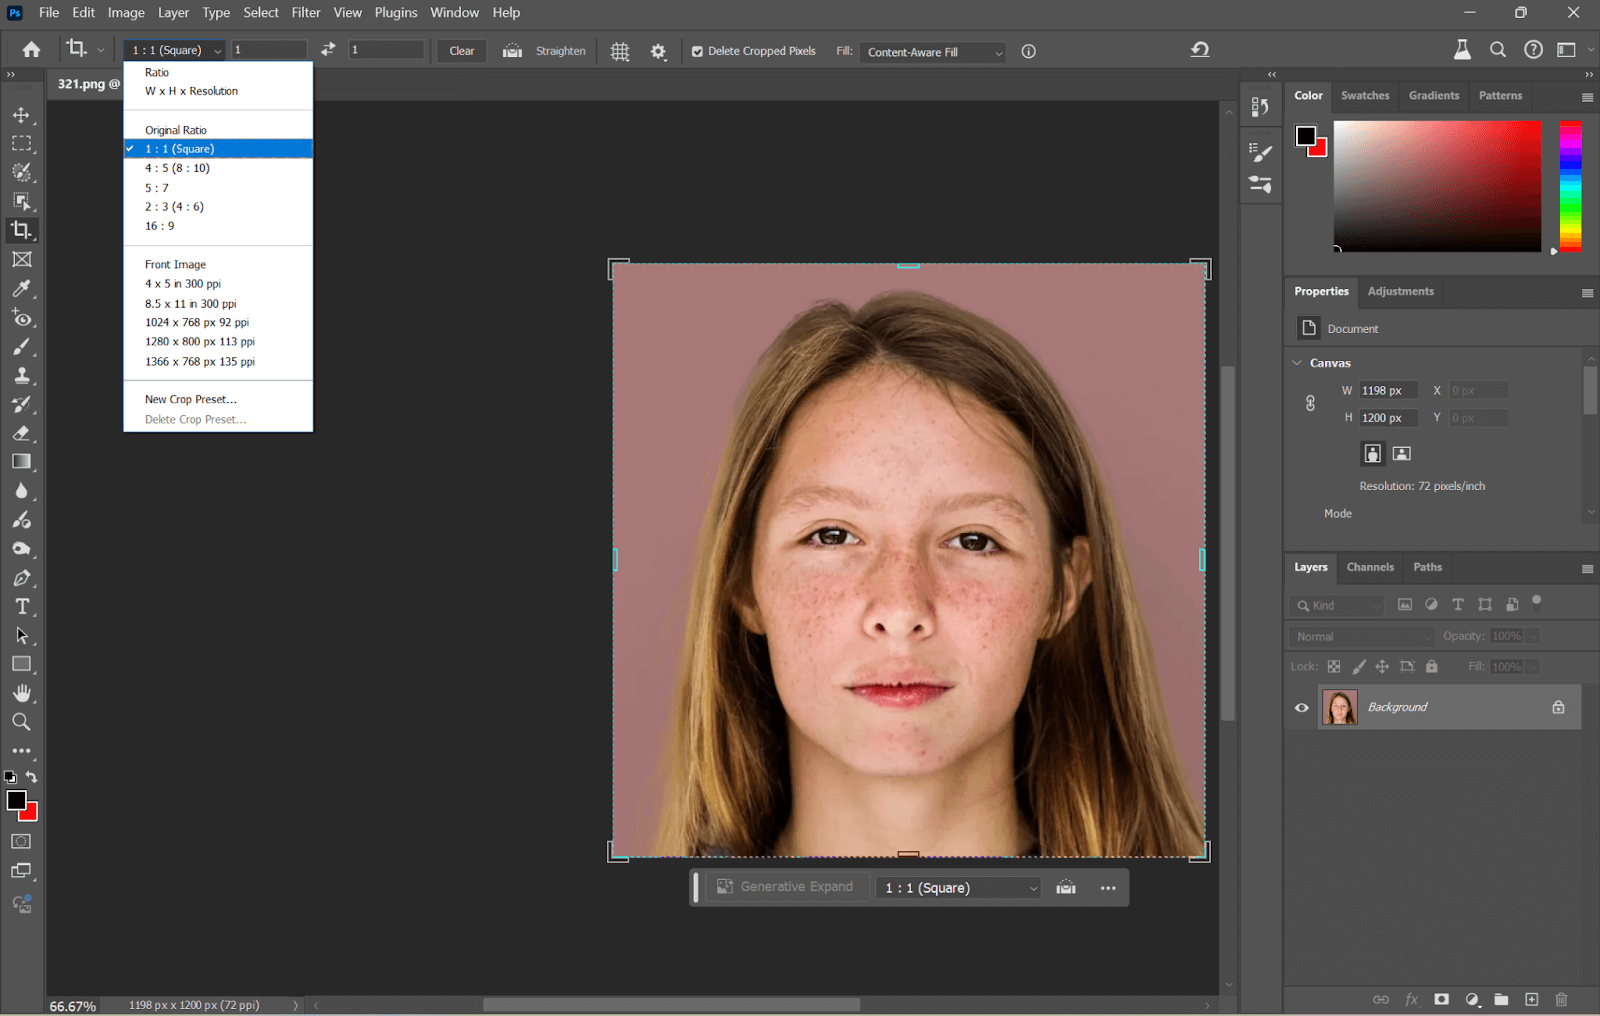
Step 2: Crop to a Square
- If a square image is required, such as for social media profile pictures, you can crop the image using the Crop Tool. Select the Crop Tool from the toolbar. In the top options bar, set the aspect ratio to 1:1 to ensure a square crop.
- Drag the crop box to adjust which part of the image to keep.
- Press Enter or click Confirm to apply the crop.
Step 3: Resize the Image
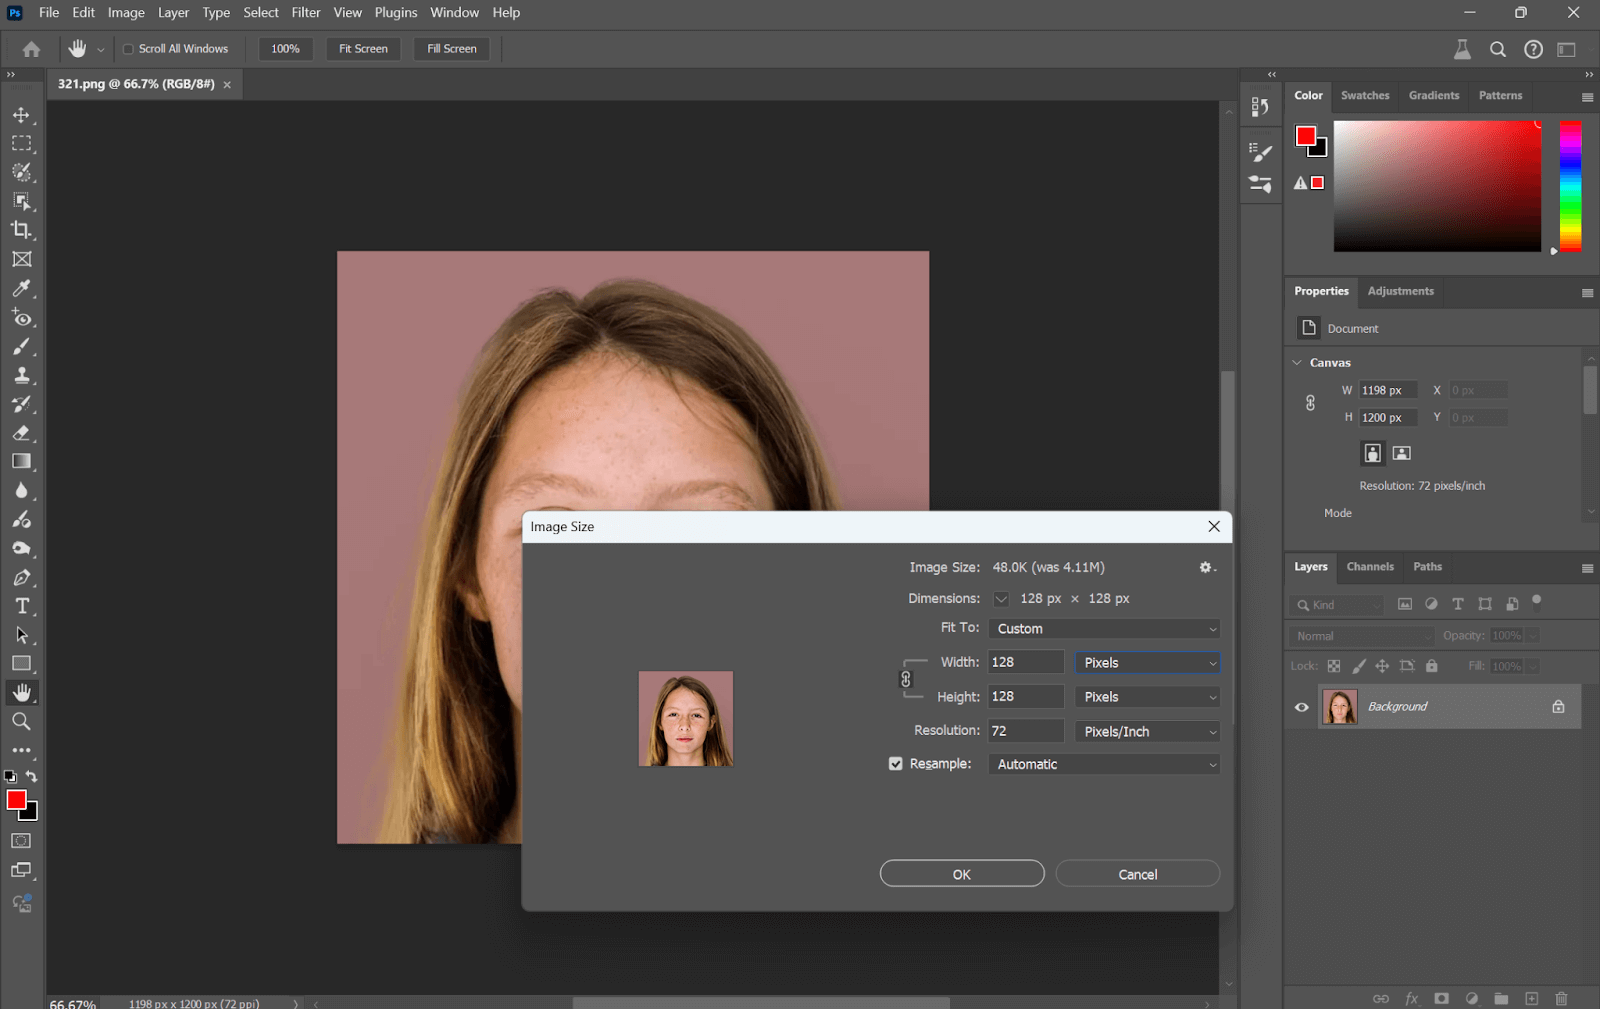
- Go to Image > Image Size.
- In the dialog box, uncheck Constrain Proportions (if checked), and enter a smaller size for pixel art, like 100px x 100px (you can adjust the size based on your preference).
- Click OK to resize the image to a smaller pixelated size.
Step 4: Apply the Pixelation Effect
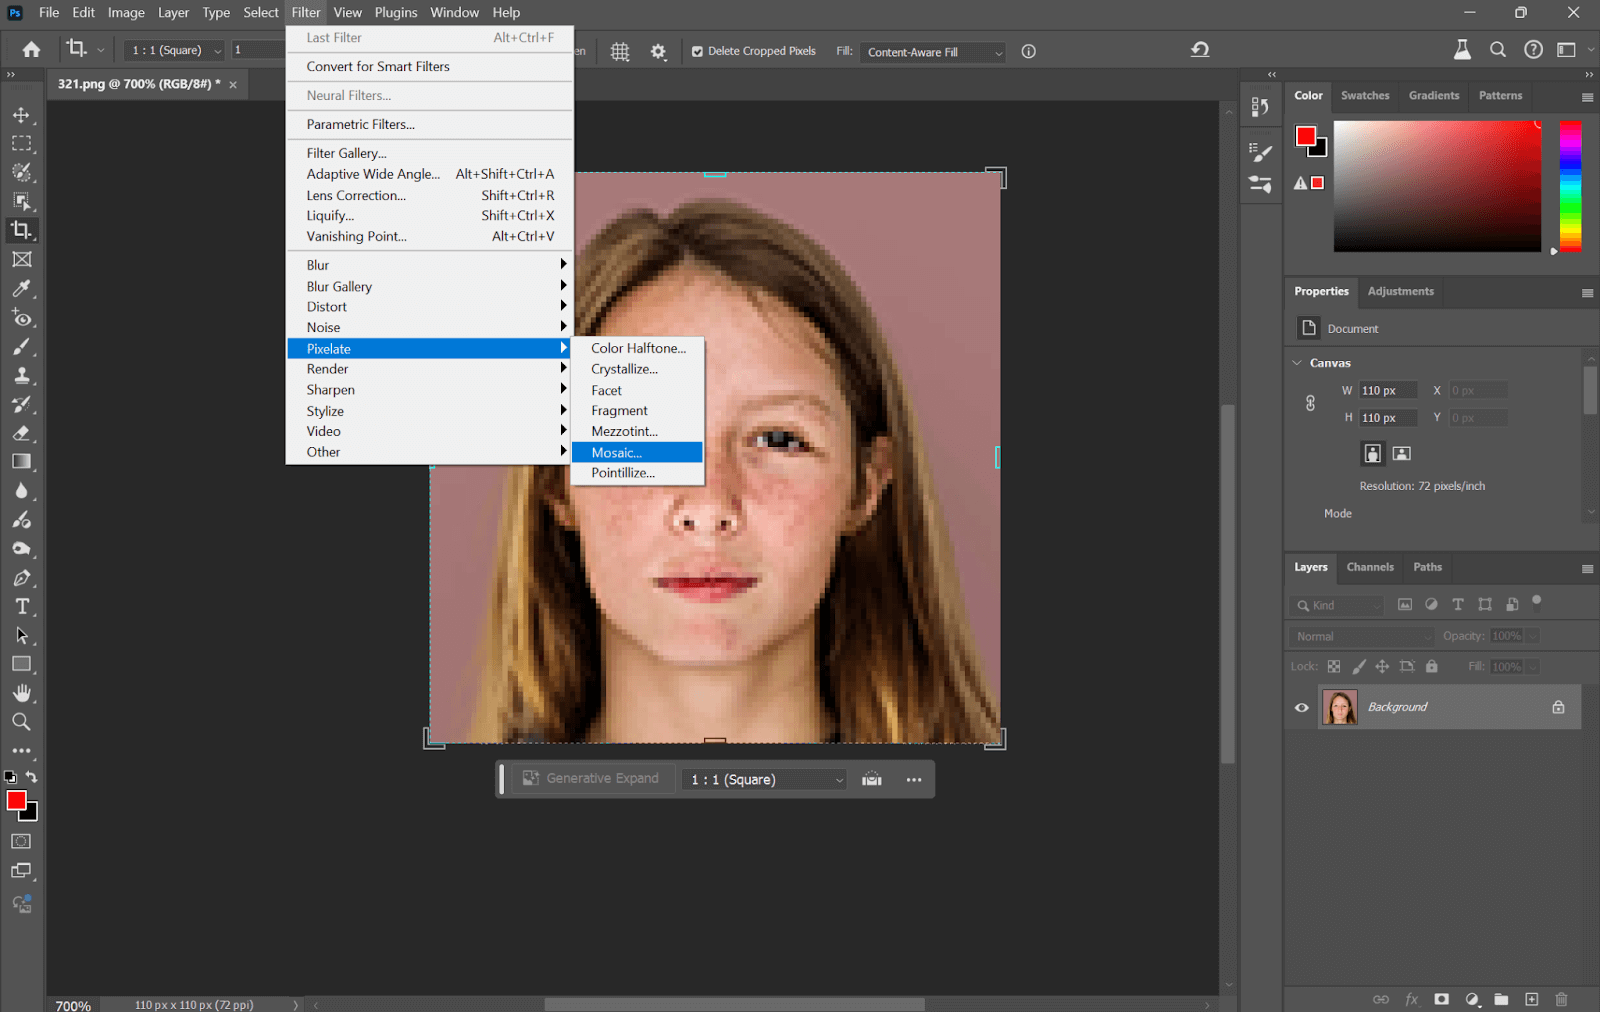
- Filter > Pixelate > Mosaic
- Set the Cell Size to a higher value, say 5 or 8, to give an evident pixelation.
- Click OK to apply the pixelation.
Step 5: Sharpen the Image
- You can sharpen the pixels to define them more clearly with the Sharpen tool:
- Go to Filter > Sharpen > Smart Sharpen.
- Adjust the sharpness level until you’re happy with the pixel clarity.
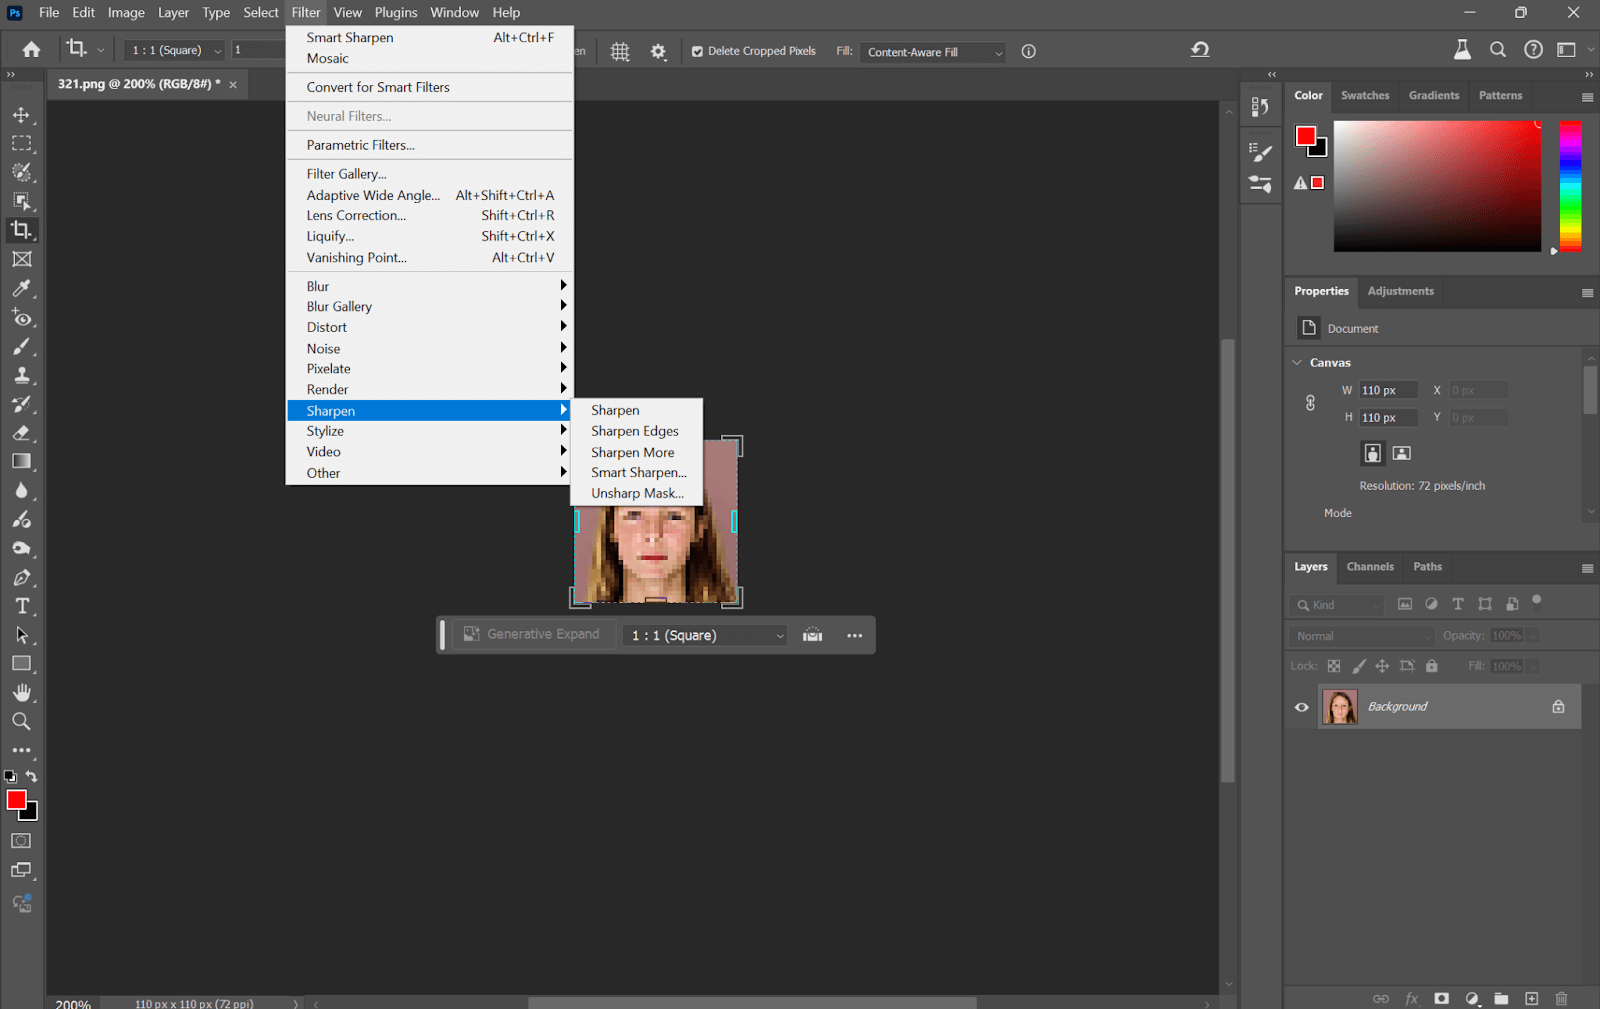
Click OK to apply the sharpening.
Step 6: Save and Export
- Once you’re satisfied with the pixel art effect, go to File > Export > Export As.
- Choose the file format, such as PNG (to retain a transparent background) or JPEG, and then click Save.
How to Make a Pixel Art Character
Not only can you make pixel avatars, but you can also create a complete pixel art character from scratch. No matter if you are working on a game or digital project or simply exploring pixel art. There are various tools to help bring your pixel character to life.
Make Pixel Art Character Using Photoshop
Photoshop allows you to design every detail of your character, from its shape to its animations, from scratch in Photoshop. It is perfect for those who want full creative control over their pixel art character design, starting from a simple concept to a fully developed character.
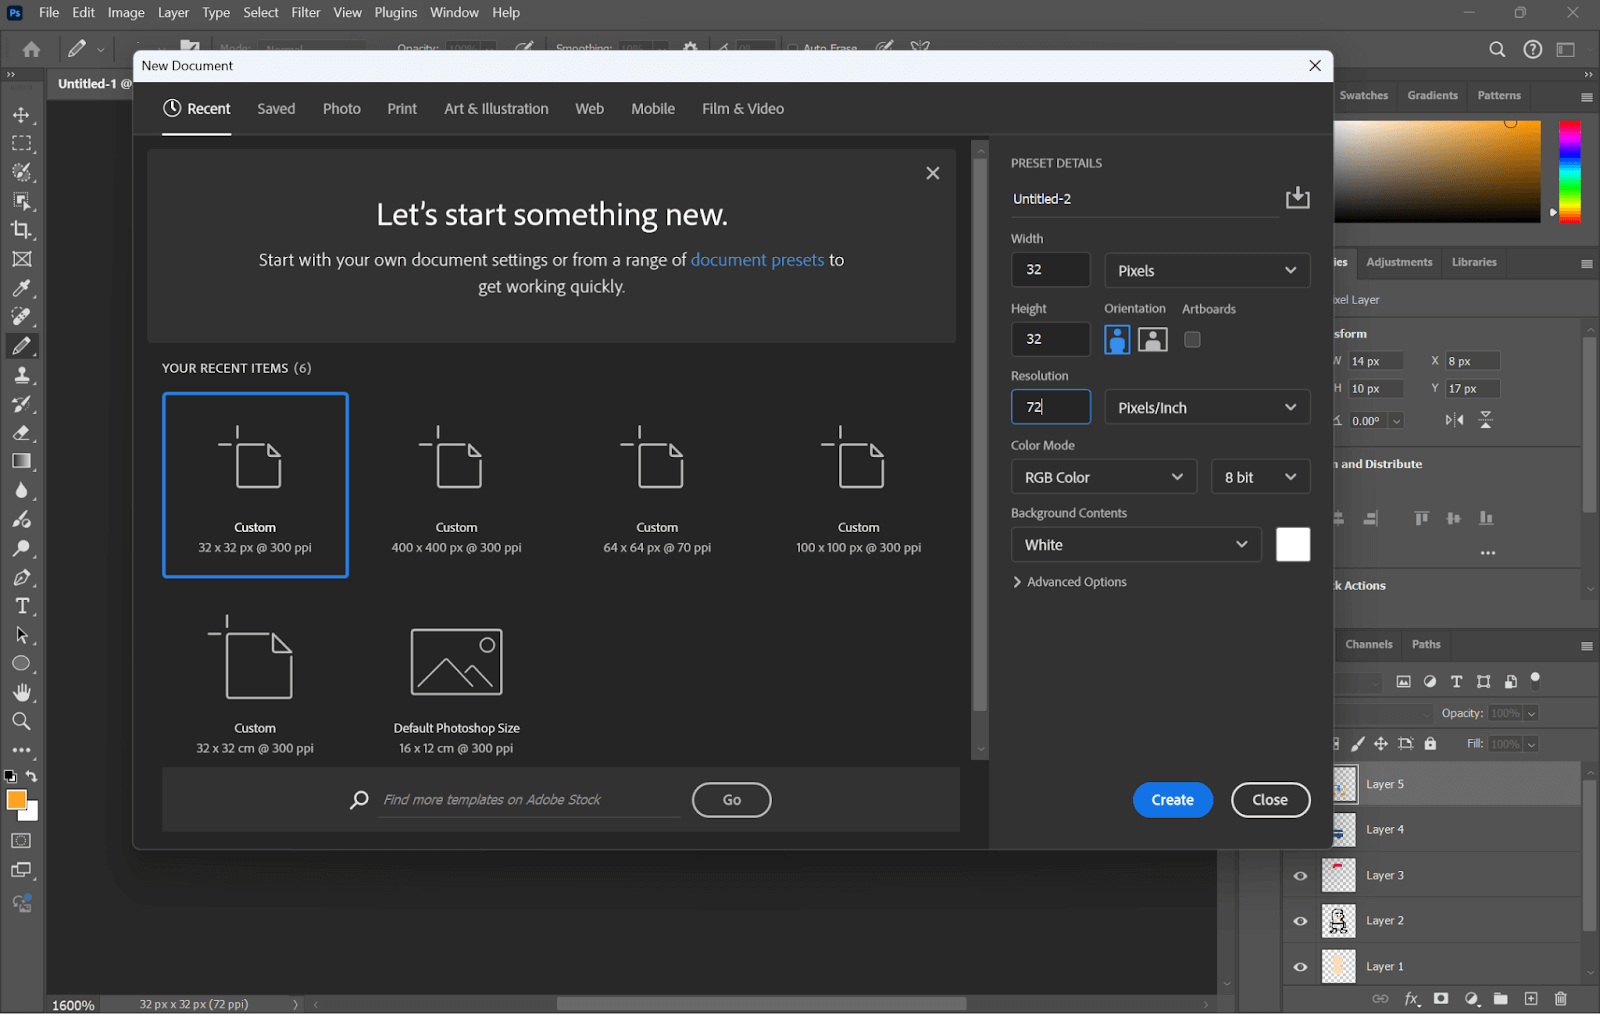
Step 1: Open Photoshop and create a new canvas. Choose a size based on your needs:
8×8 for very simple characters or icons.
32×32 for small, detailed characters. These are good for games with a retro feel to them.
64×64 for more detailed characters.
128×128 for highly detailed designs.
Set the resolution to 72 PPI to keep it optimized for pixel art.
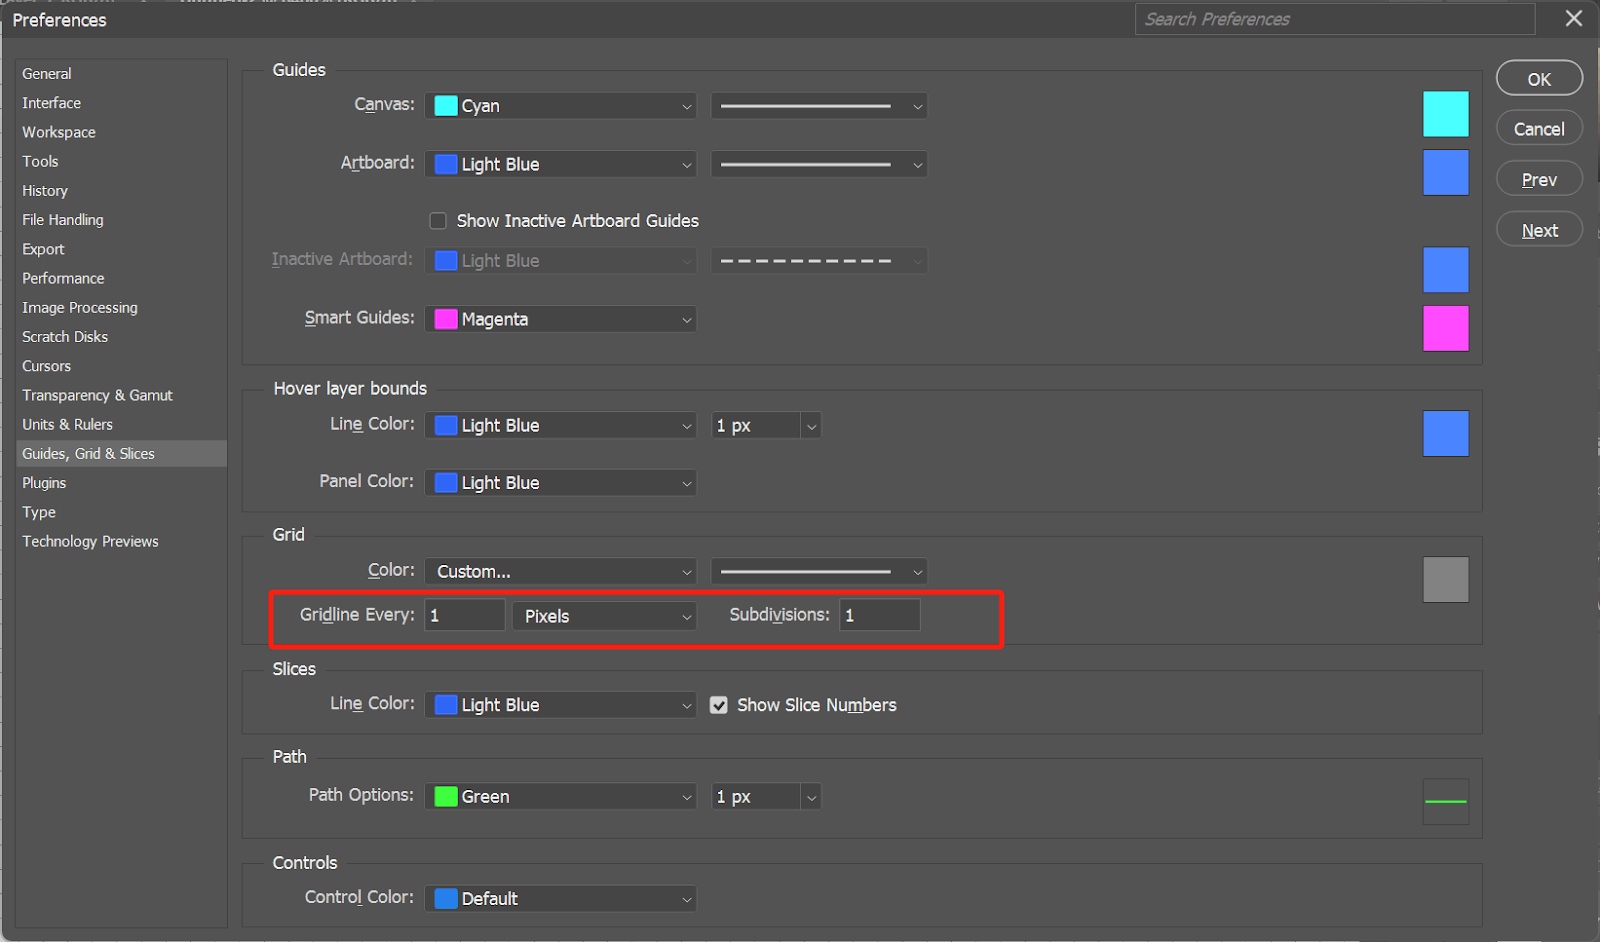
Step 2. Go to View > Show > Grid and then define your grid in Preferences > Guides, Grid & Slices. Set the gridline to 1 pixel and subdivision to 1 for drawing pixels.
Step 3: Use Ctrl + + keys for Windows or Cmd + + for Mac to zoom in on your canvas. Now, you can see each pixel distinctly if you are working on really small canvas sizes like 32×32.
Step 4: Click on the Pencil Tool from the toolbar (shortcut: B) and set the brush size to 1 pixel in the brush settings. This way, you can draw individual pixels without filling up multiple grid spaces. Then, you will find what you draw will become pixel-styled.
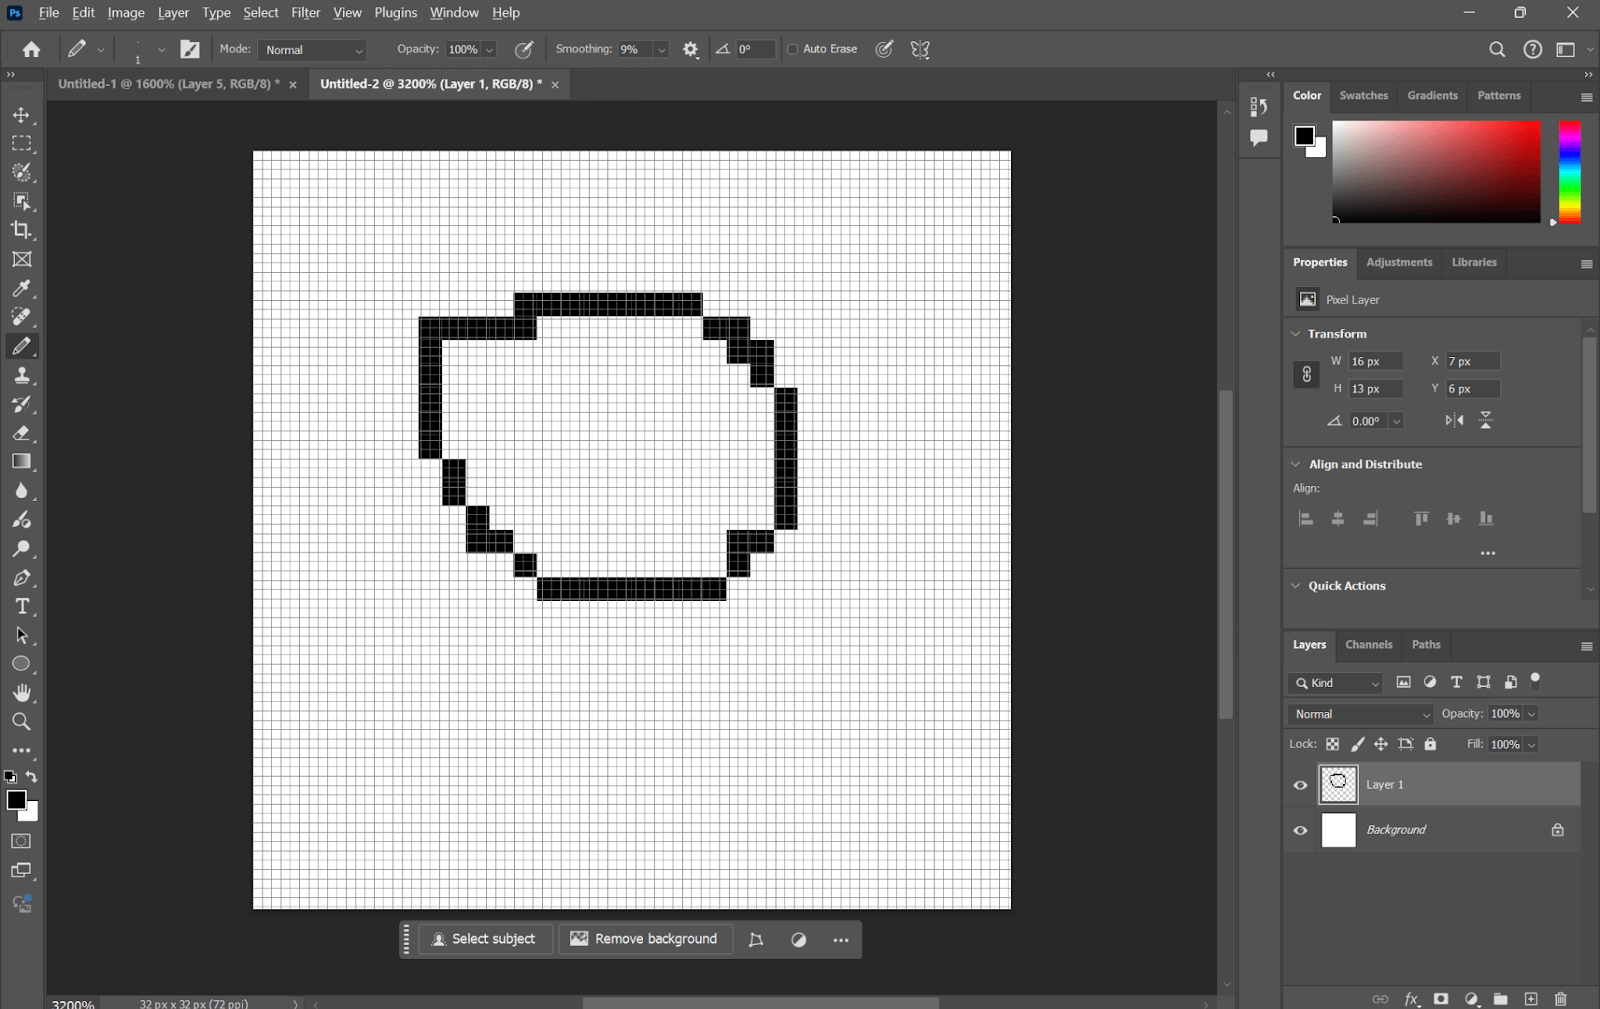
Step 5: Create a new layer for your character design. Start by sketching the basic frame or outline of your character. Use simple shapes to build the head, body, and limbs.
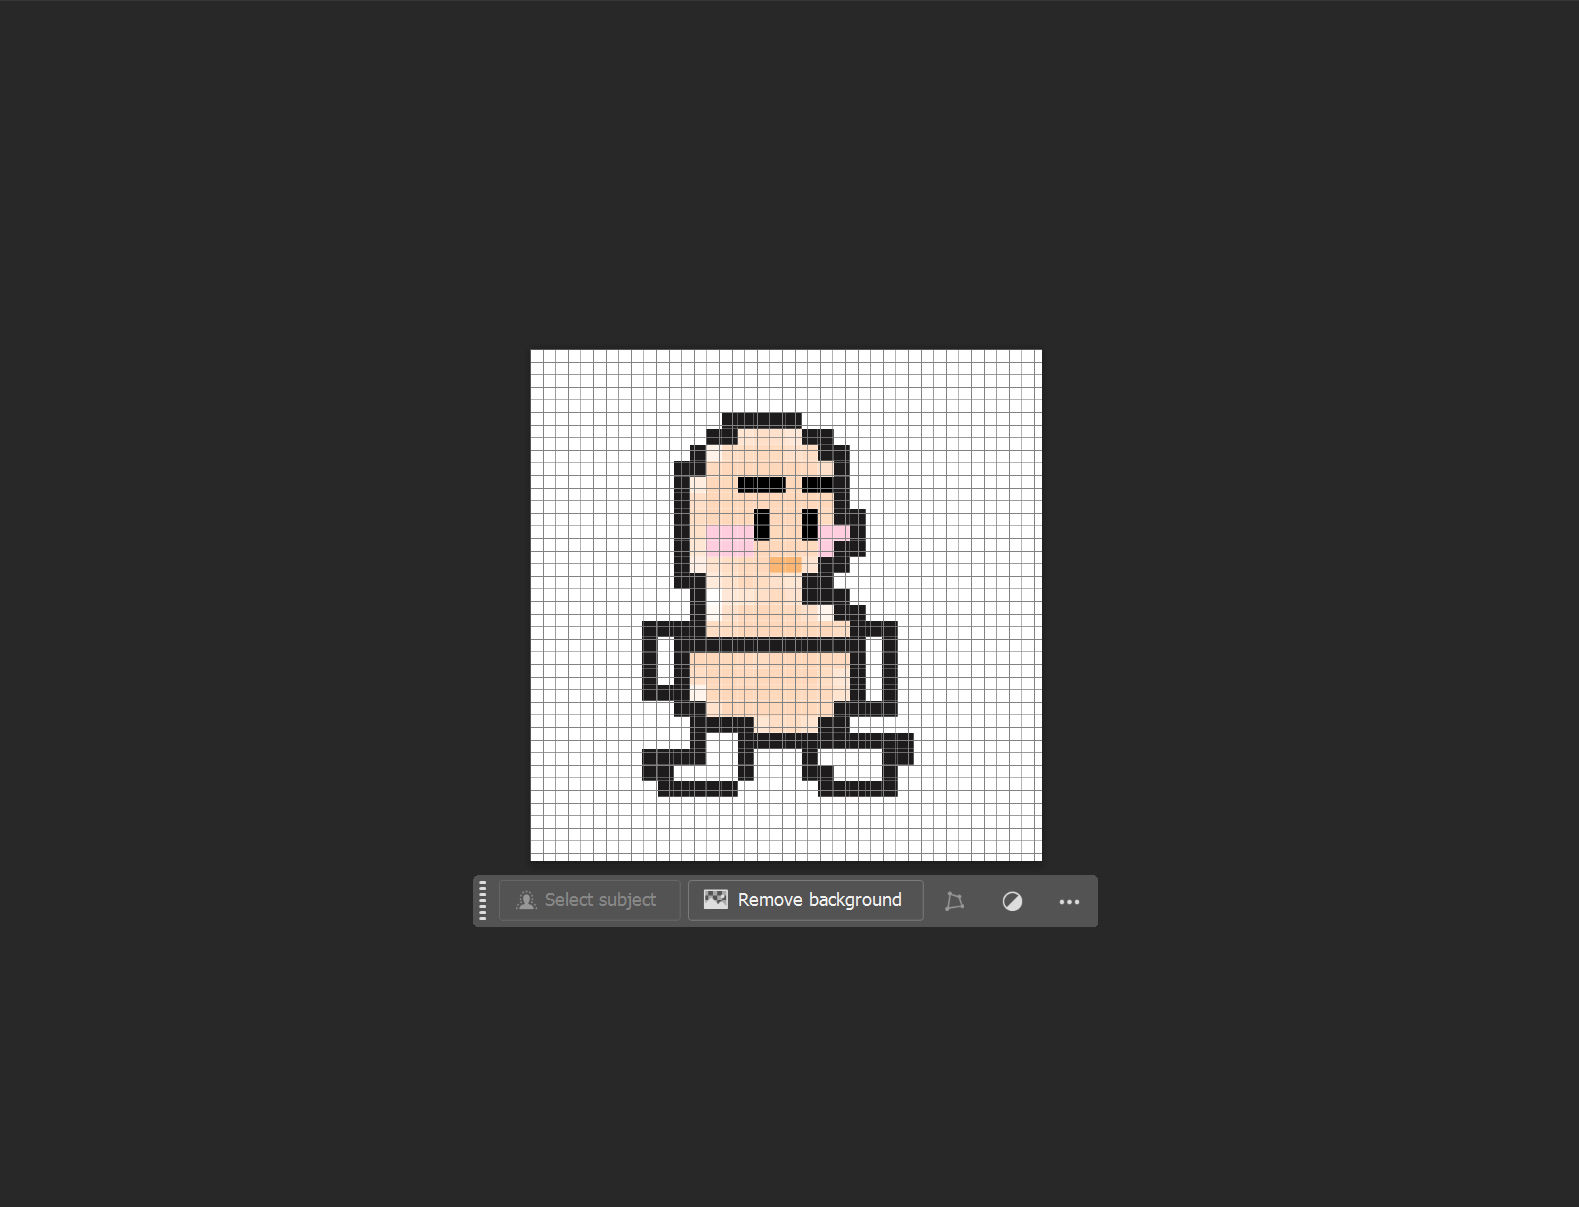
Step 6: The next layers include clothing, accessories, and facial details. This way, parts stay separate and are easier to work with when editing later.
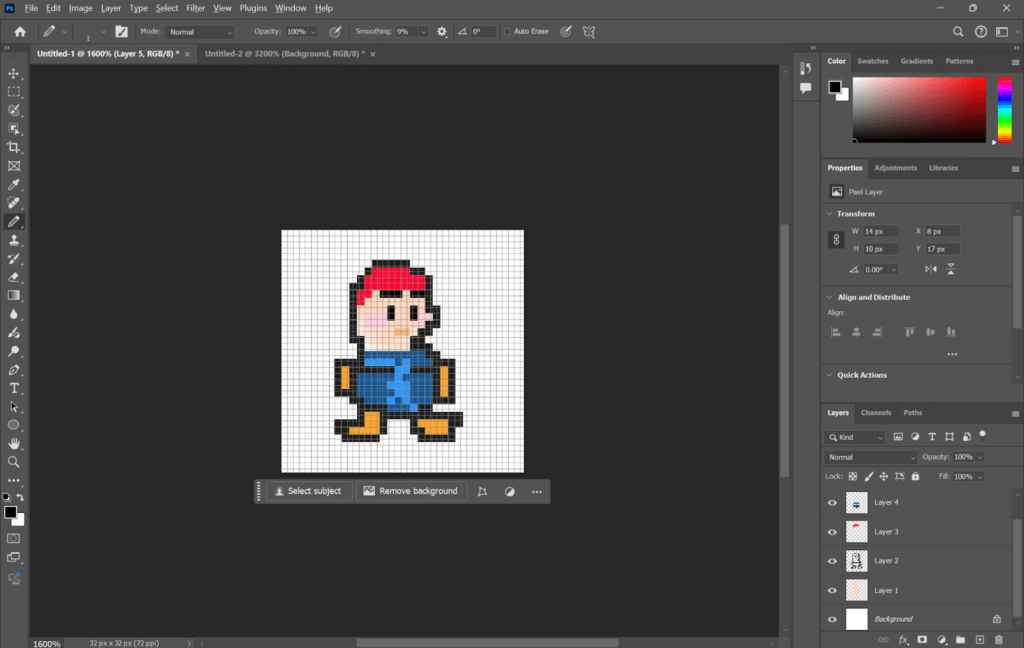
Step 7: Once the character design is finished, clean up the extra lines or pixels that do not belong to your character. Merge all the layers, but back up the layered file in case of future edits.
Step 8: To export your completed pixel character, go to File > Export > Save for Web (Legacy). Save the file as a PNG to keep all the sharpness of your pixel art.
Make Pixel Art Character Using AI
Using AI to make a pixel art character makes it easier to turn your design into pixel art fast. You don’t need to draw each pixel by hand. Some AI tools, like AiPassportPhotos, as we have introduced above, let you upload your drawing, and they change it into pixel art for you. This saves you both time and effort while giving you something fun and new.
👉Here’s how to do it:
Step 1: Make or draw your character in any program you like. Keep it simple and clear so the AI can work well.
Step 2: When your drawing is ready, go to a site such as AiPassportPhotos. Upload your file there.
Step 3: After you upload, choose the pixel style. The AI will quickly change it into pixel art. Then, you can save and enjoy the result.
How to Make a Pixel GIF with Piskel
If you want to create a GIF picture with pixel art, Piskel is a great, approachable tool to start with. For both beginners in pixel art and professional designers, Piskel will easily help you create a pixel GIF thanks to its very intuitive interface and simple features. In this tutorial, we’ll take you through a step-by-step process to turn your static pixel art into a lively animated GIF.
Step 1: Upload or Draw Your Pixel Art
Upload the pixel art you have created or create a new character or image directly in Piskel using the mouse and pencil tools. Once your first frame is ready, you are all set to start animating.
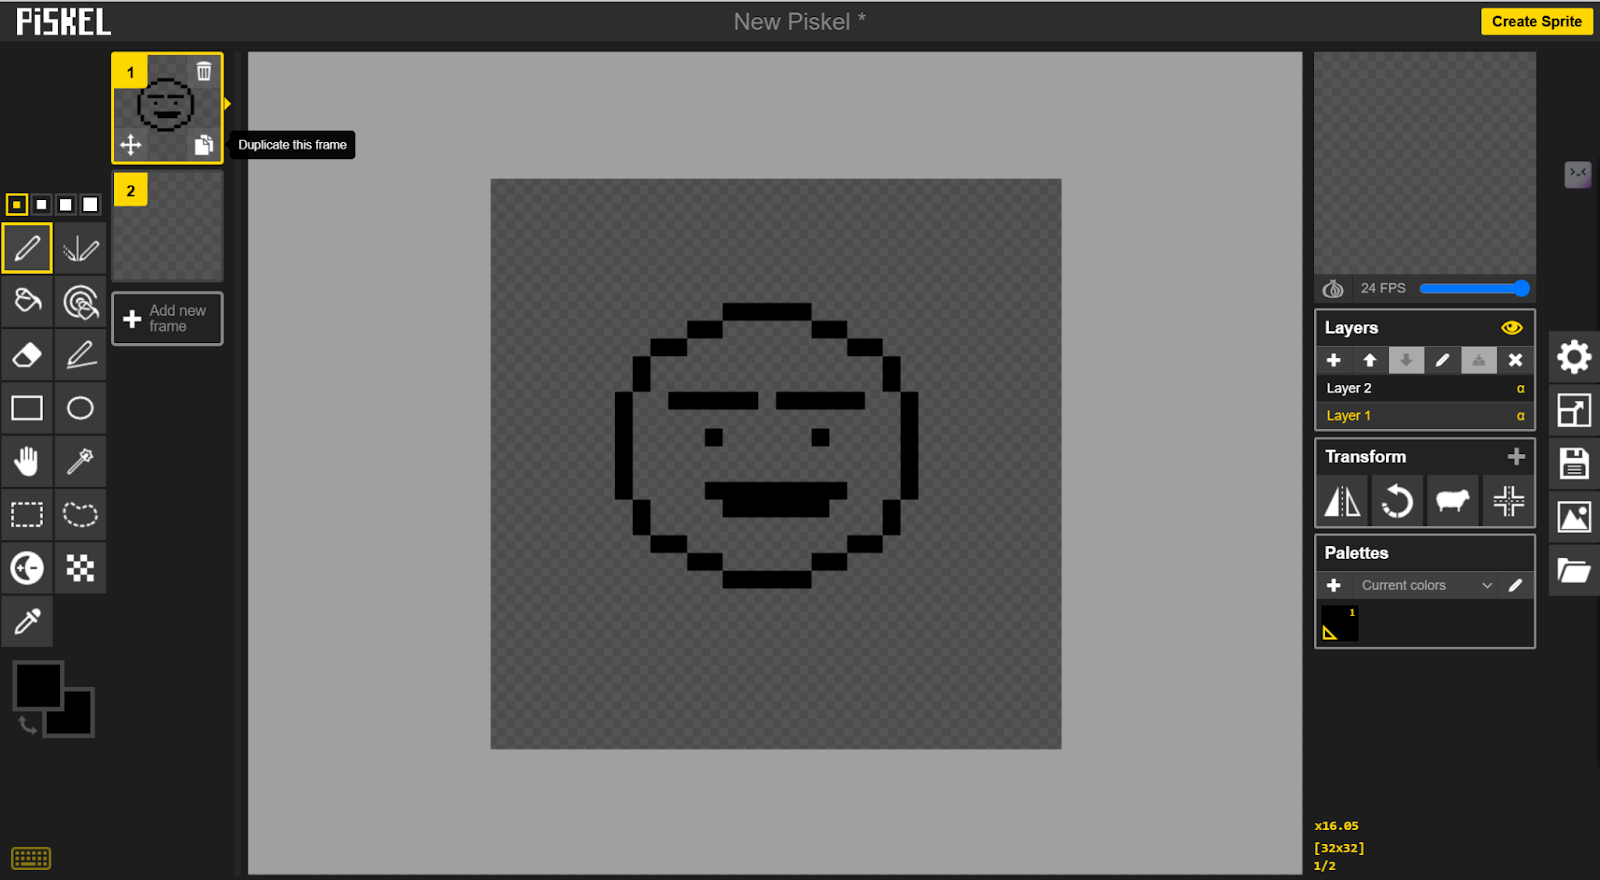
Step 2: Add Additional Frames
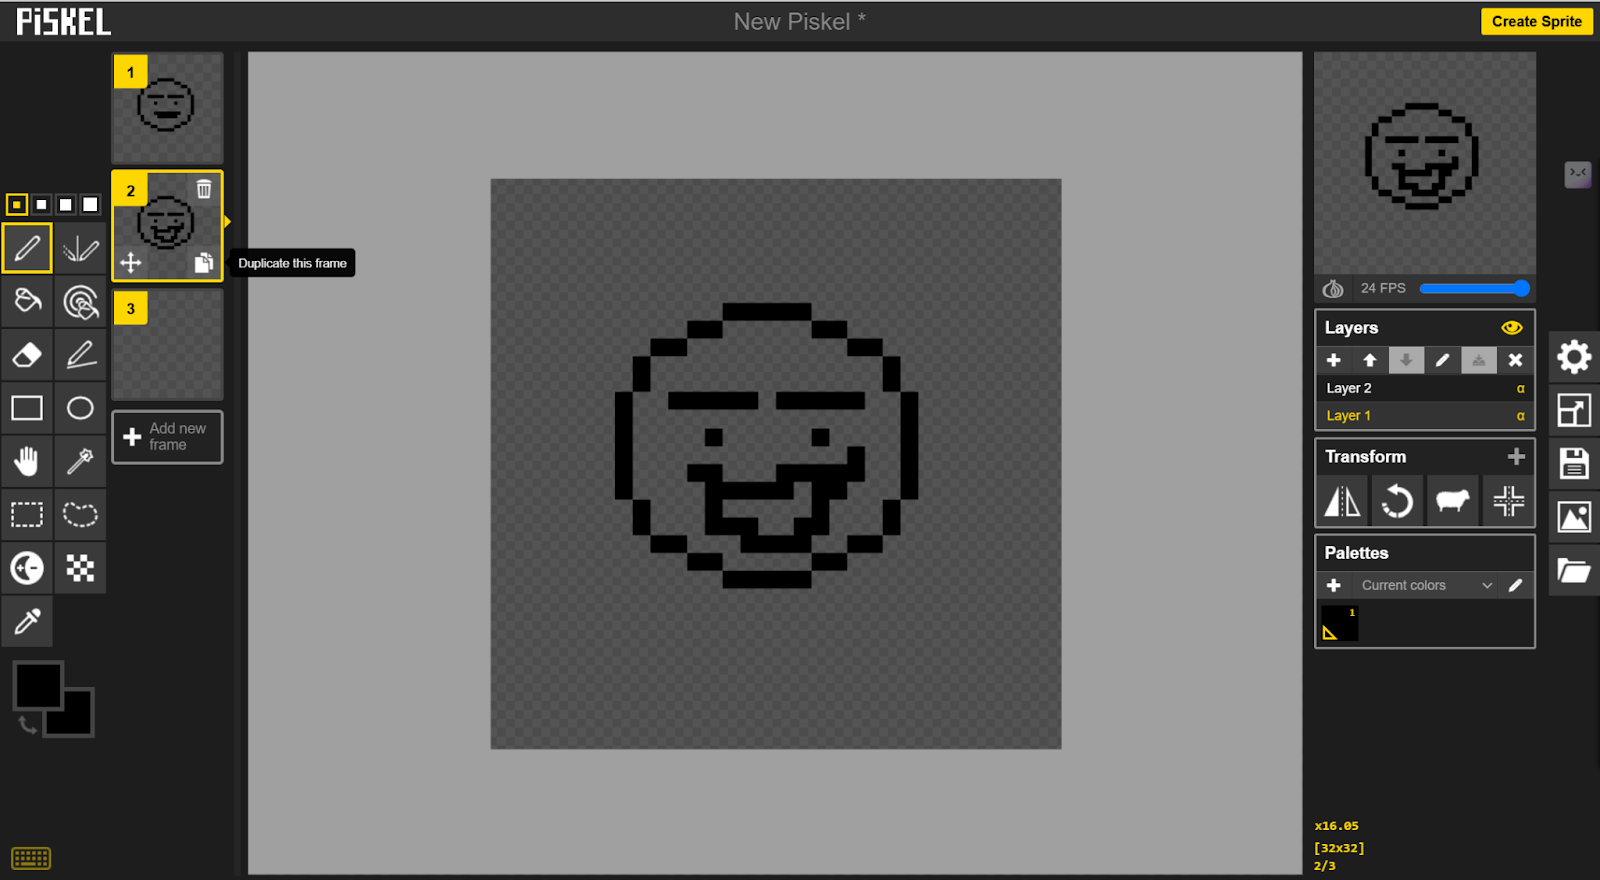
Since GIFs need multiple frames to animate, you will need to create at least one more frame. You can either upload a new pixel art frame or draw it in Piskel. These frames will be the individual stages of your animation.
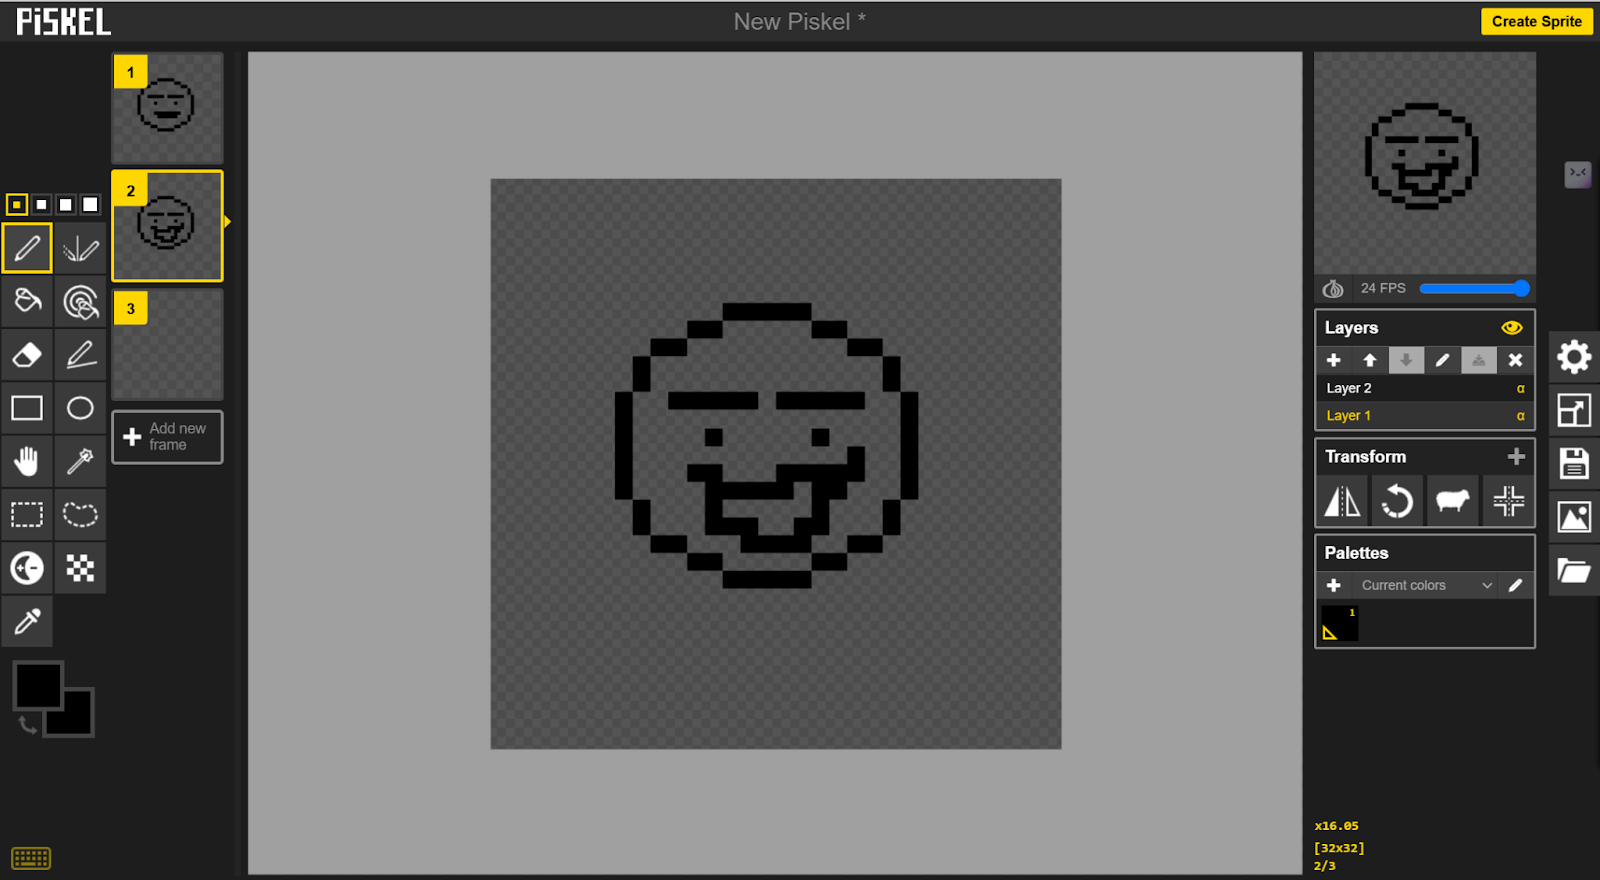
Step 3: Duplicate Layers
Duplicate your layers for every extra frame, or move layers up/down to adjust the timing and sequence of your animation. You can reorder the frames to make sure the animation flows correctly in the right order.
Step 4: Preview Your Animation
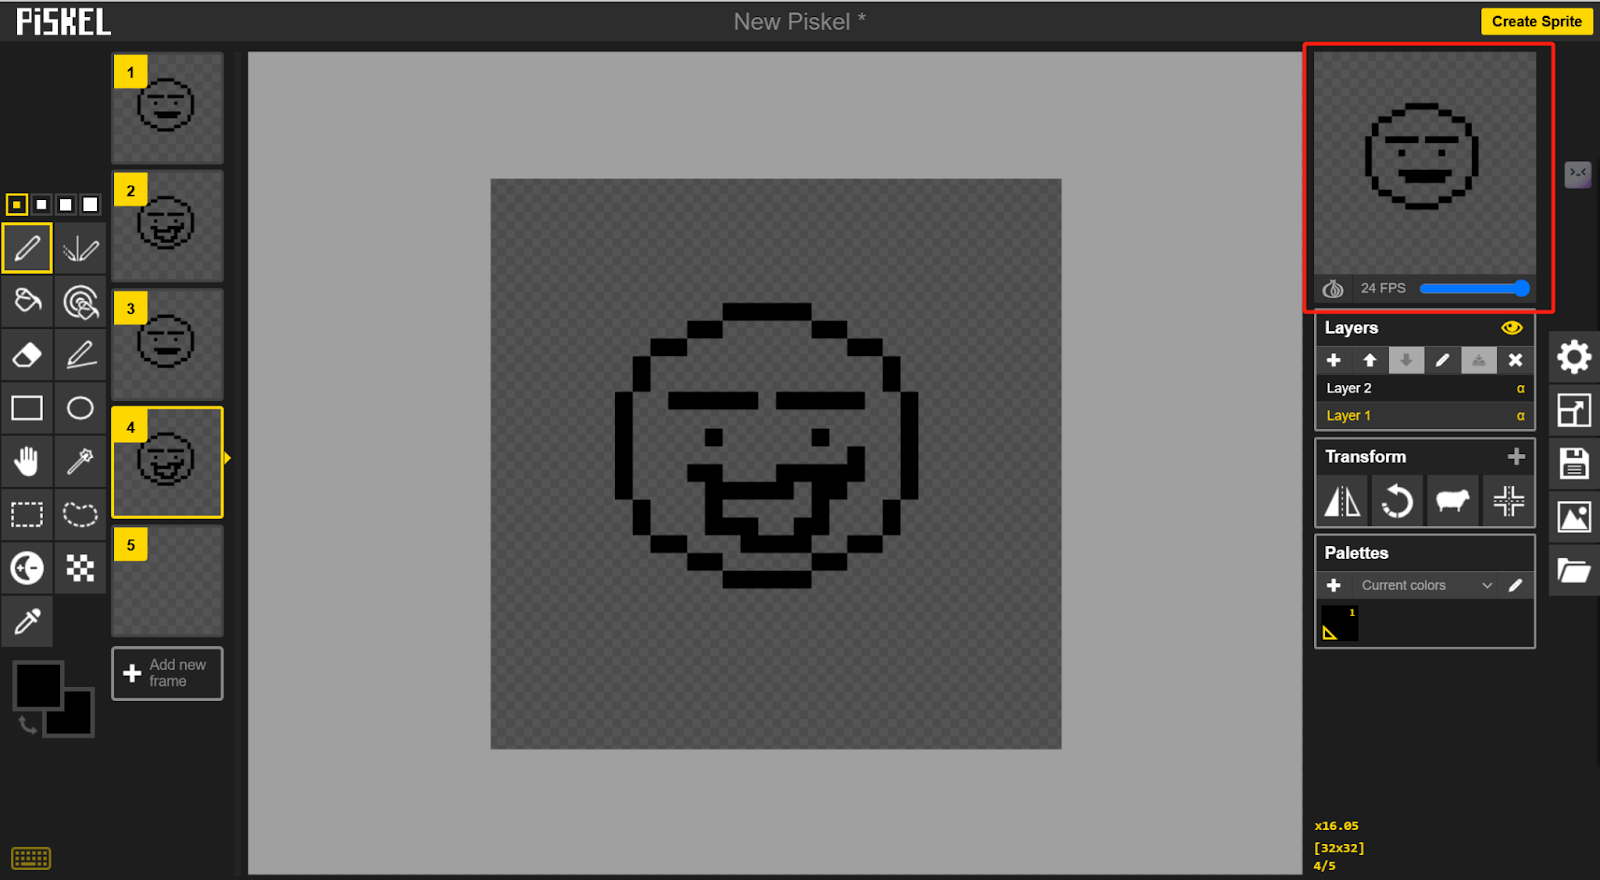
To preview how your GIF looks, click the Preview button in the top-right corner of the interface. This will show you animation in real-time.
Step 5: Export Your Pixel GIF
Once you’re happy with your animation, click on Export in order to save your animated GIF.

FAQ
What’s the easiest way to make a pixel avatar?
The easiest way to make a pixel avatar is by using automated tools like AiPassportPhotos. With these, all you have to do is upload your photo and apply a pixel filter in just a few clicks, an extremely easy process even for those who are new to using such programs. Other platforms, like Avatars in Pixels, allow you to build a pixel avatar with pre-designed assets.
What can I use pixel art for?
Pixel art is super-versatile and has a lot of uses. In gaming, it’s more common for retro-style character design, backgrounds, and icons. On social media, it can be used as an interesting profile picture or avatar. Another major use of pixel art is within the realm of NFTs, where it is used to design a collectible digital asset. It also adds a touch of nostalgia or artistic flair to digital art projects, is applicable on merchandise like T-shirts, mugs, and stickers, and really gives them that appealing, vintage vibe.
How to stop pixel art from becoming blurred?
Save and resize the picture properly to avoid blurring of pixel art. While scaling, always use the interpolation method “nearest neighbor” or something similar, which will help preserve the sharp, blocky edges of the pixels. Avoid saving the image in formats that compress it, like JPEG, which will add unwanted compression artifacts; instead, use PNG for lossless quality. Also, if your pixel art is going to appear on the internet or in a design program, make sure that resolution and scaling settings are set to prevent the smoothing of the pixels or anti-aliasing. Doing so will keep your pixel art crisp and clean.
Conclusion
You can create a pixel avatar or character using automated tools like AiPassportPhotos for quick results or master Photoshop to get a detailed custom design. So, don’t be afraid to experiment with pixel art. It is fun and one more way to express yourself in the digital world. Try the tools and techniques mentioned above, and start making your unique pixel avatars and characters now.