
Outlining photos is one of those cool artistic methods for adding special graphic effects and boosting aesthetic appearance. Whether you use this kind of photo for social media, marketing materials, or just personal projects, outlined images draw attention and focus on what’s most important.
In this article, we will look into different ways to outline an image by going through step-by-step guides on how to achieve the perfect look for your visuals.
How to Outline an Image Online
If you’re looking for a quick and easy way to create an outline of an image online, these tools offer a convenient solution without the need for software installation. Below are four excellent websites that can help you outline your images effectively.
PhotoRoom
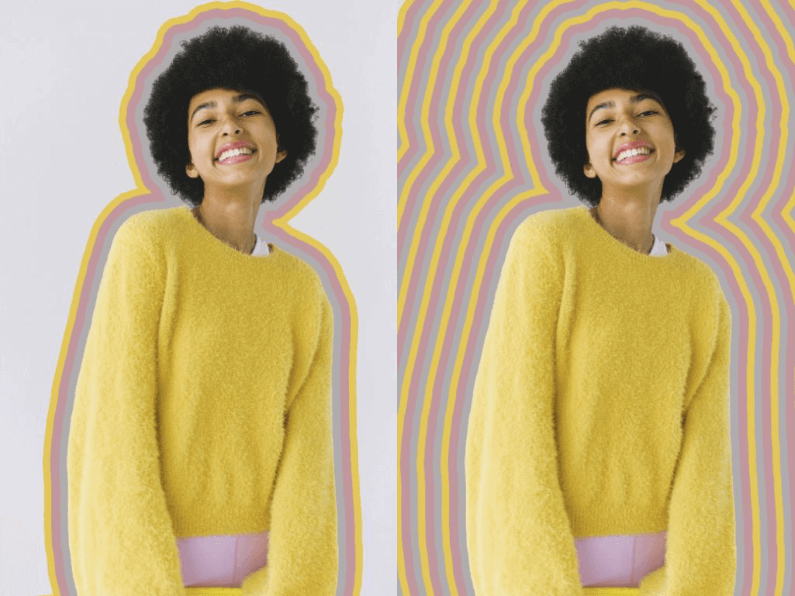
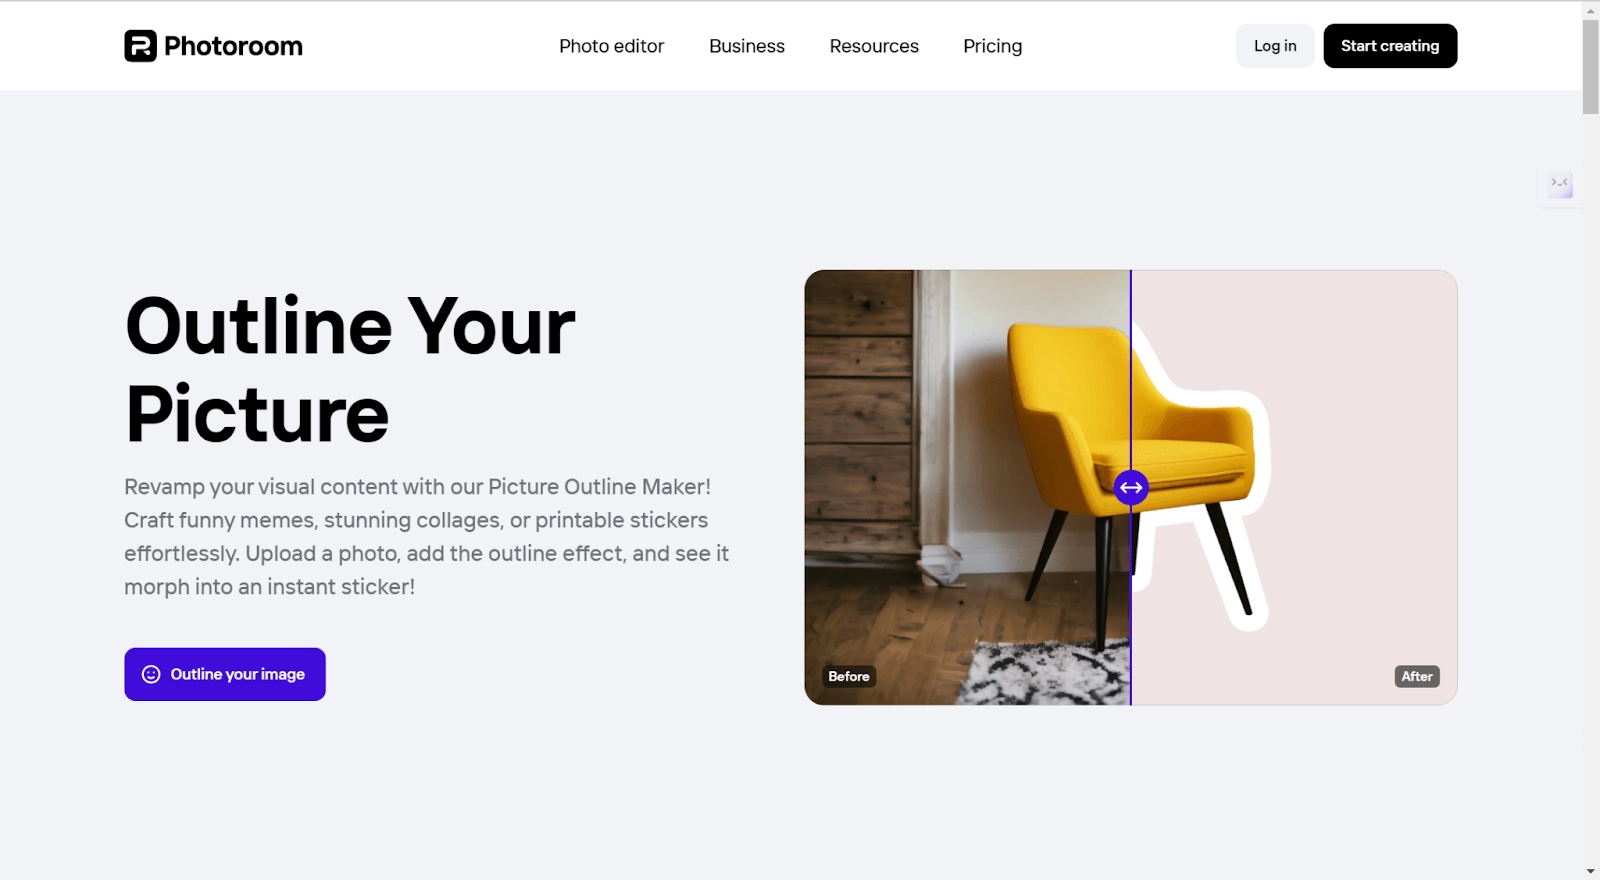
Give your visuals a refresh with PhotoRoom‘s Picture Outline Maker! If you want to create fun memes, striking collages, or printable stickers, then this online tool is ideal for you. You just have to upload your photo and add an outlining effect, and then the picture will turn into an eye-catching sticker.
How to Use:
Step 1: Choose and upload any picture that you want to outline.
Step 2: The background will be automatically removed.
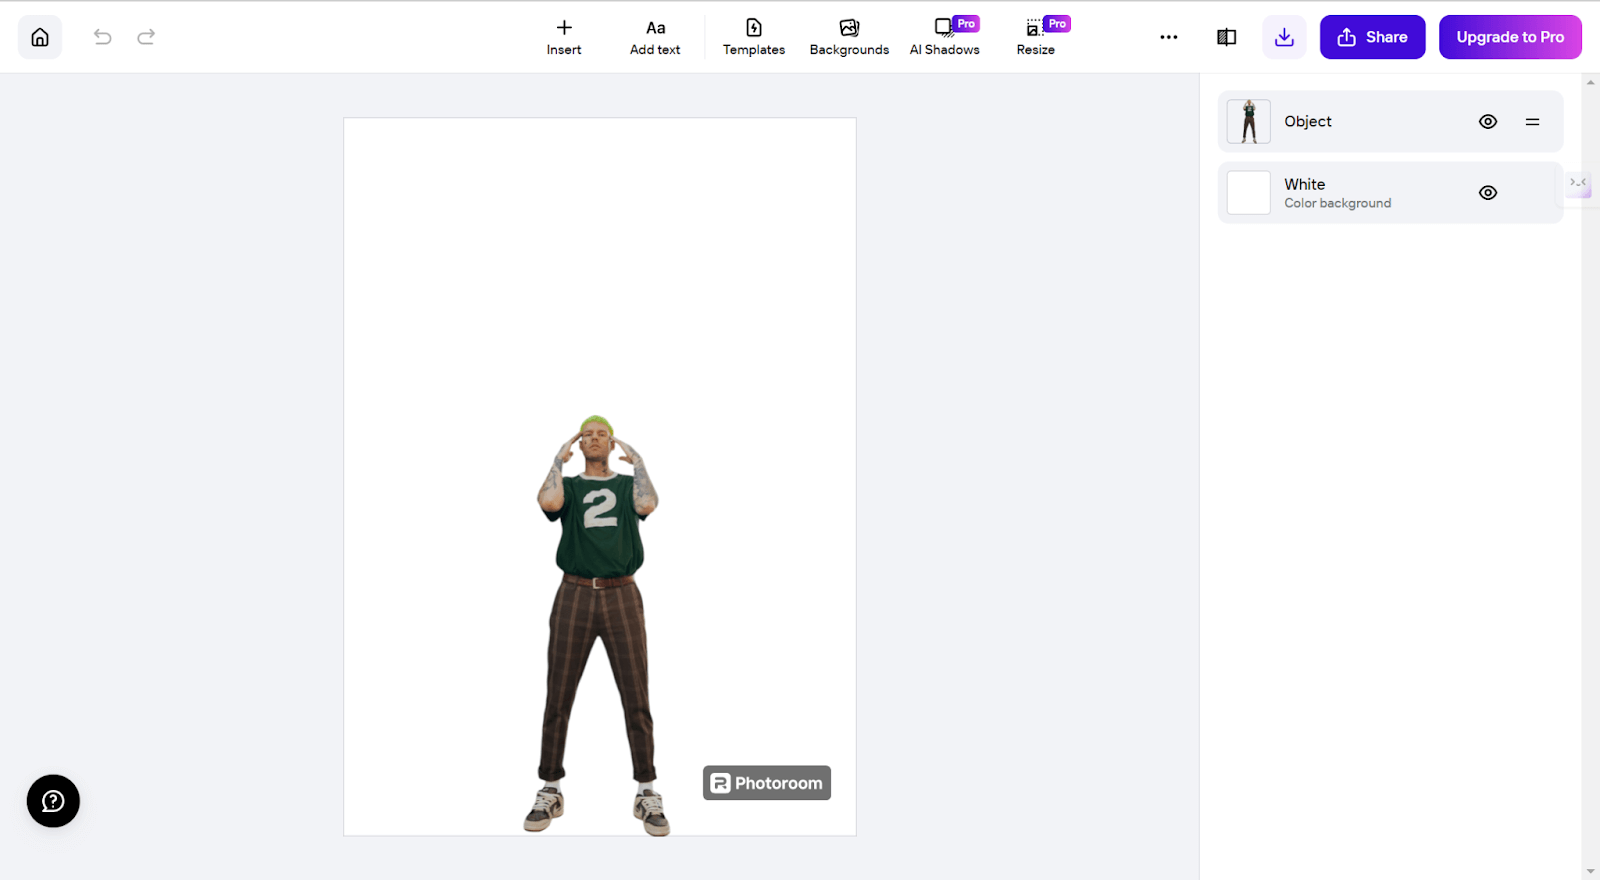
Step 3: Click the object/person you want to choose.
Step 4: Enable the outline effect by dragging the toggle to the right.
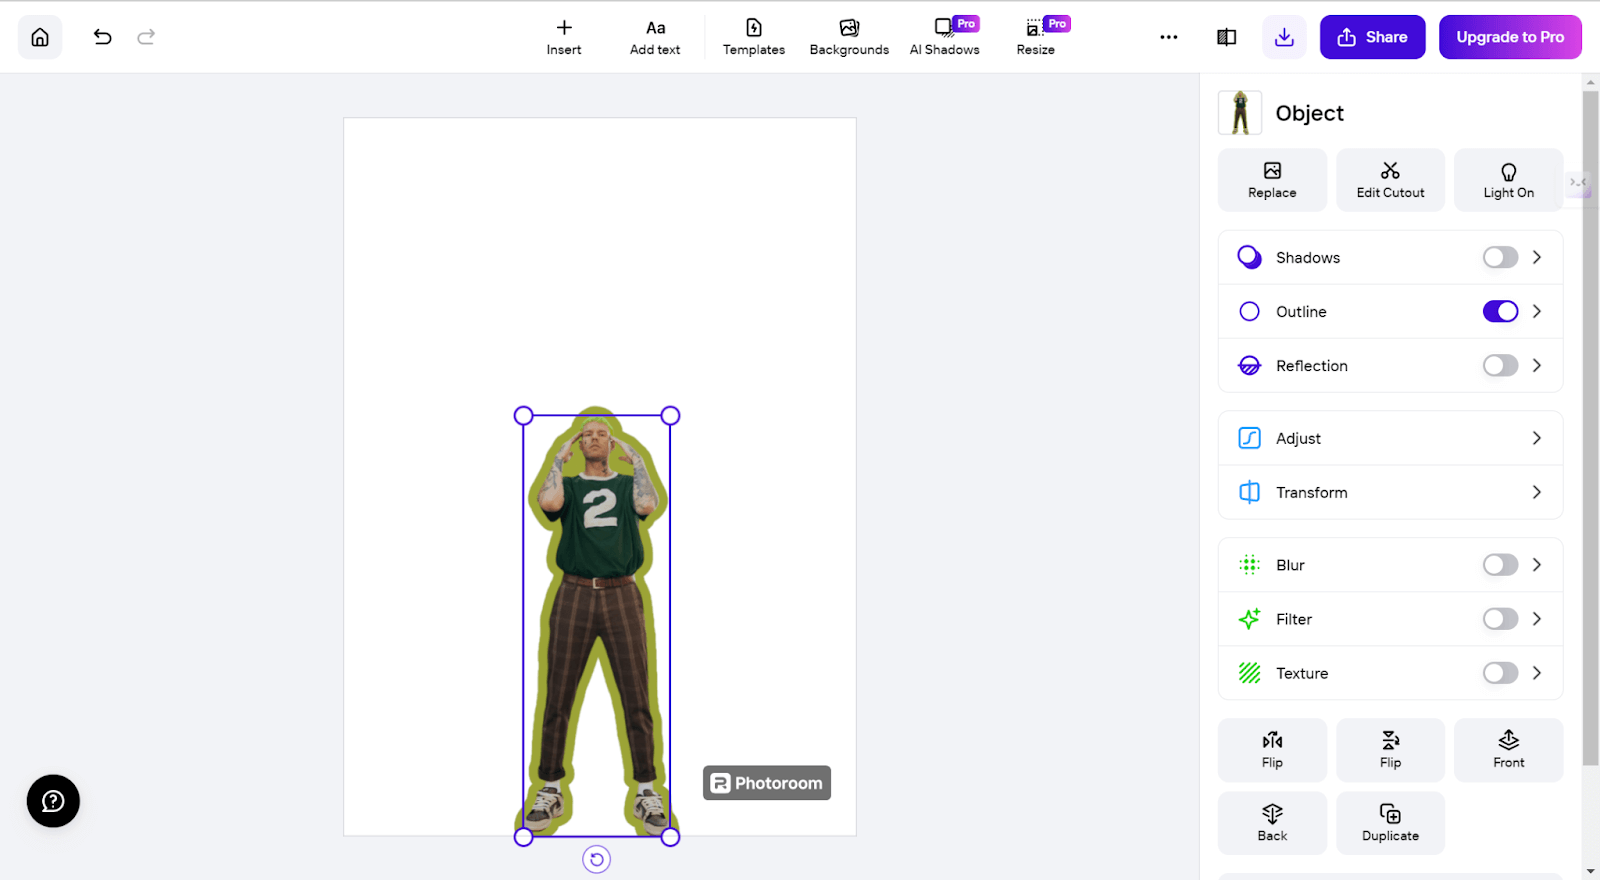
Step 5: Bring the outline color and intensity to your preference.
Step 6: Give a flair to your picture: change the background or add text.
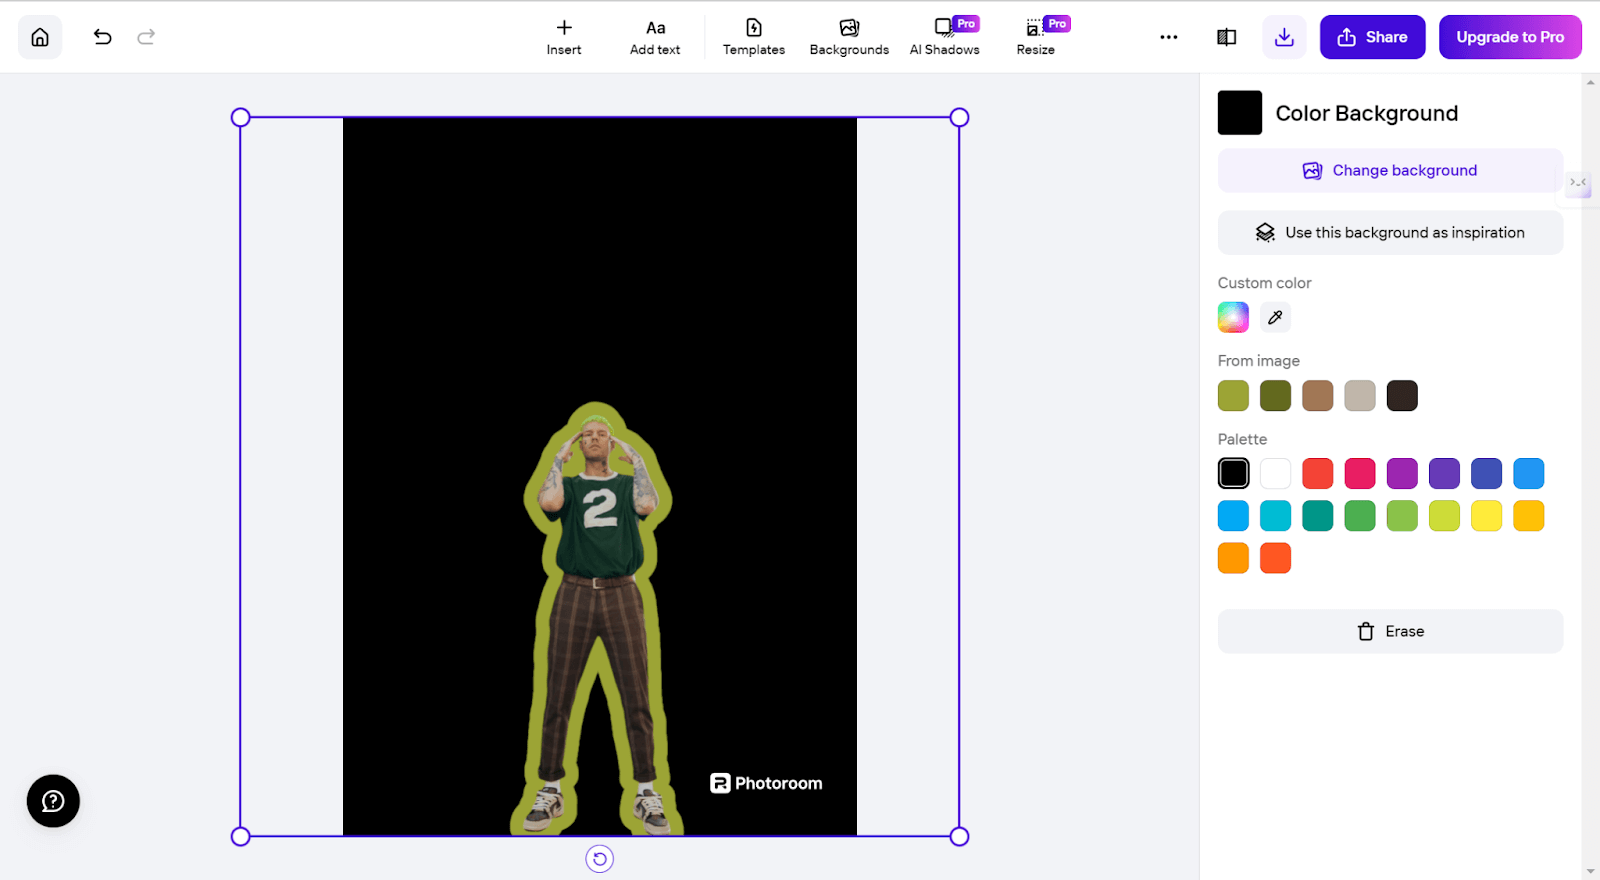
Step 7: Download your outlined image from the top-right corner.
Pricing:
- Free: $0.
- Pro: $89.99 yearly.
- Teams: $89.99 yearly (3 seats, included).
- Enterprise Plan: Custom pricing-contact for details.
Online PNG Tools
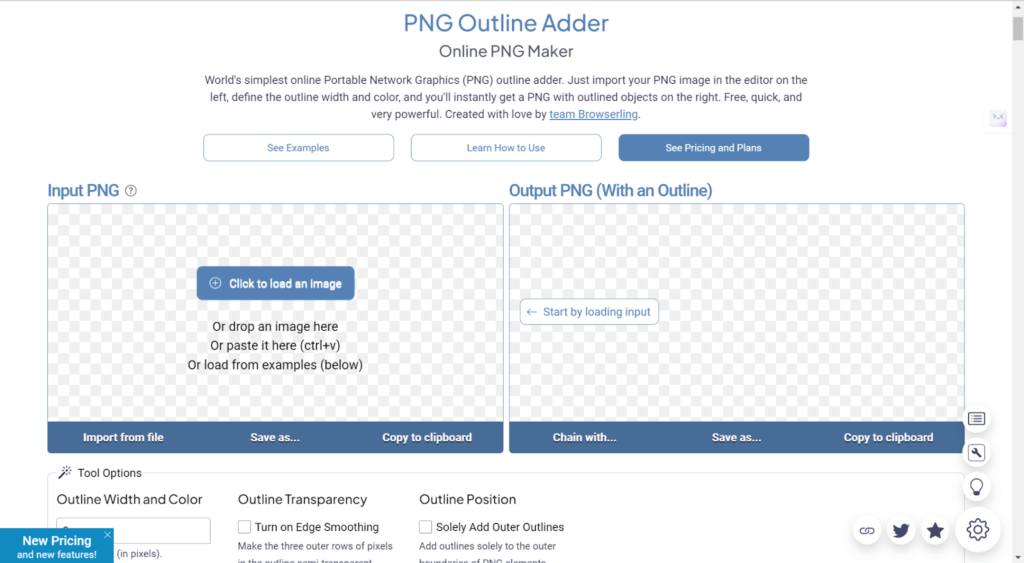
Online PNG Tools lets you add the outline to the PNG images with ease. It features a very user-friendly interface in which you can import your image, select the outline width and the color of that outline, and instantly see your outlined picture. With this tool, you will enhance the highlights of elements quite well, which helps create clear visibility.
How to Use:
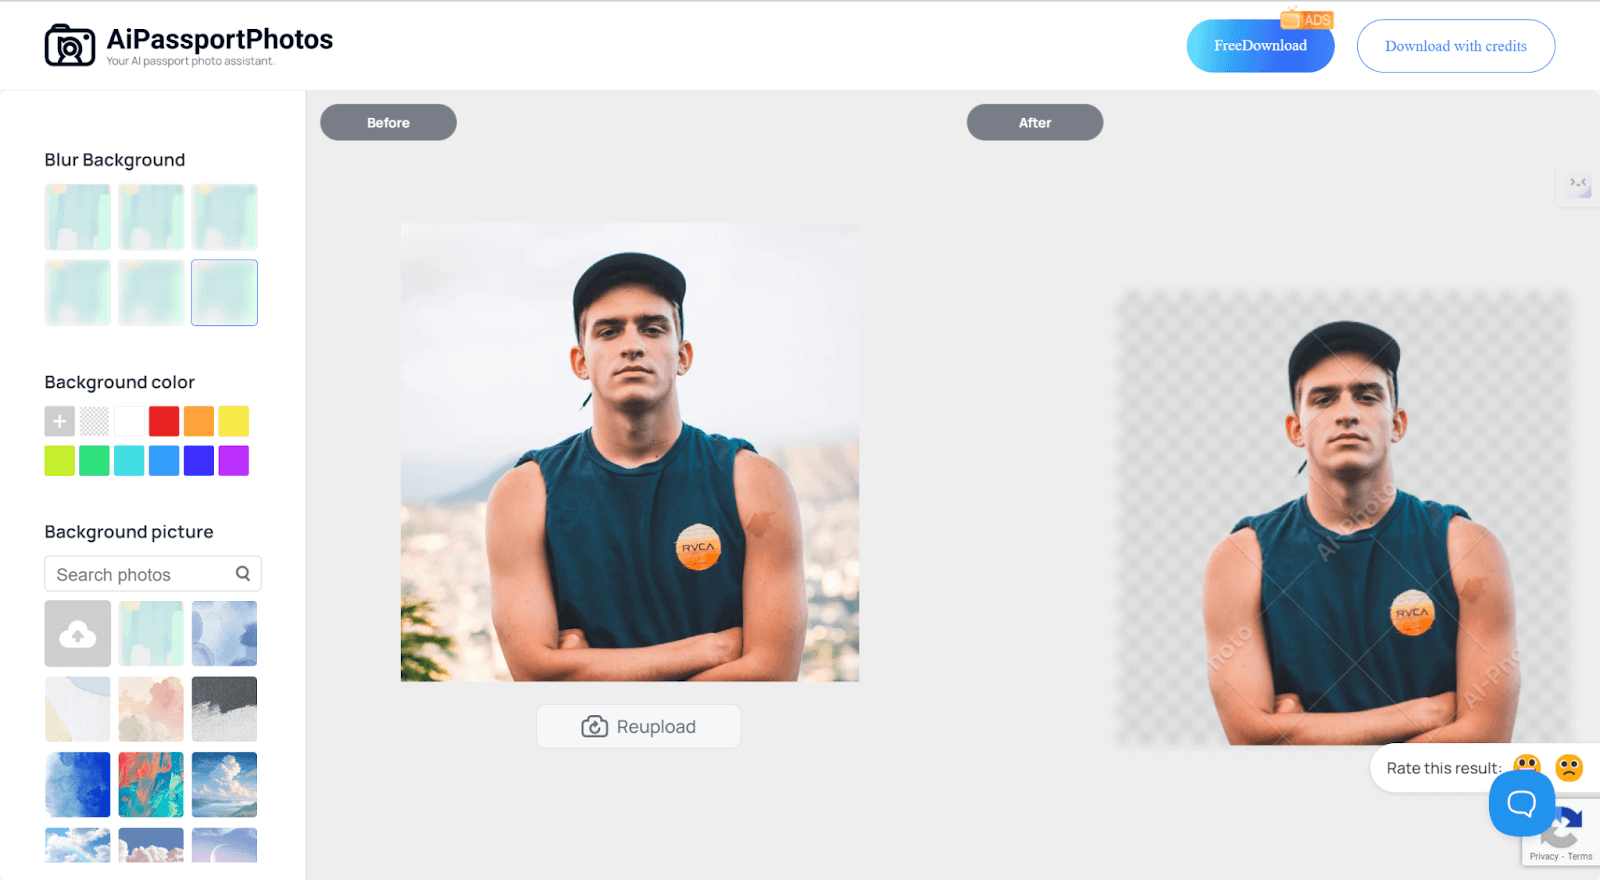
Step 1: First, you need to remove the background of the picture that you want to outline since this platform does not automatically remove the background for you. Go to the AiPassportPhotos Background Remover and upload your photo. Let the AI automatically remove the background for you and save the edited photo on your computer. It is completely free to use.
Step 2: Import your background removed image into the outline maker website.
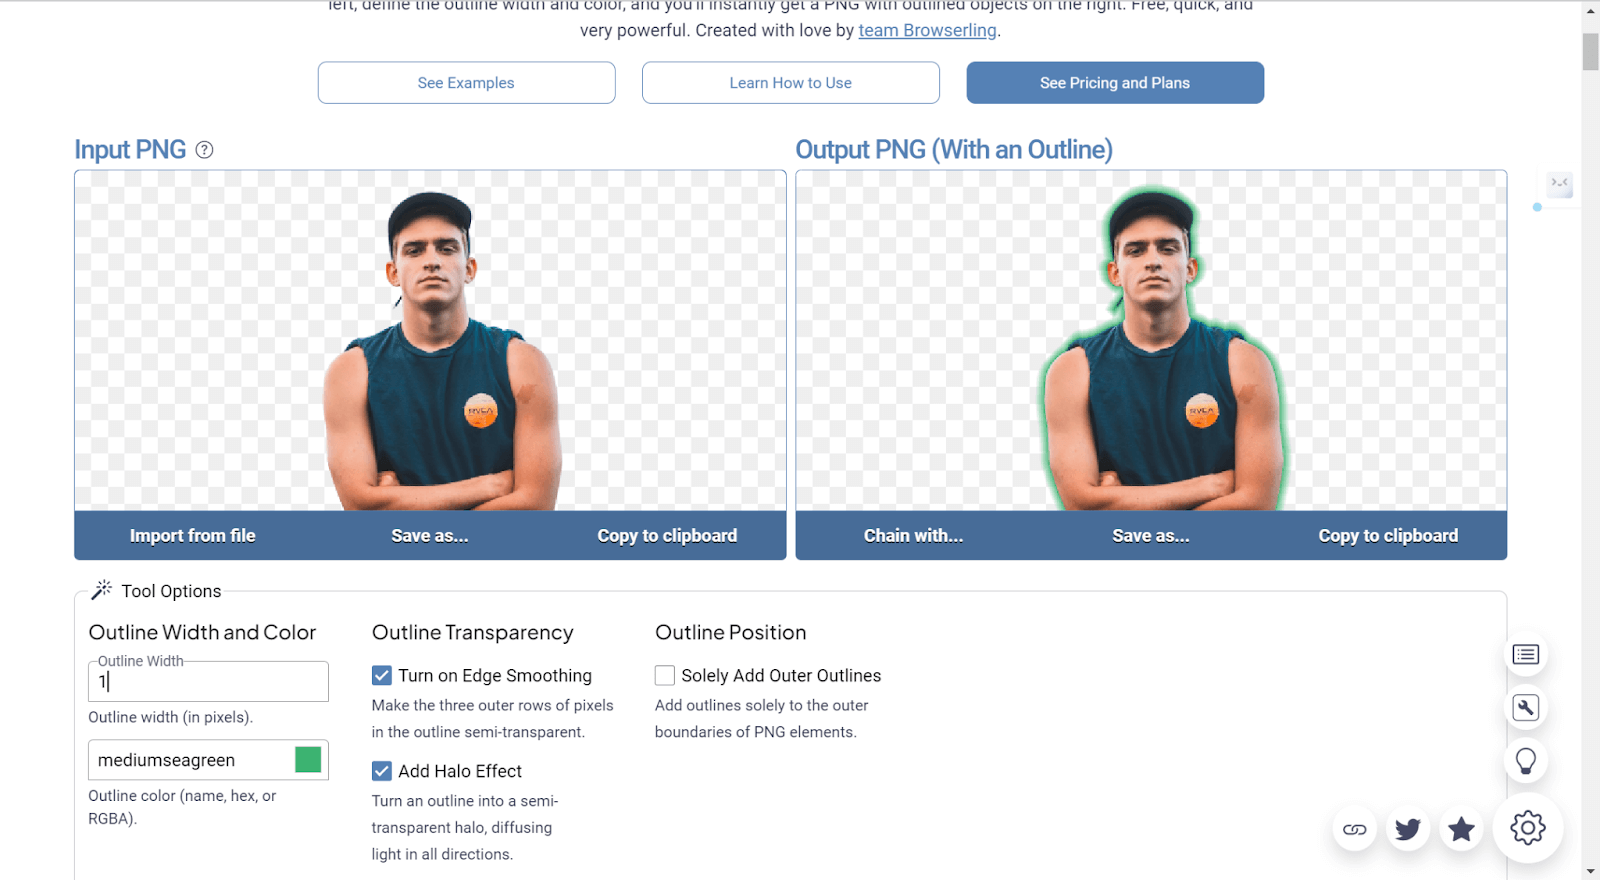
Step 3: Set the width in pixels for your outline and select an outline color.
Step 4: Add additional options like smoothing edges and halo effects.
Step 5: The after-effect will be shown in real time on the right screen.
Step 6: Download your newly outlined PNG image.
Pricing:
- Freemium Plan: Free for non-commercial use.
- Premium Plan: $6/mo (billed annually).
- Team Plan: $9/mo (billed annually).
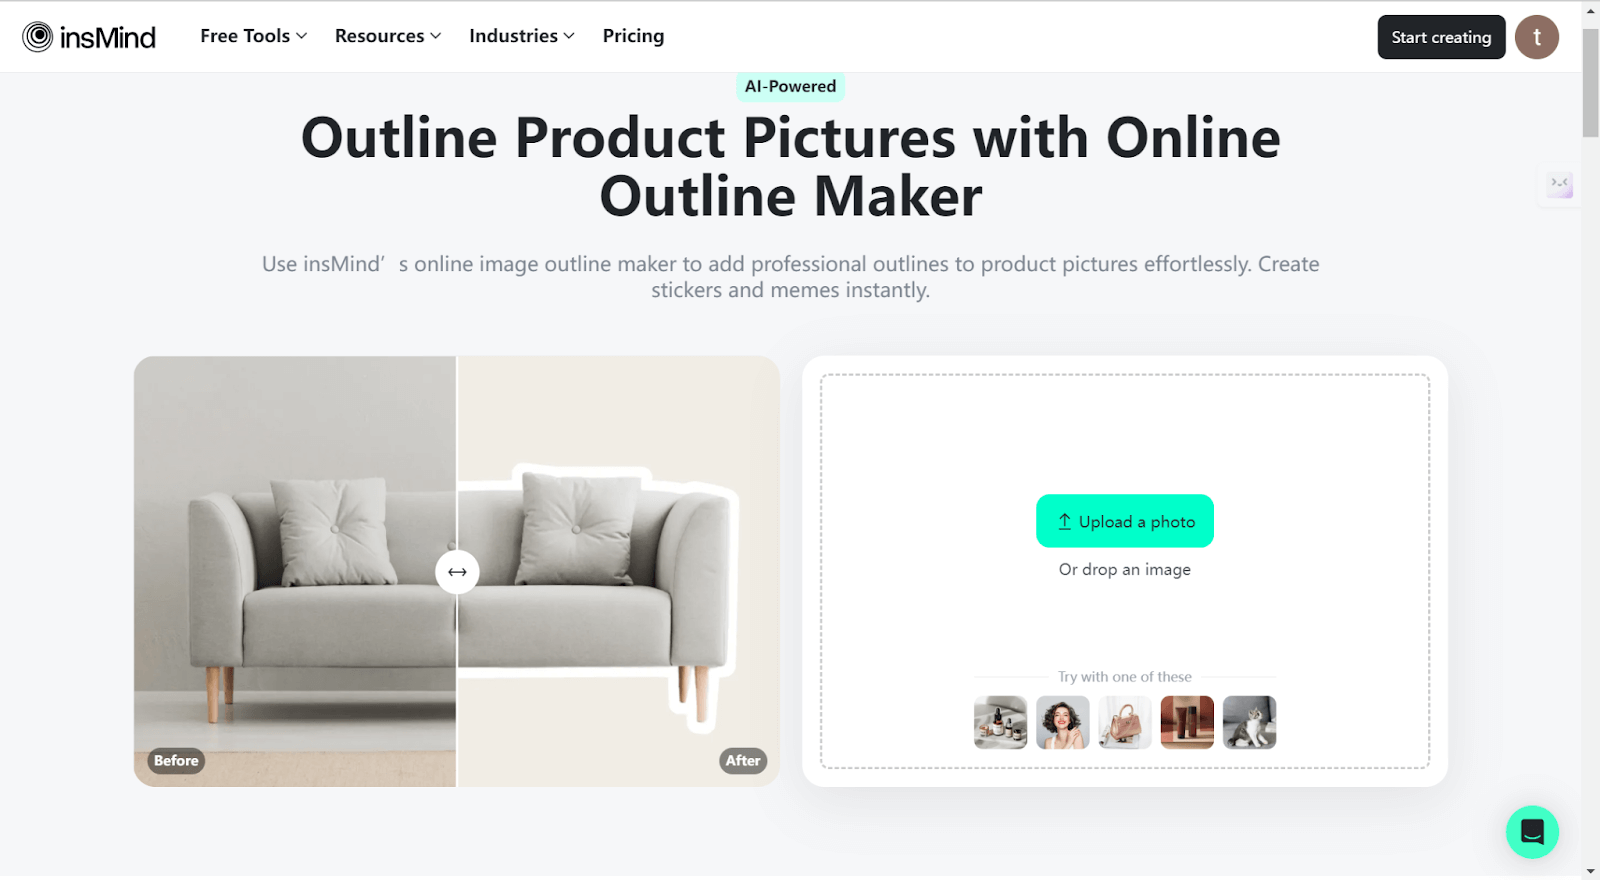
InsMind Picture Online Maker
InsMind‘s picture outline maker is another effective tool for completing this task. It is a comprehensive photo editor that offers you the ability to outline your images with ease. What’s more, it comes in handy if you want to create cool stickers and memes or make your image pop without extra hassle, especially if you are into selling something online.
Step 1: Access the insMind website and upload your desired image.
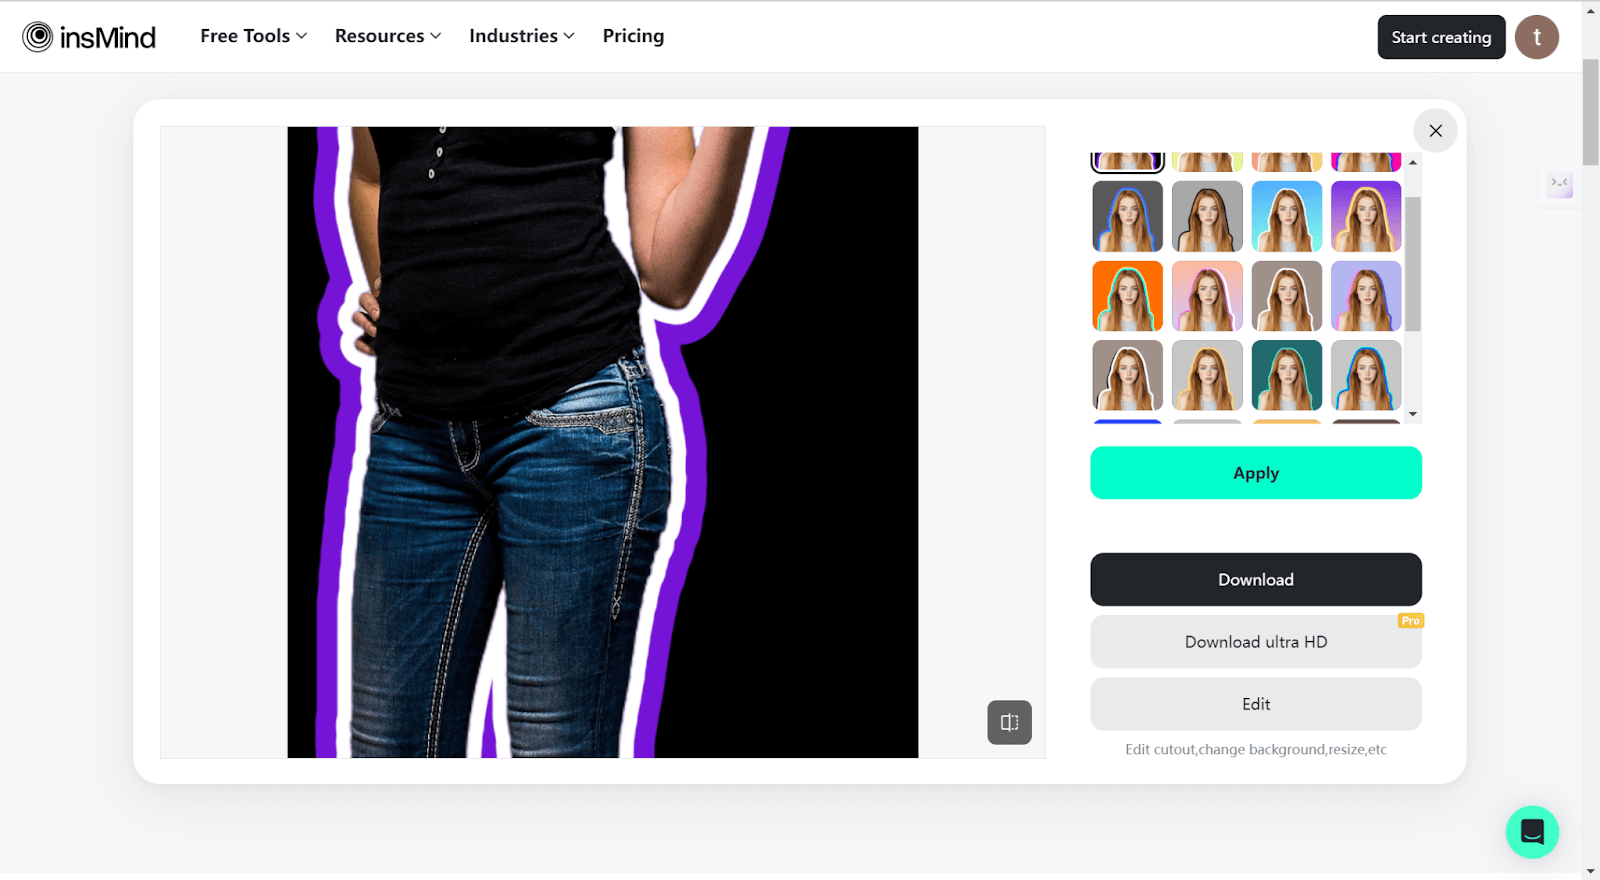
Step 2: Select the outline tool from the menu.
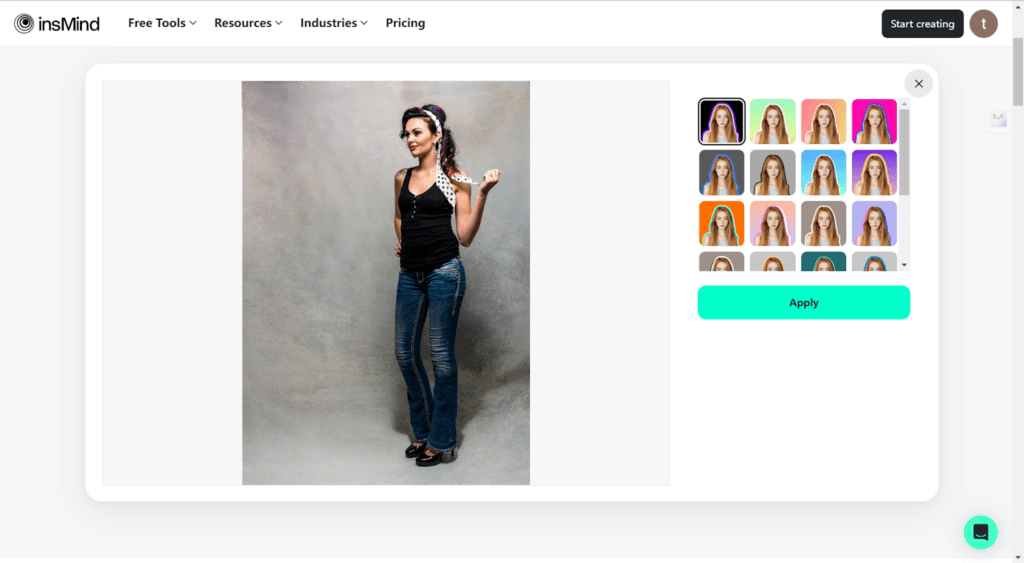
Step 3: Your background will turn automatically as that of the template. We can see the result is not good, but we can still edit it by entering its editor.
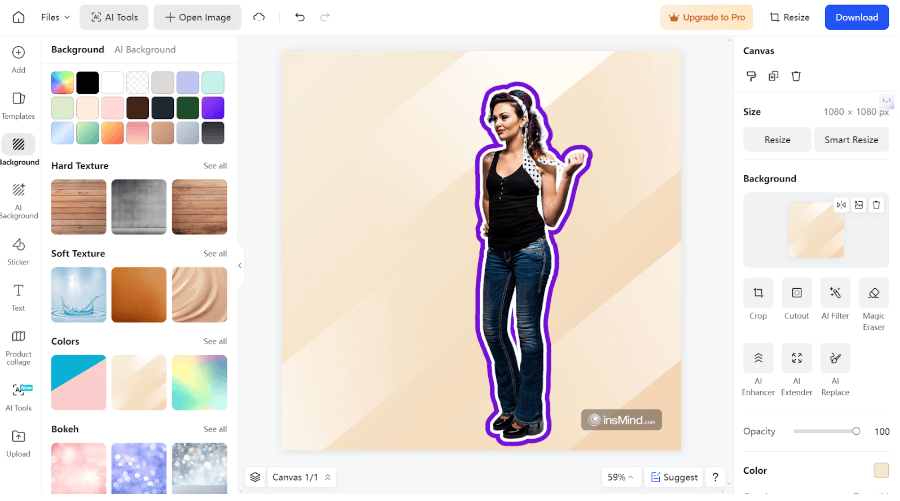
Step 4: Click on the Edit button. Select the subject, shrink it, and move it to align with the
canvas edge. You can also do more, like change the background, etc.
Step 5: Once satisfied with the outline, download your enhanced image for sharing.
Pricing:
- Free account: $0.
- Monthly: $19.99.
- Quarterly: $9.99.
- Yearly: $69.99.
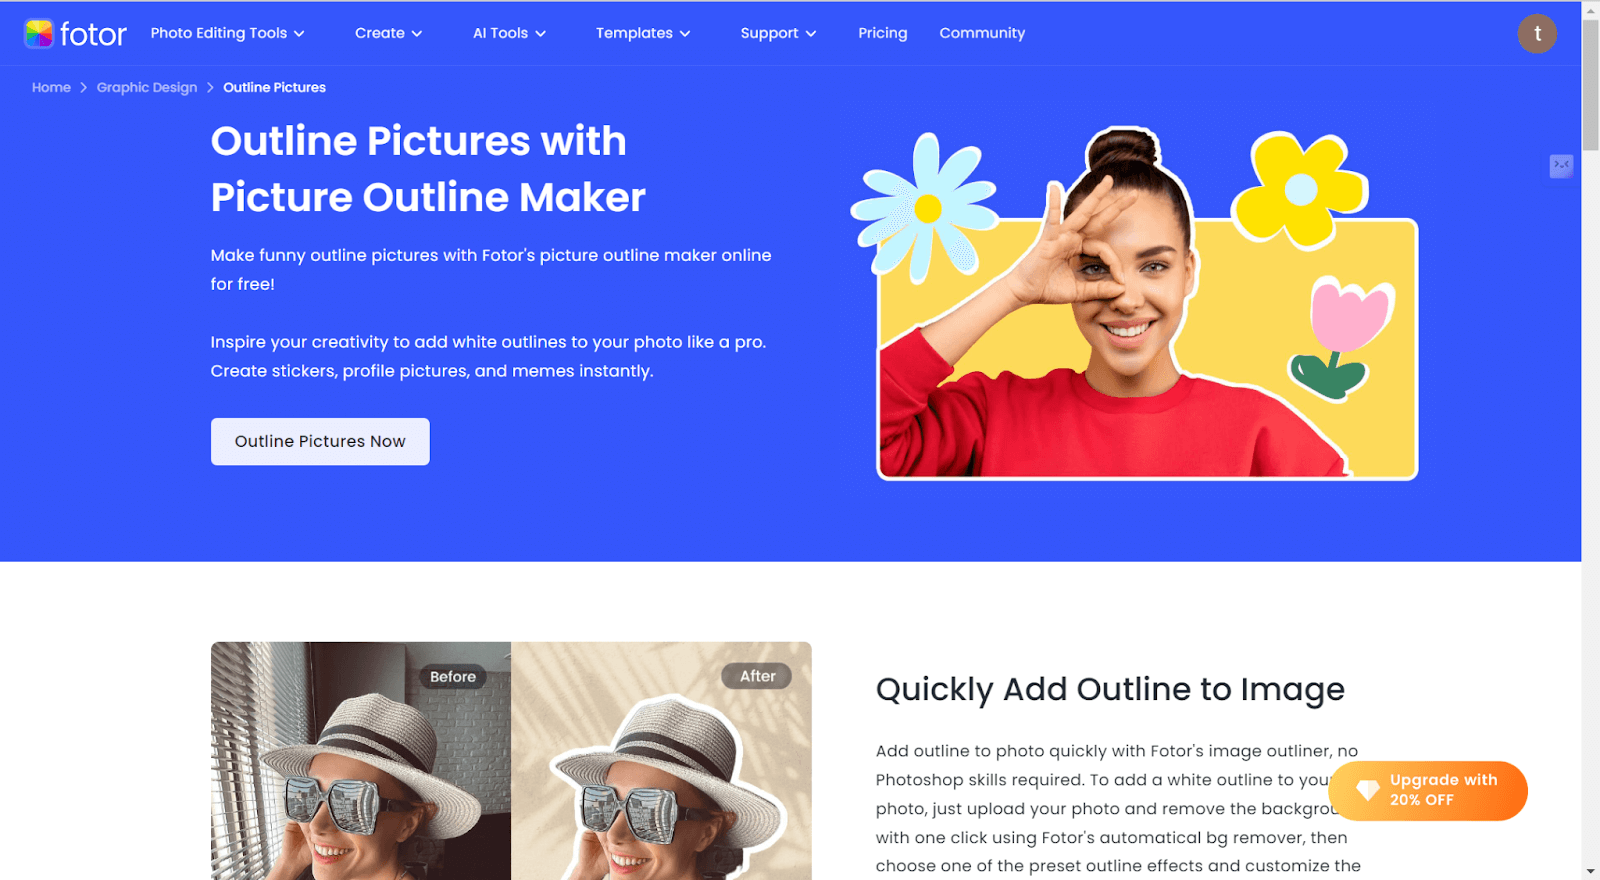
Fotor
Go ahead and take your visuals to the next level without stress using Fotor‘s Picture Outline Maker. This advanced online picture editor lets you create stunning outlines of your pictures that are ideal for everything, from designing catching images to creating professional stickers. With its intuitive design interface, even a rookie can turn regular photos into catchy graphics by making your content pop on social media and beyond.
How to Use:
Step 1: Click on “Outline Pictures Now” to access the tool and upload your image.
Step 2: On the left side, find Upload and upload your picture. Then, choose and select the photo.
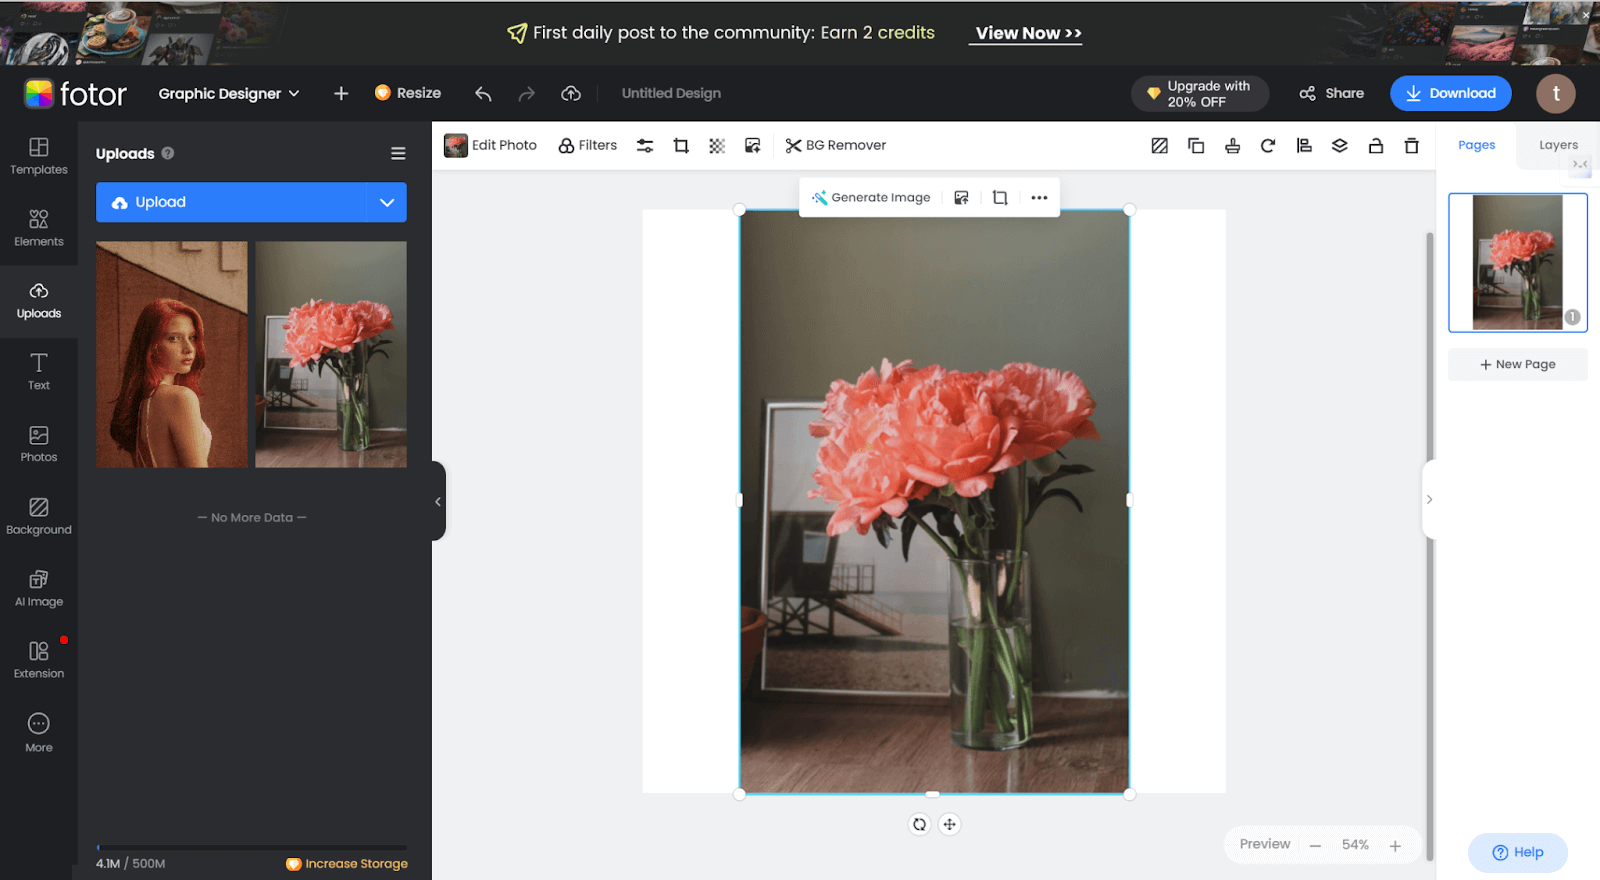
Step 3: Choose Edit photo on the top bar. Use the background remover to eliminate any unwanted backgrounds.
Step 4: Select the subject you want to outline, then click “Edit Photo.” again.
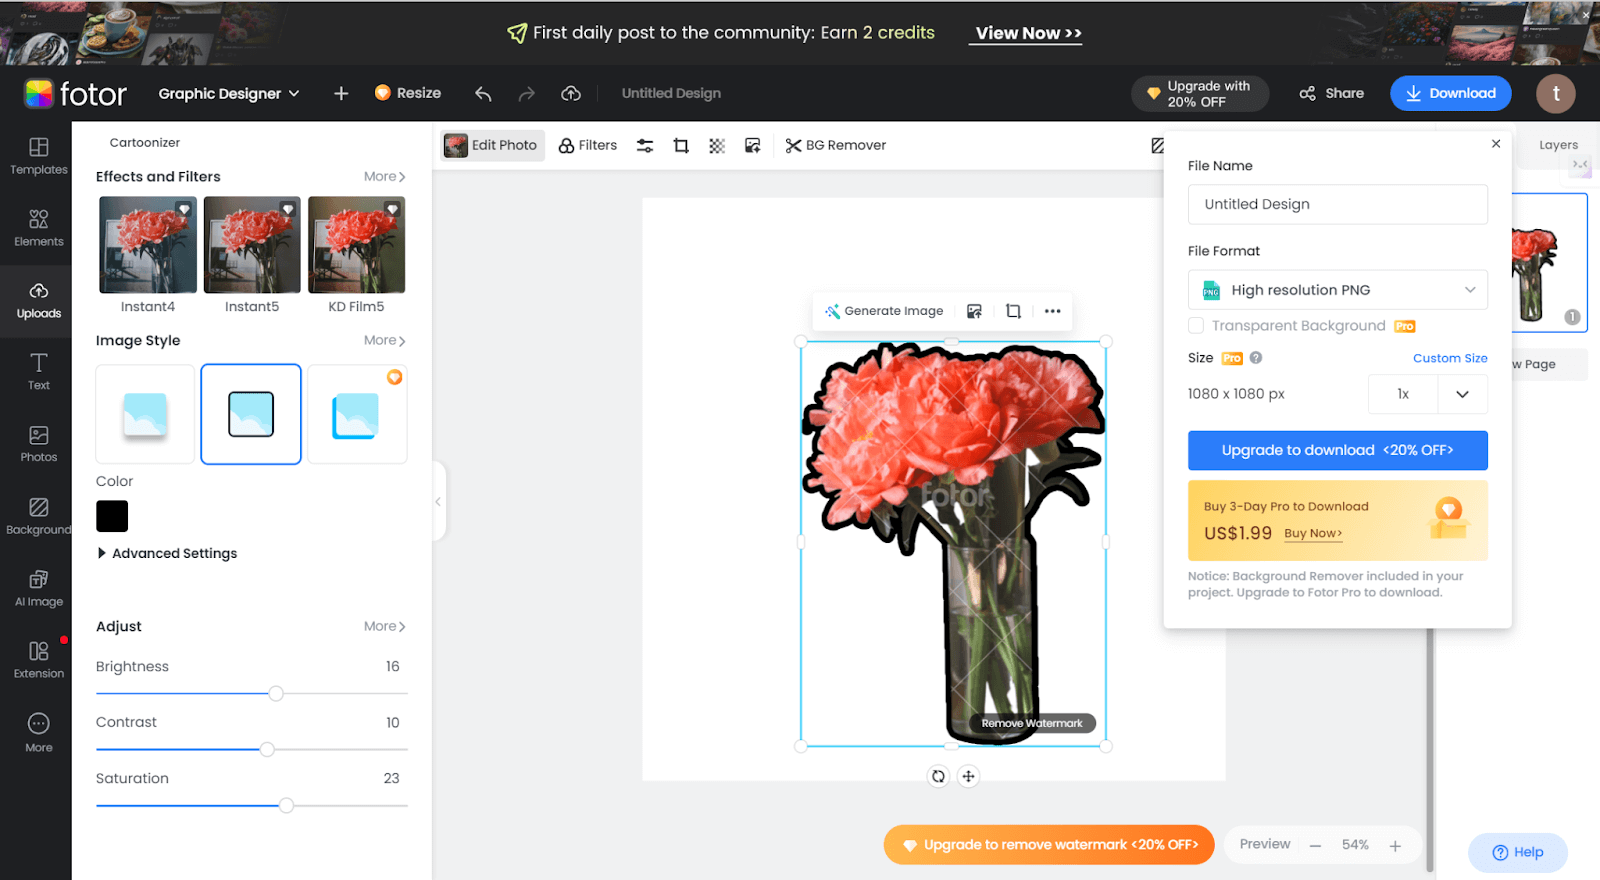
Step 5: In the Image Style section down below, choose your preferred outline effect, customizing color, and thickness as desired (more color needs a premium account).
Step 6: Add any additional creative elements, and finally, download your outlined image in the desired format (please note you cannot download if you subscribe).
Pricing:
- Basic: Free
- Pro: $3.33/month (billed annually)
- Pro+: $7.49/month (billed annually)
How to Outline an Image in Photoshop
Although online tools offer a fast and easy approach to outlining an image, many people like to use Photoshop because it offers a few more advanced features and some flexibility. Additionally, you could have better control over the outline’s look for a highly professional finish. Here is how you outline an image in Photoshop:
Step 1: Open Your Image in Photoshop.
Open Photoshop, go to File> Open, and select the image to which you want to apply an outline.
Step 2: Unlock the Background Layer.
In the Layers panel, find your image layer. If it is locked, a lock icon will show that it is double-click on it to unlock it. A pop-up will come; click OK, and it will change to a normal layer.
Step 3: Remove the Background (optional)
Use the Select Tool to choose the whole picture, you can see the Remove Background button (only latest Photoshop available).
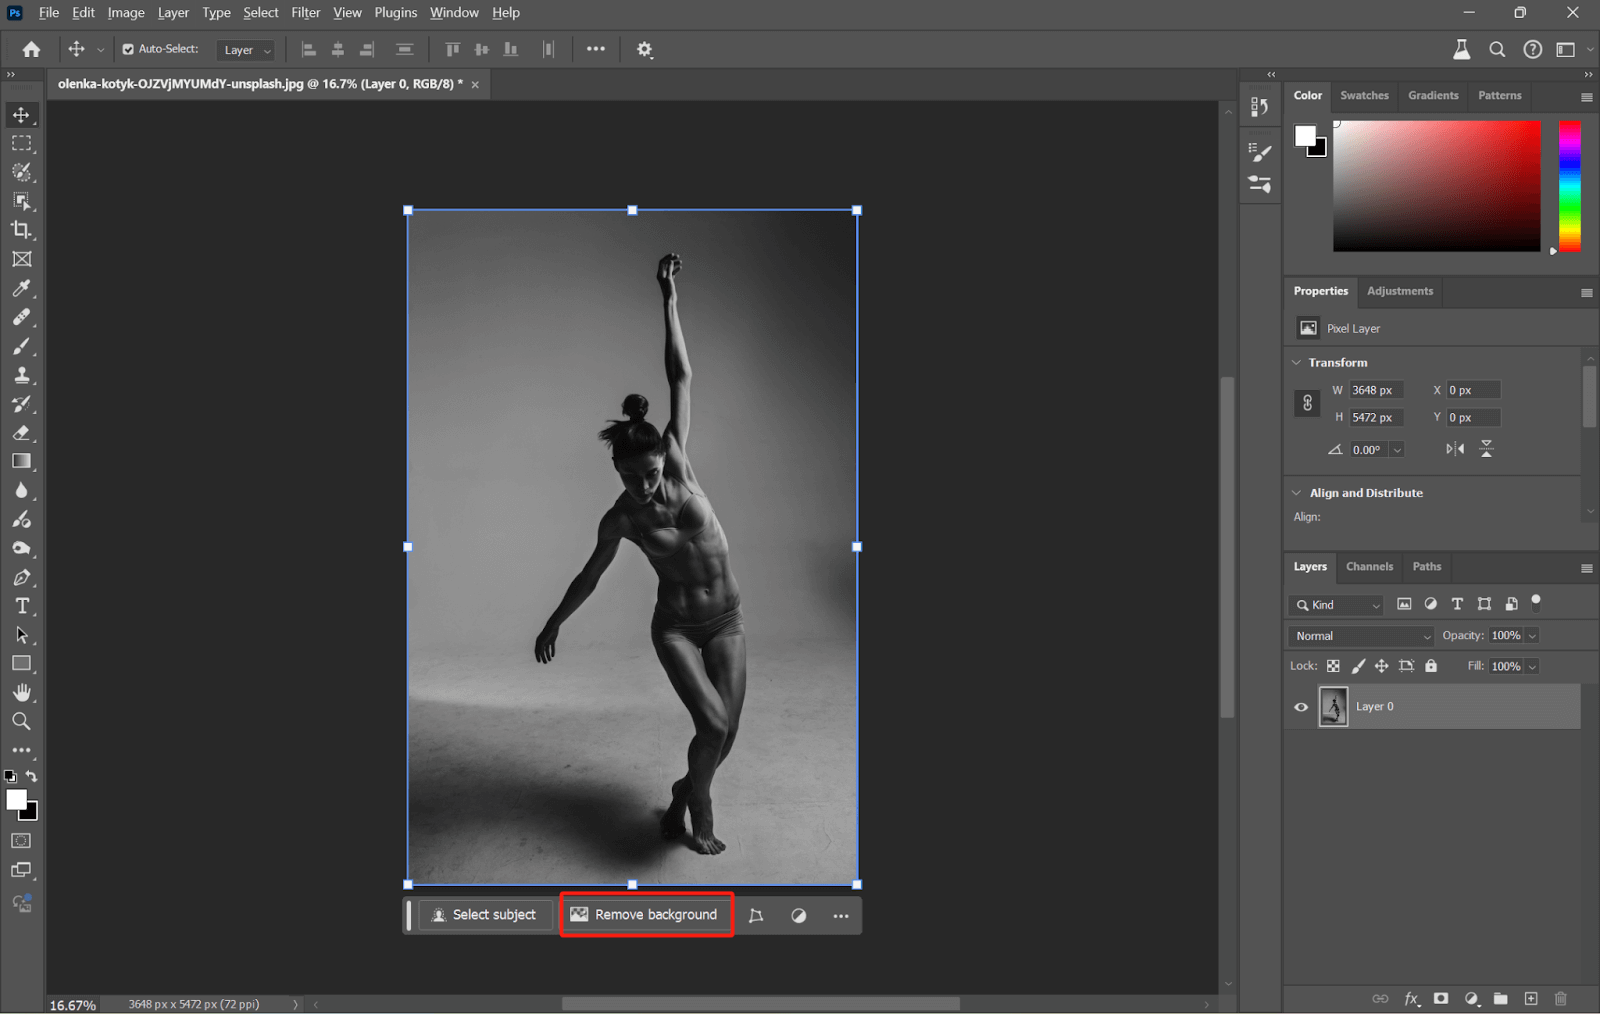
Click it and the background will be automatically removed.
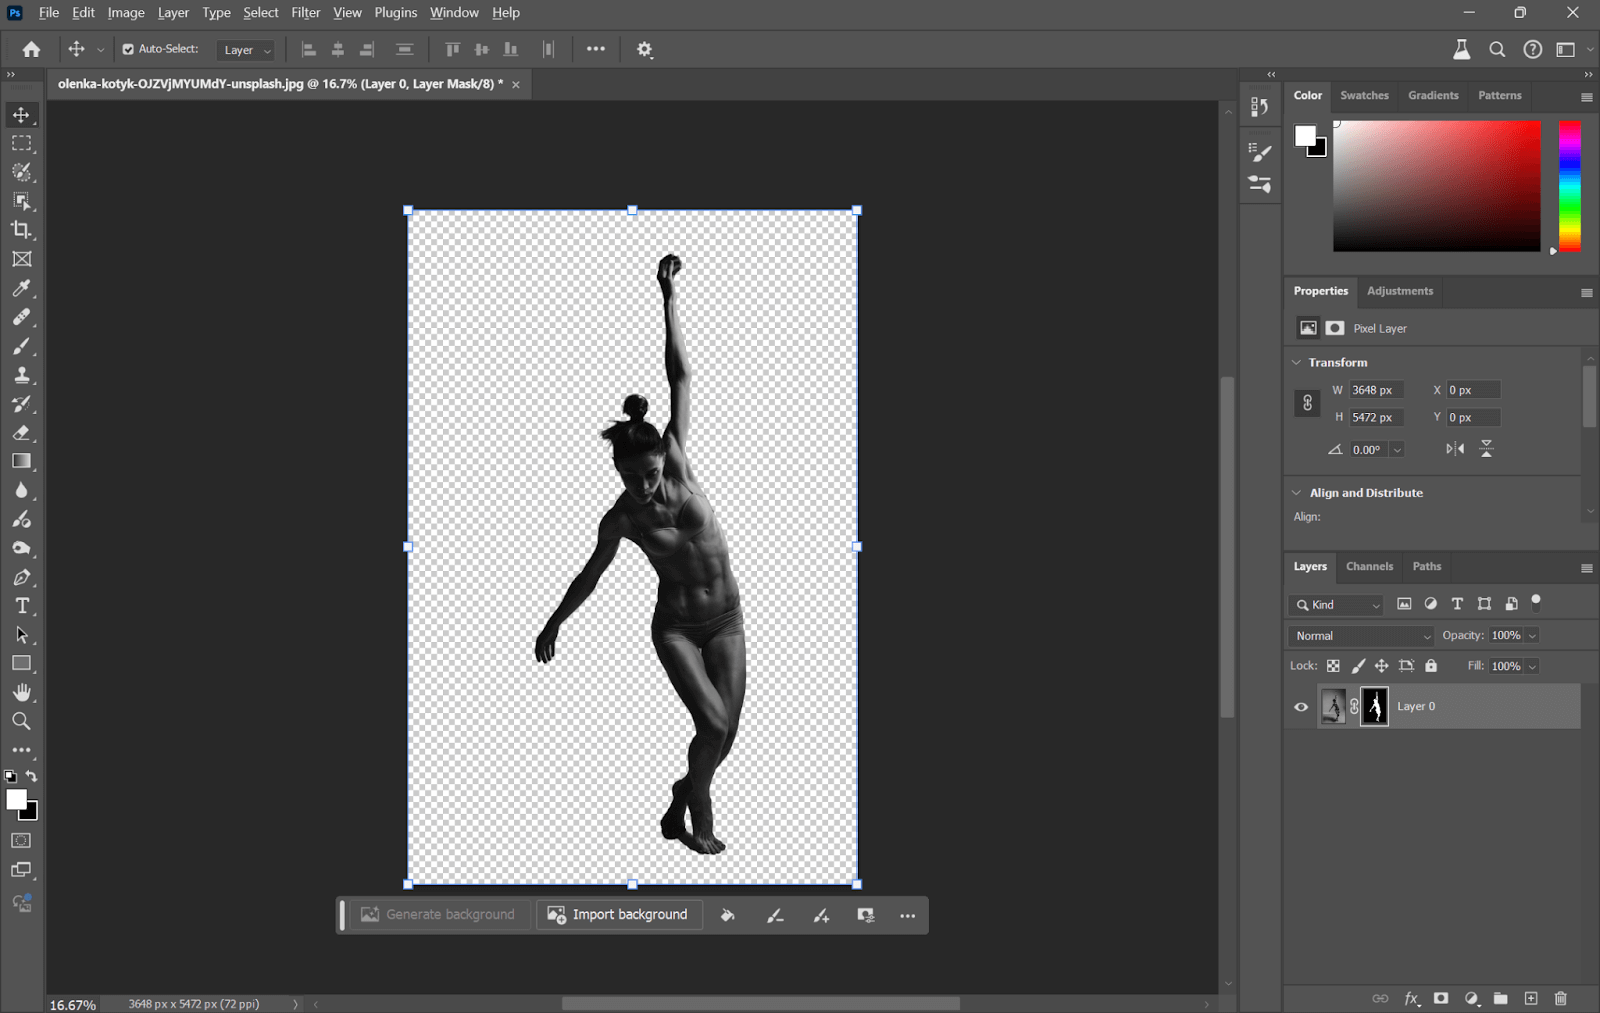
If you don’t use the latest Photoshop, you can use an Online Background Remover to remove photo background. For different aesthetic, you can also keep the background
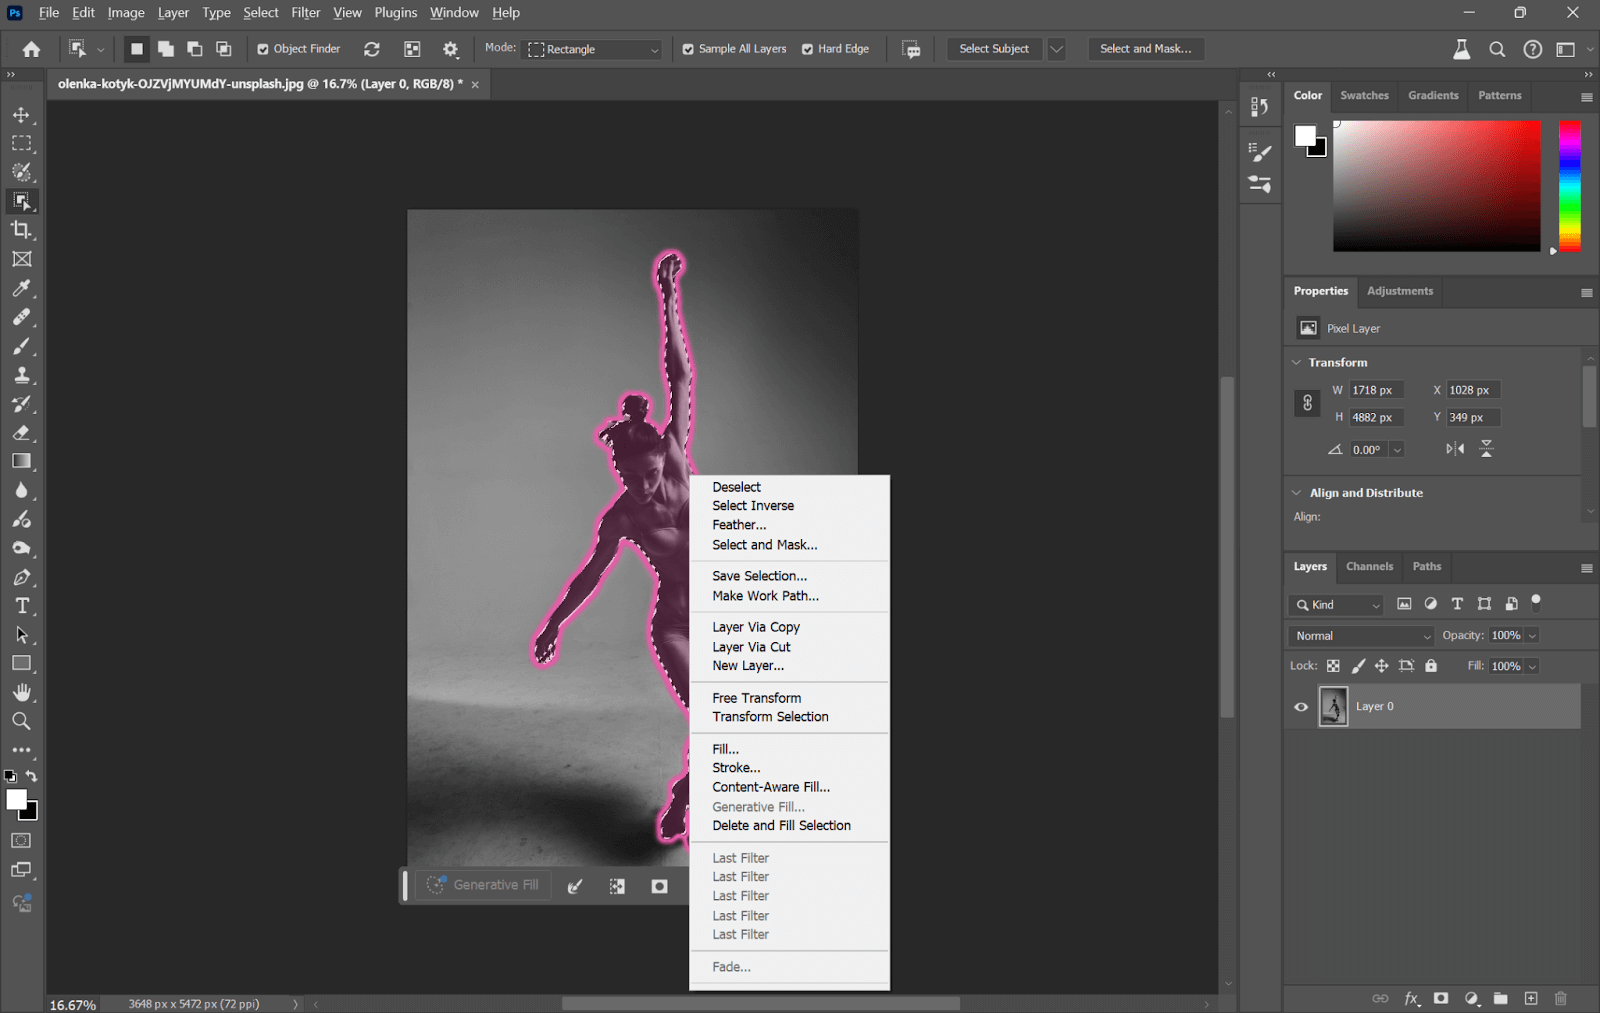
Step 4: Select the Subject.
From the toolbar, select either the Object Selection Tool/Quick Selection Tool (if the photo is less complex without any complex structure) or the Lasso Tool (for complex subjects to choose) to select the subject in your photo. Just drag your tool over your subject, and upon release, Photoshop will instantly trace the edges of the outline. If necessary, revert to the Select and Mask option for refinement to give fine-tuning to the edges.
Step 5: Add a New Layer for the Outline (Optional)
Highlight your subject, right-click it, and select Layer via Copy to transfer the subject to a new layer. This transfers the subject alone onto a new layer, so if you want to add an outline, it won’t affect the background.
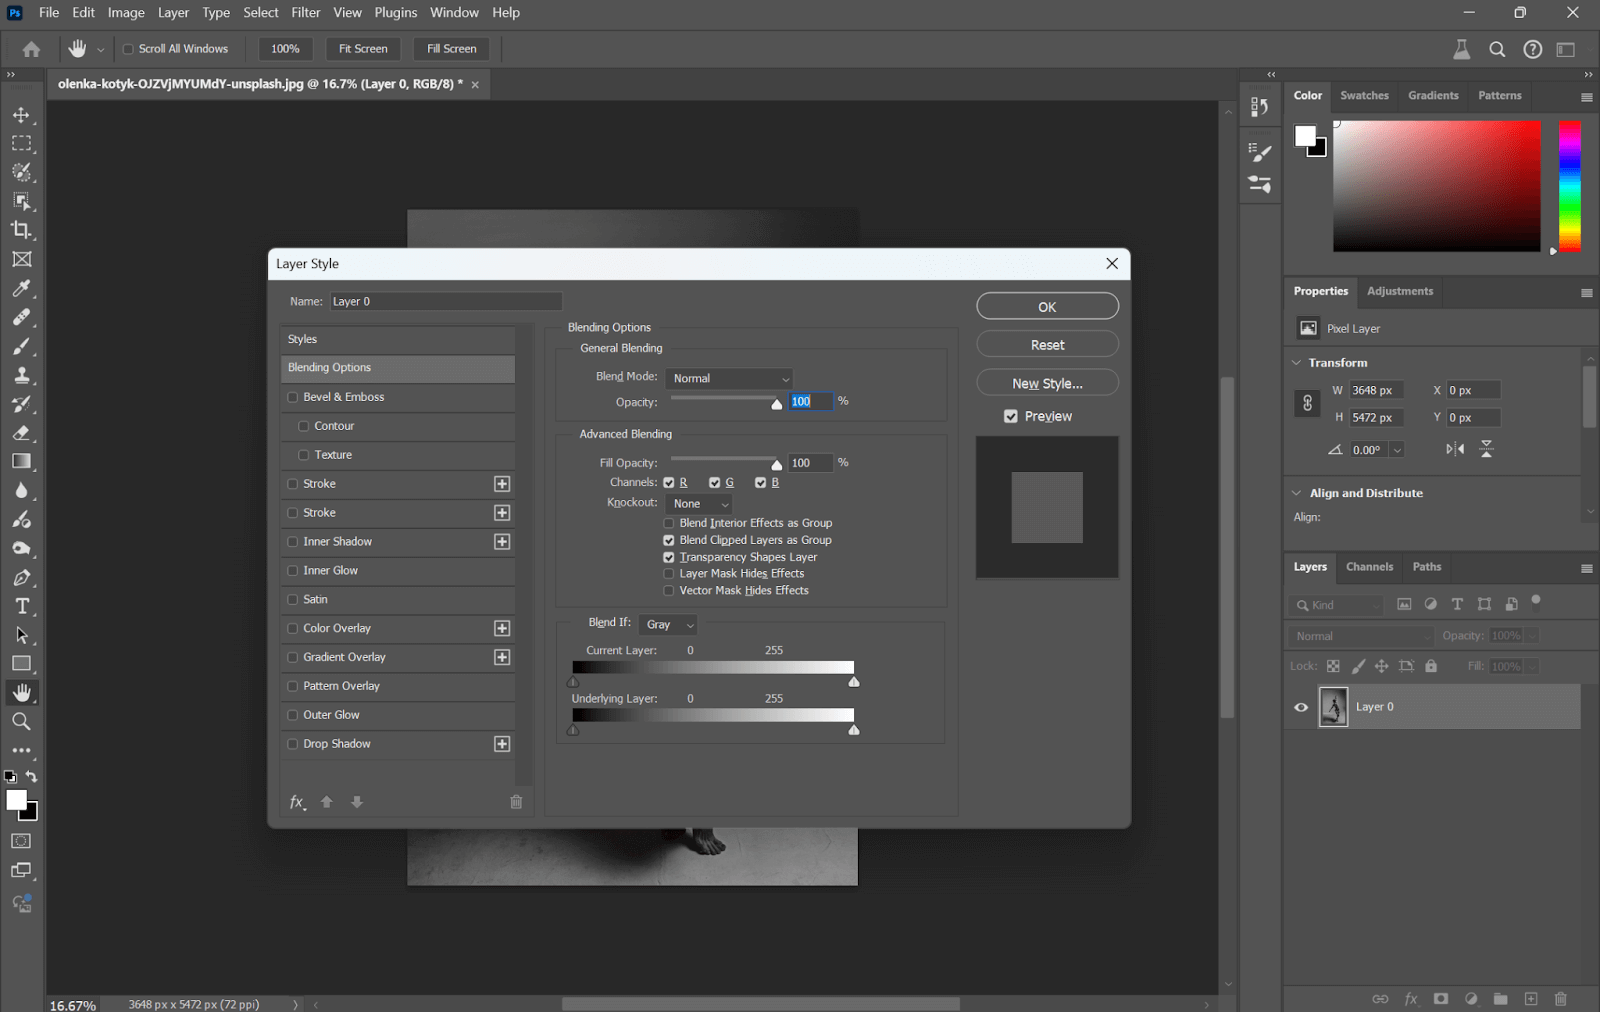
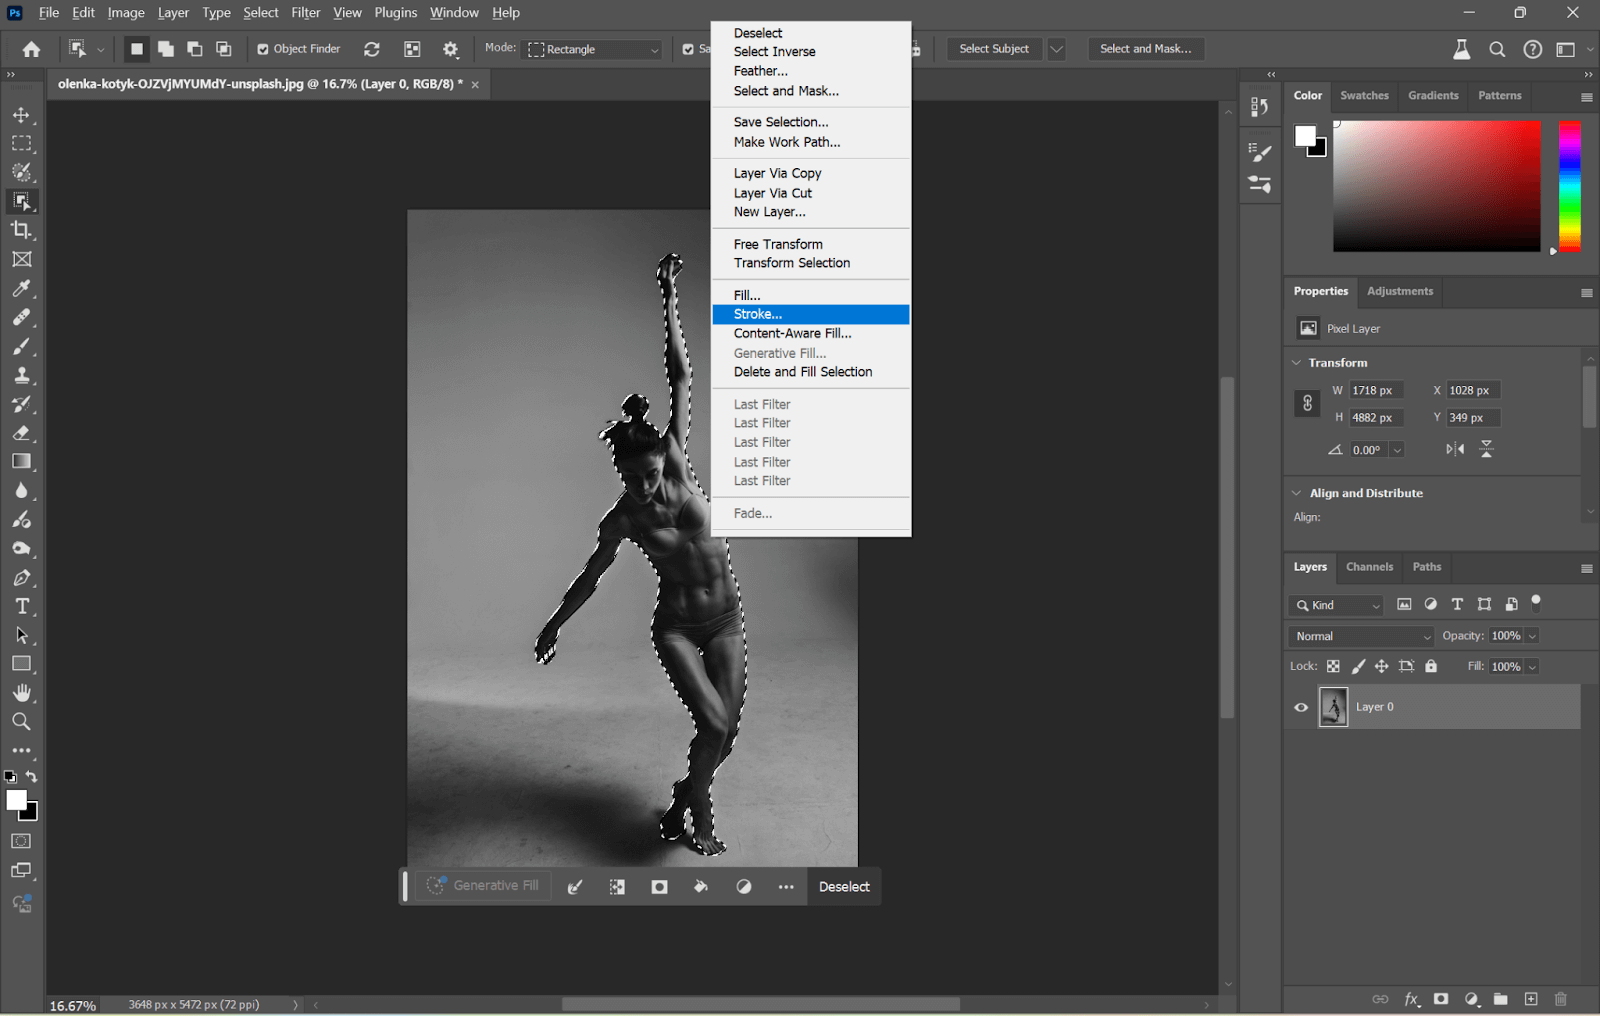
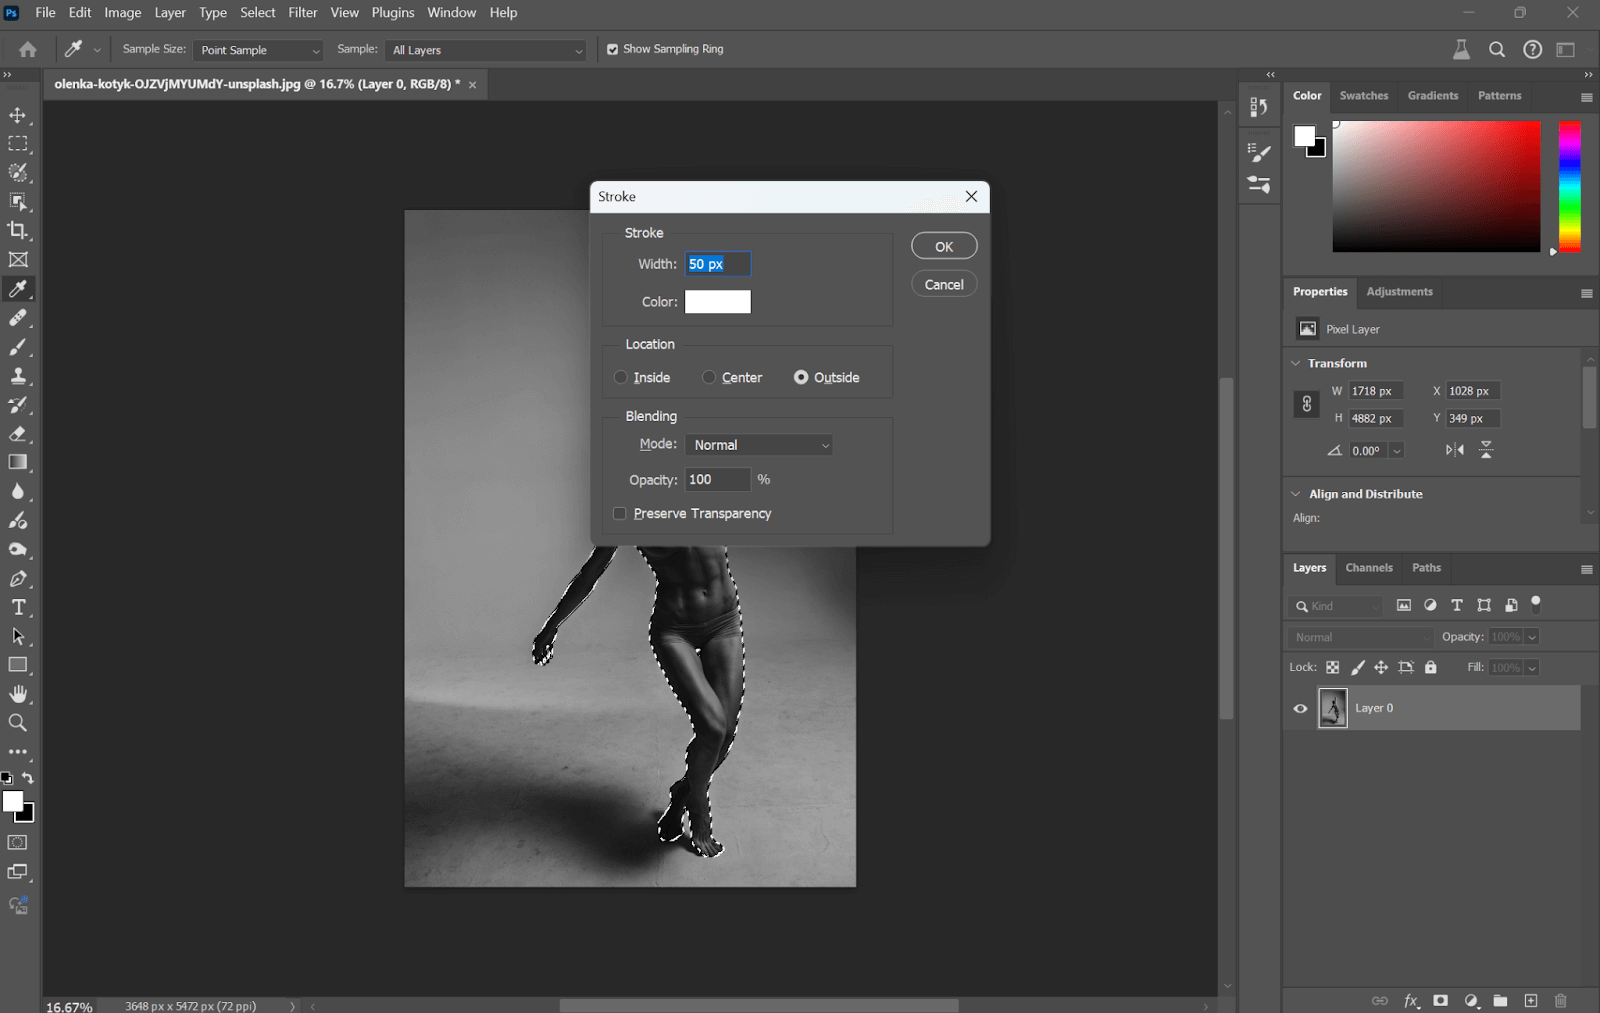
Step 6: Apply a Stroke (Outline) to the Subject.
With the new subject layer selected, right-click on the selected part > choose Stroke. A window will pop up where you can adjust the size, position, and color of the Stroke.
Size: Change the size of the Stroke by your own measure according to the size of the image taken, usually between 5-50px.
Position: Click Outside/Center/Inside to put the outline.
Color: Click on the color box to select your color of choice for the outline.
Step 7: Apply and Refine Outline.
Now that you have input your stroke settings click OK to apply your outline. You can also easily edit the Stroke at any time by reopening this Layer Style window.
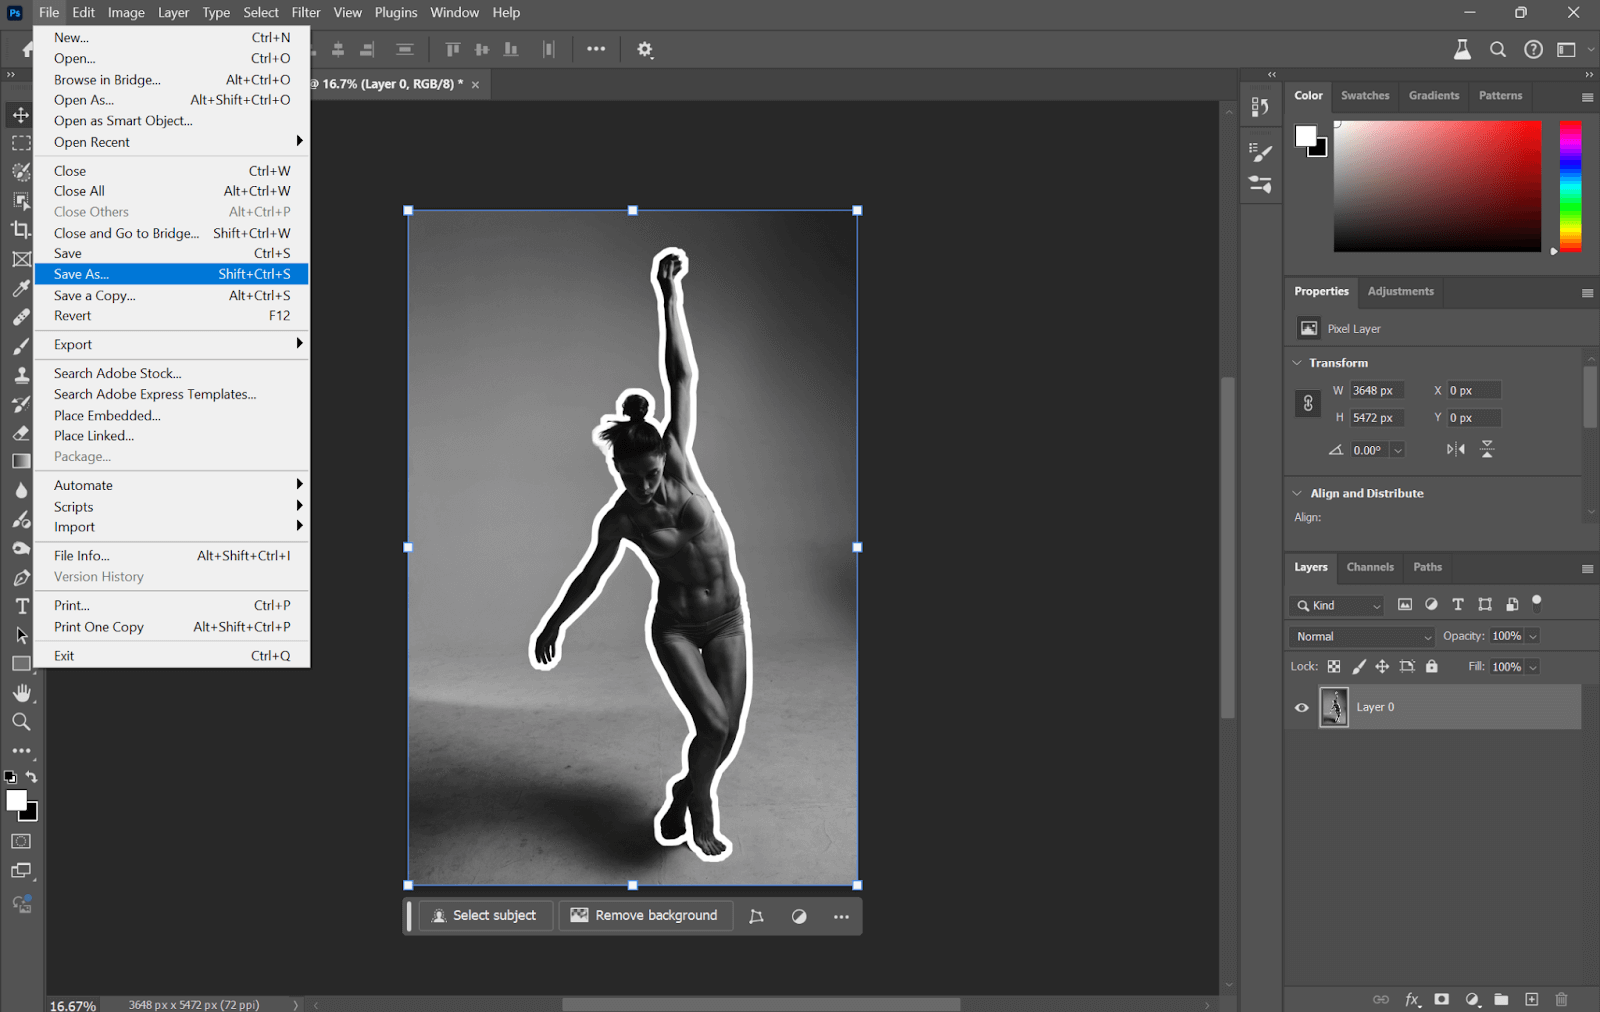
Step 8: Save the image.
Save your image once you are satisfied with your outline. Go to File> Save As and select what type of File you need it to be. Click Save.
How to Outline an Image in Canva
Canva is an excellent, easy-to-use graphic designing tool that brings great visuals into being with much ease. That includes various features for outlining an image without needing prior advanced design skills. If you are in the mood to do a super simple outline with your images in a user-friendly manner, that’s where Canva comes into play. Here is how to do this:
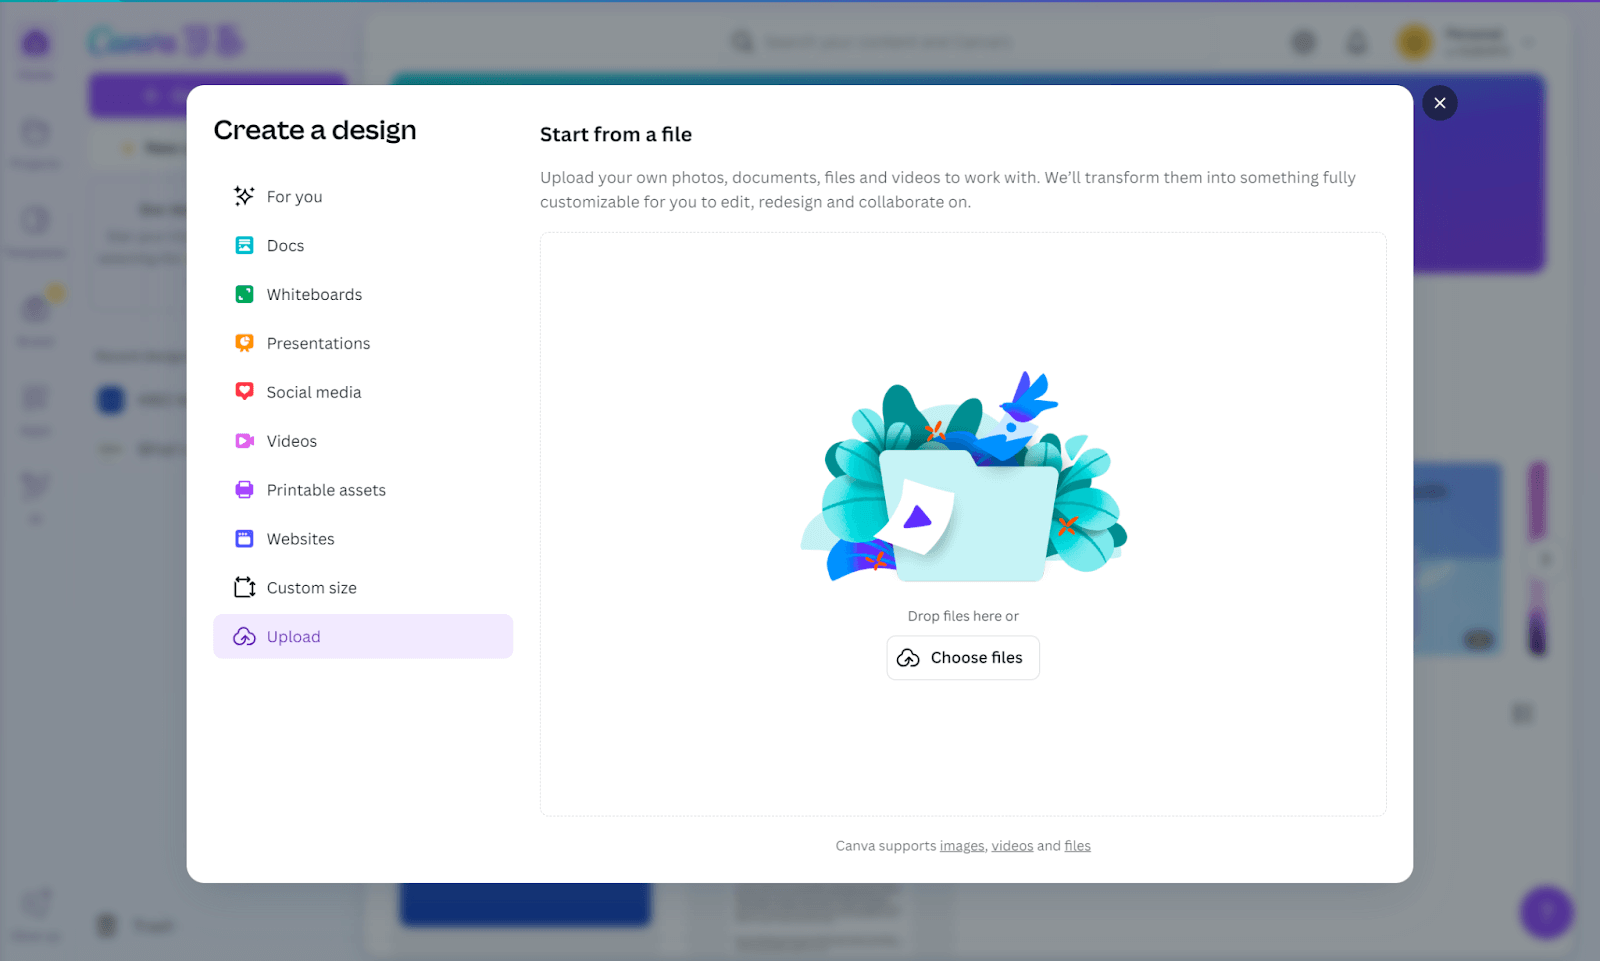
Step 1: Open Canva and Upload Your Image
Access Canva by logging into your account or creating one if you don’t have one. Then, proceed with a blank template or choose one for your design needs. Click the Uploads on the left toolbar and upload your image.
Step 2: Remove the Background
Click on the image, go to the Edit Image, and choose Background Remover. This feature automatically detects an image’s background and just leaves the subject.
Note: This feature is only available to Canva Pro users. If you’re using the free one, you can use Online Background Remover to complete this and then upload a background-removed picture.
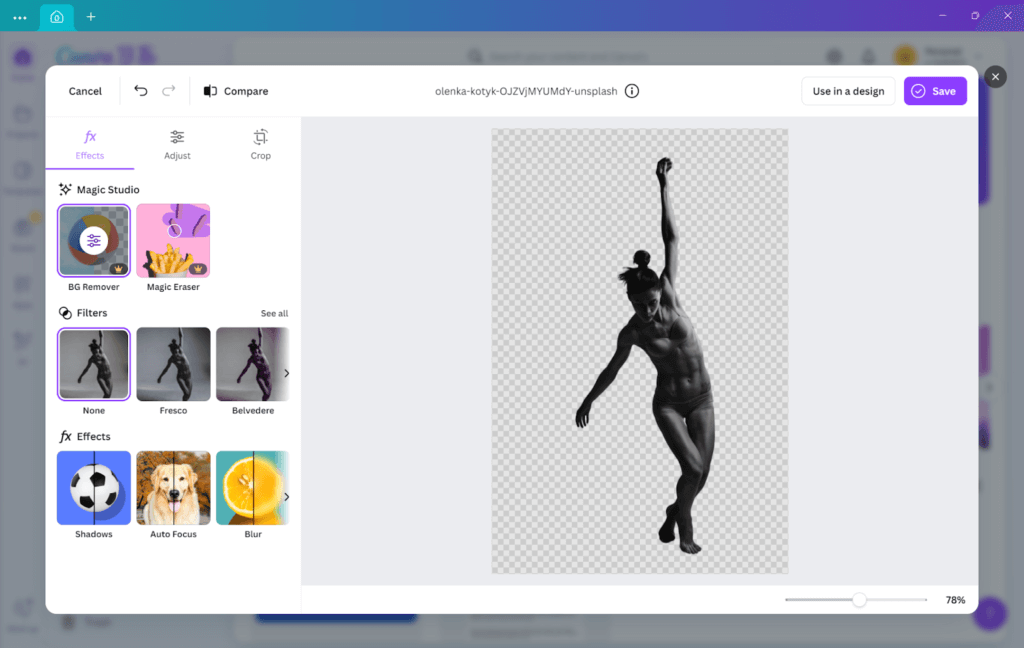
Step 3: Apply an Outline Effect for the Outline
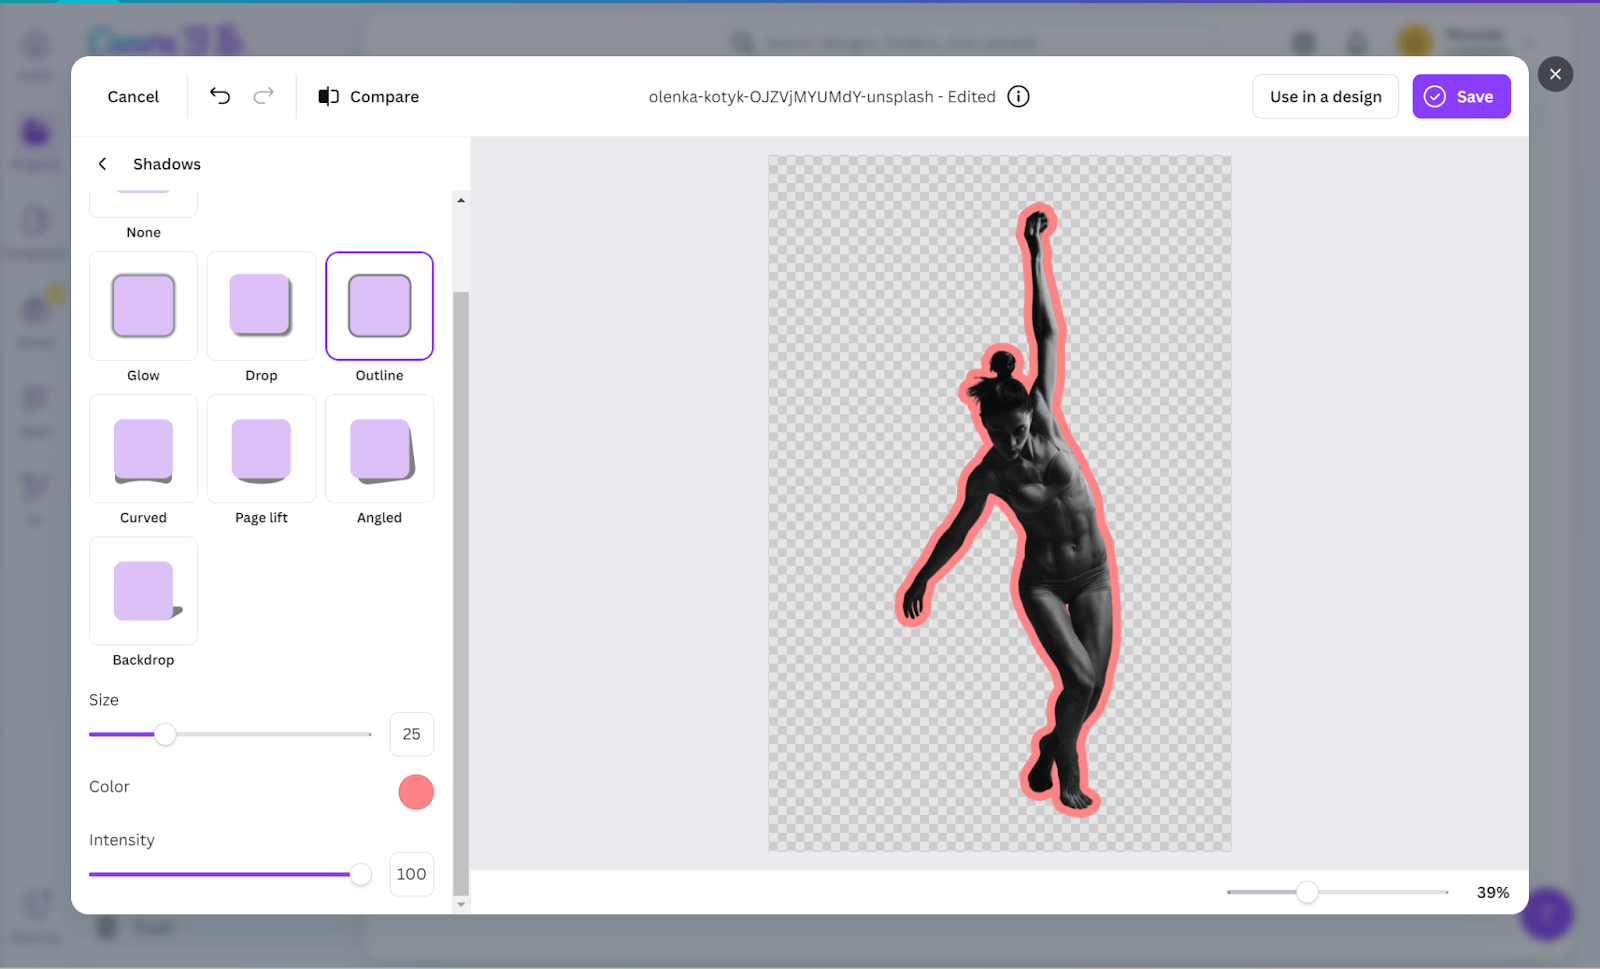
Use Canva’s “Outline” shadow; you can also apply other effects to create an outline. Go back to the “Edit Image” panel again, scroll down again in the “Shadows” section, and click on “Outline.”
Step 4: Fine-tune the Outline
Upon clicking “Outline,” you can adjust the setting’s size, intensity, and color to create a solid outline of your image.
Step 5: Download Your Image
When you are satisfied with your outline, click “Download” in the top right of the screen. Choose your file format, and the image will save.
How to Outline an Image in Illustrator
With Adobe Illustrator, you can create clean and editable outlines that are suitable for detailed design work or professional projects. Here is how you can outline an image step by step (I already used AiPassportPhotos to remove the background for quick access).
Step 1: Open Your Image
Open Adobe Illustrator, then Open File from the menu and select an image you want to outline.
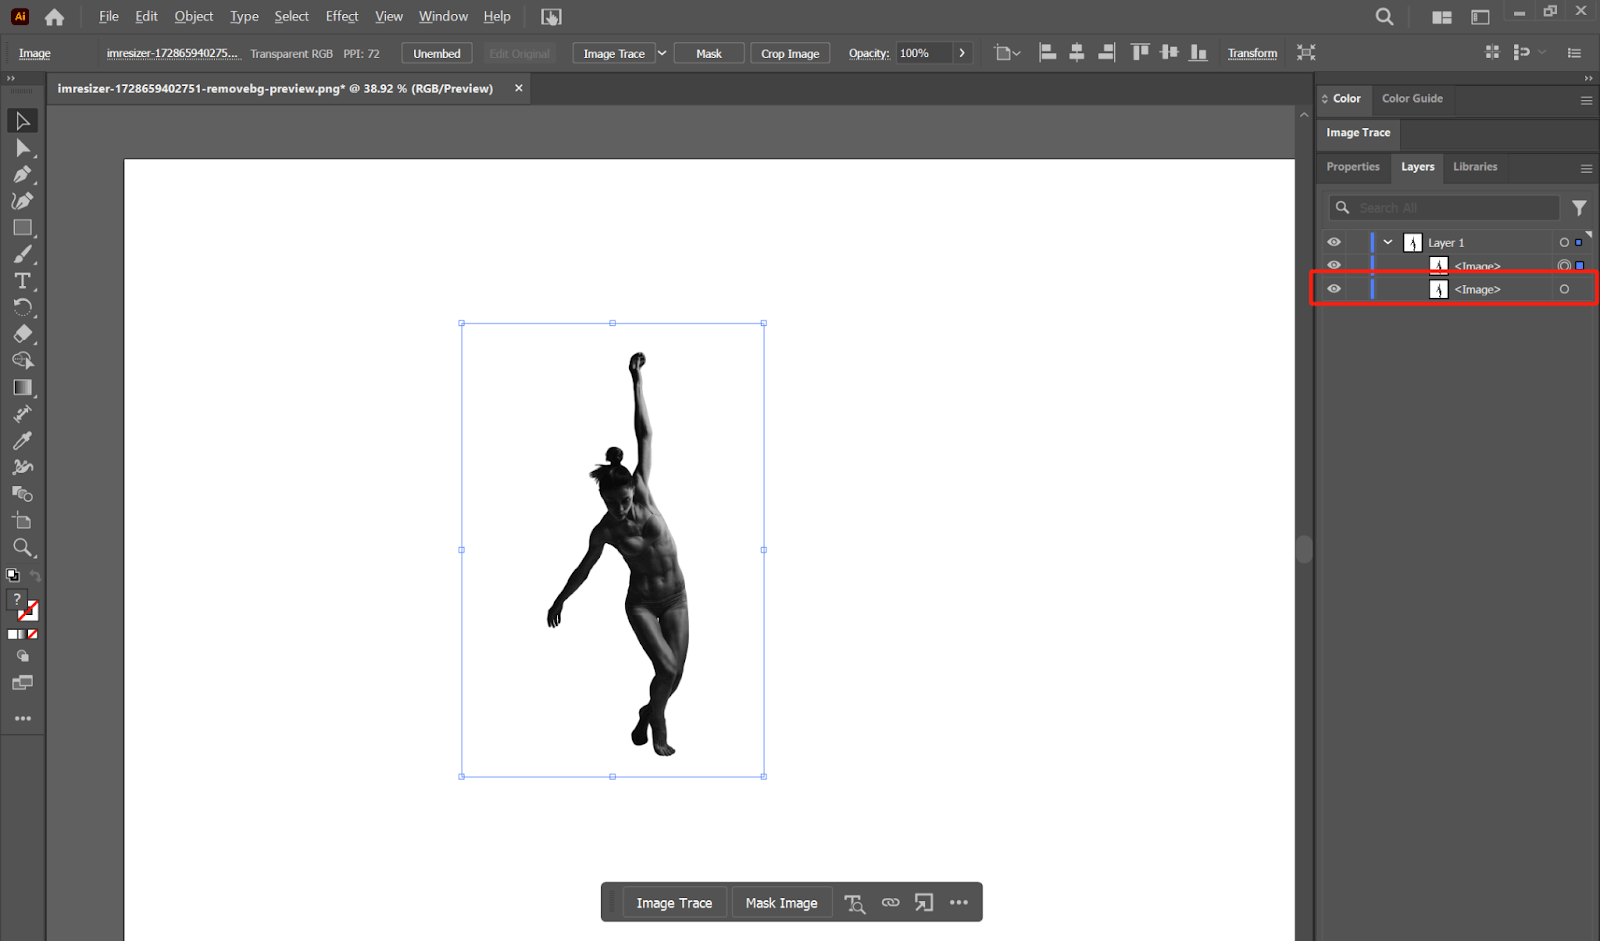
Step 2: Duplicate Image
Press Ctrl+C or Cmd+C(Mac) to copy the image, and then press Ctrl+F or Cmd+F(Mac) to paste the copied image in front of the original image.
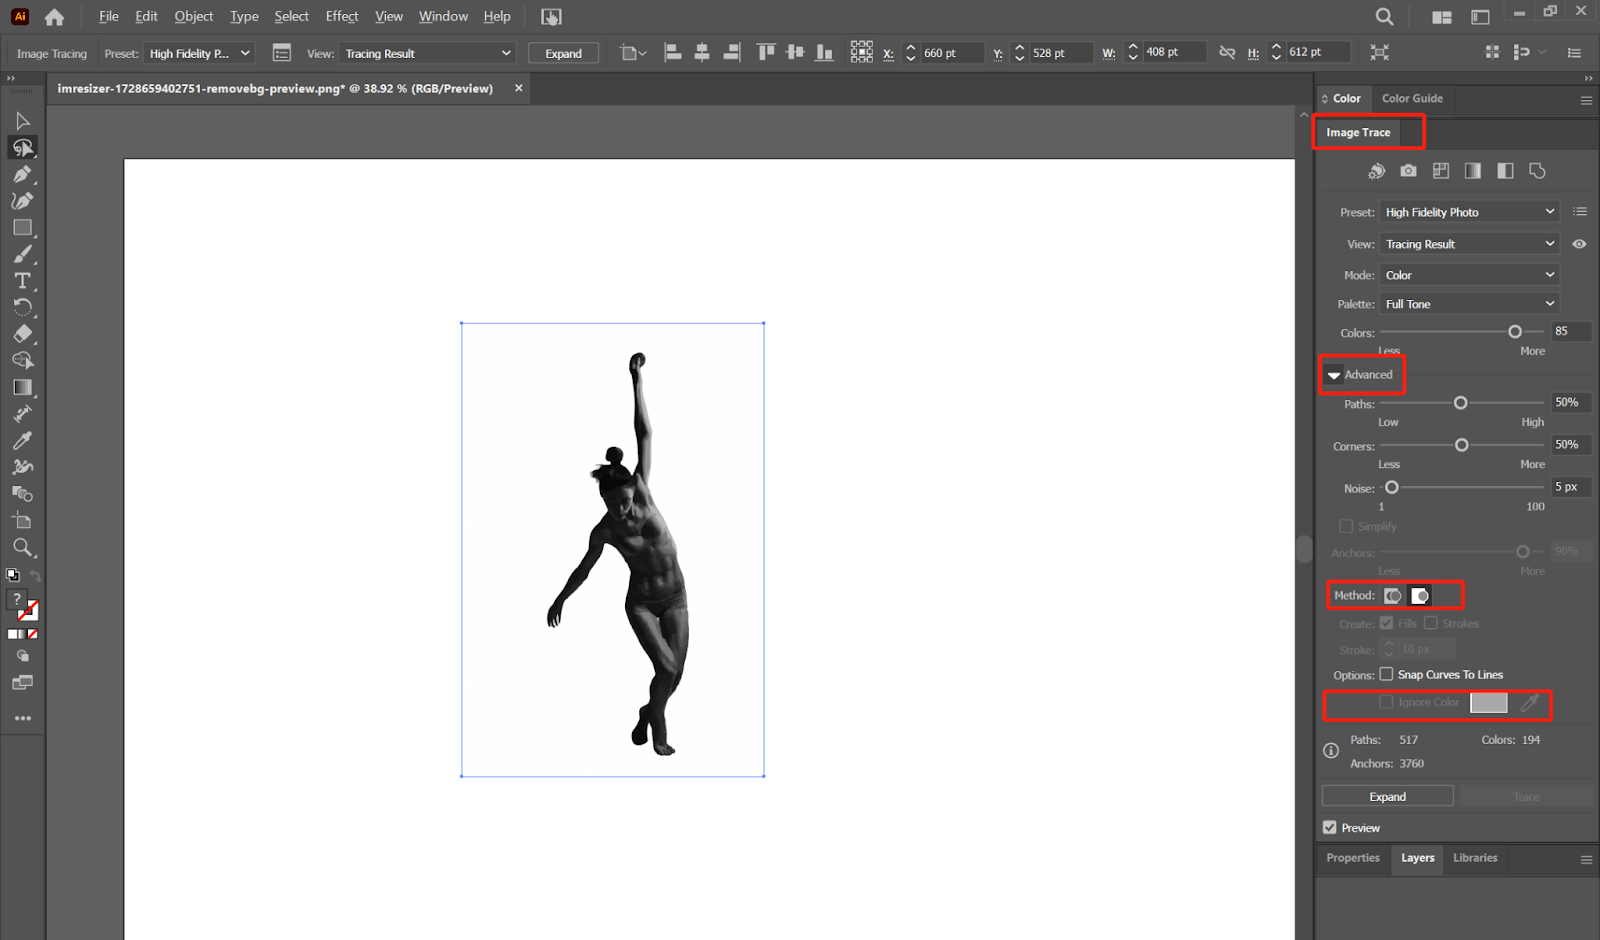
Step 3: Apply Image Trace to Convert Vector Image
Make sure the pasted image is selected.
- Apply Image Trace:
Opening Image Trace Panel: through Window> Image Trace.
Select Proper Preset: Click on the preset, which could be more detailed, such as High Fidelity Photo, or with a stronger contrast outline, such as a Black and White Logo.
- Apply Advanced Options:
Click the triangle icon aside Advanced.
- Advanced settings:
Choose Abutting: Make sure the color blocks are connected with no gaps.
Ignore White: Check. This ignores the white areas in the image to emphasize the subject.
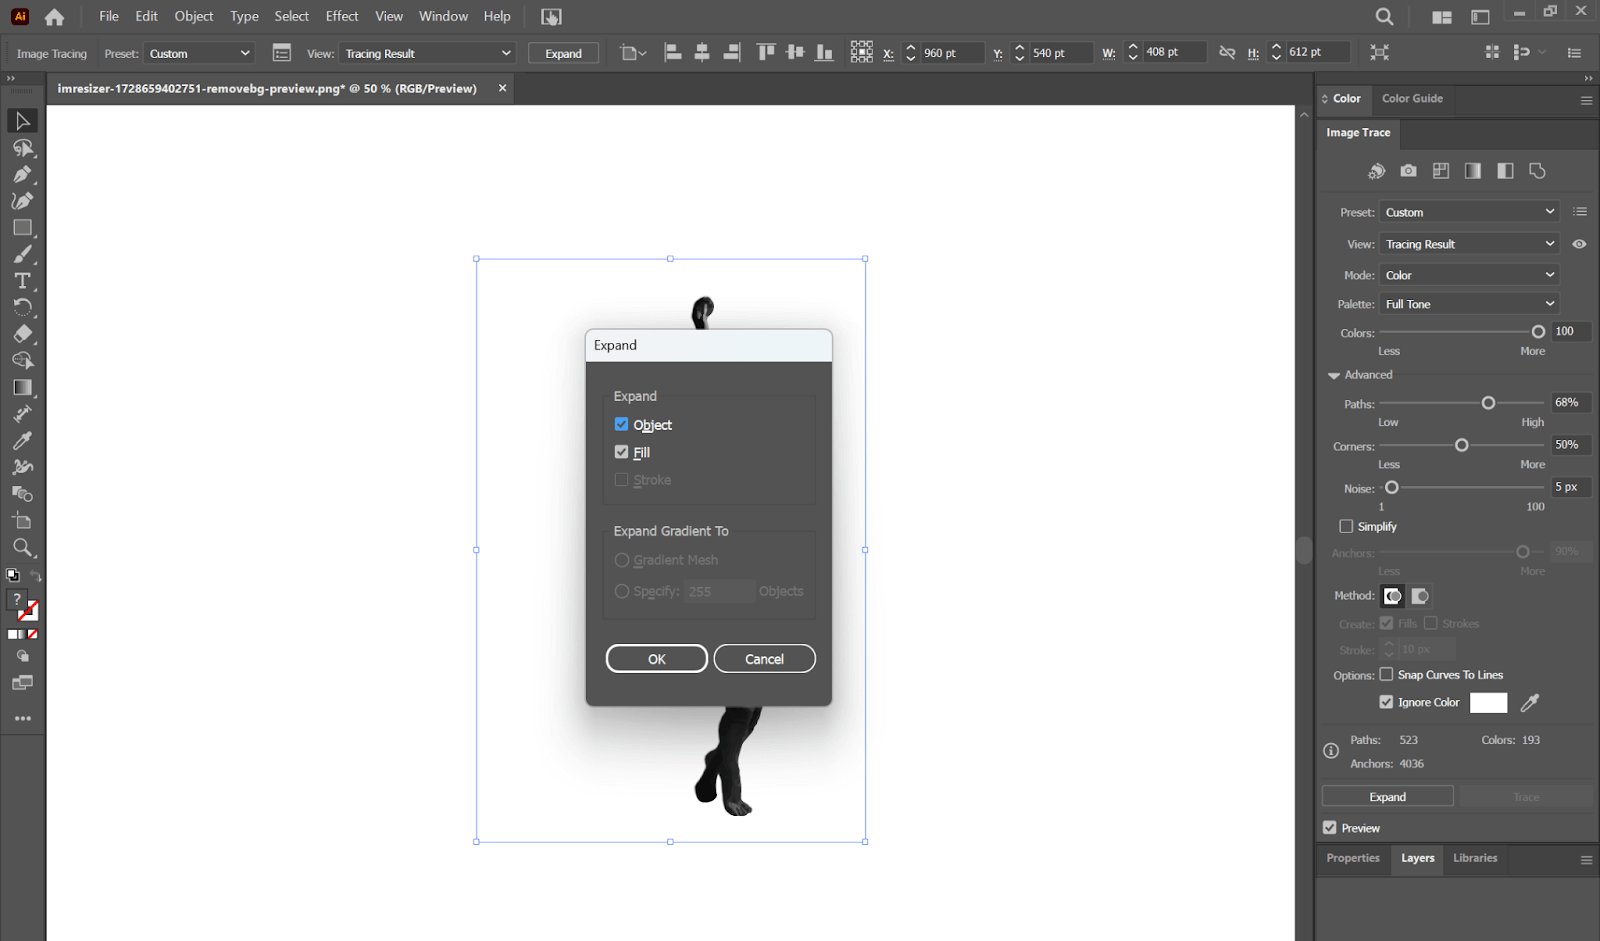
Step 4: Expand the Image
Expand the Traced Image: Object > Expand. In the opened Window, make sure that the boxes next to Object and Fill have checks in them and click OK. That will convert the tracing effect into real vector paths.
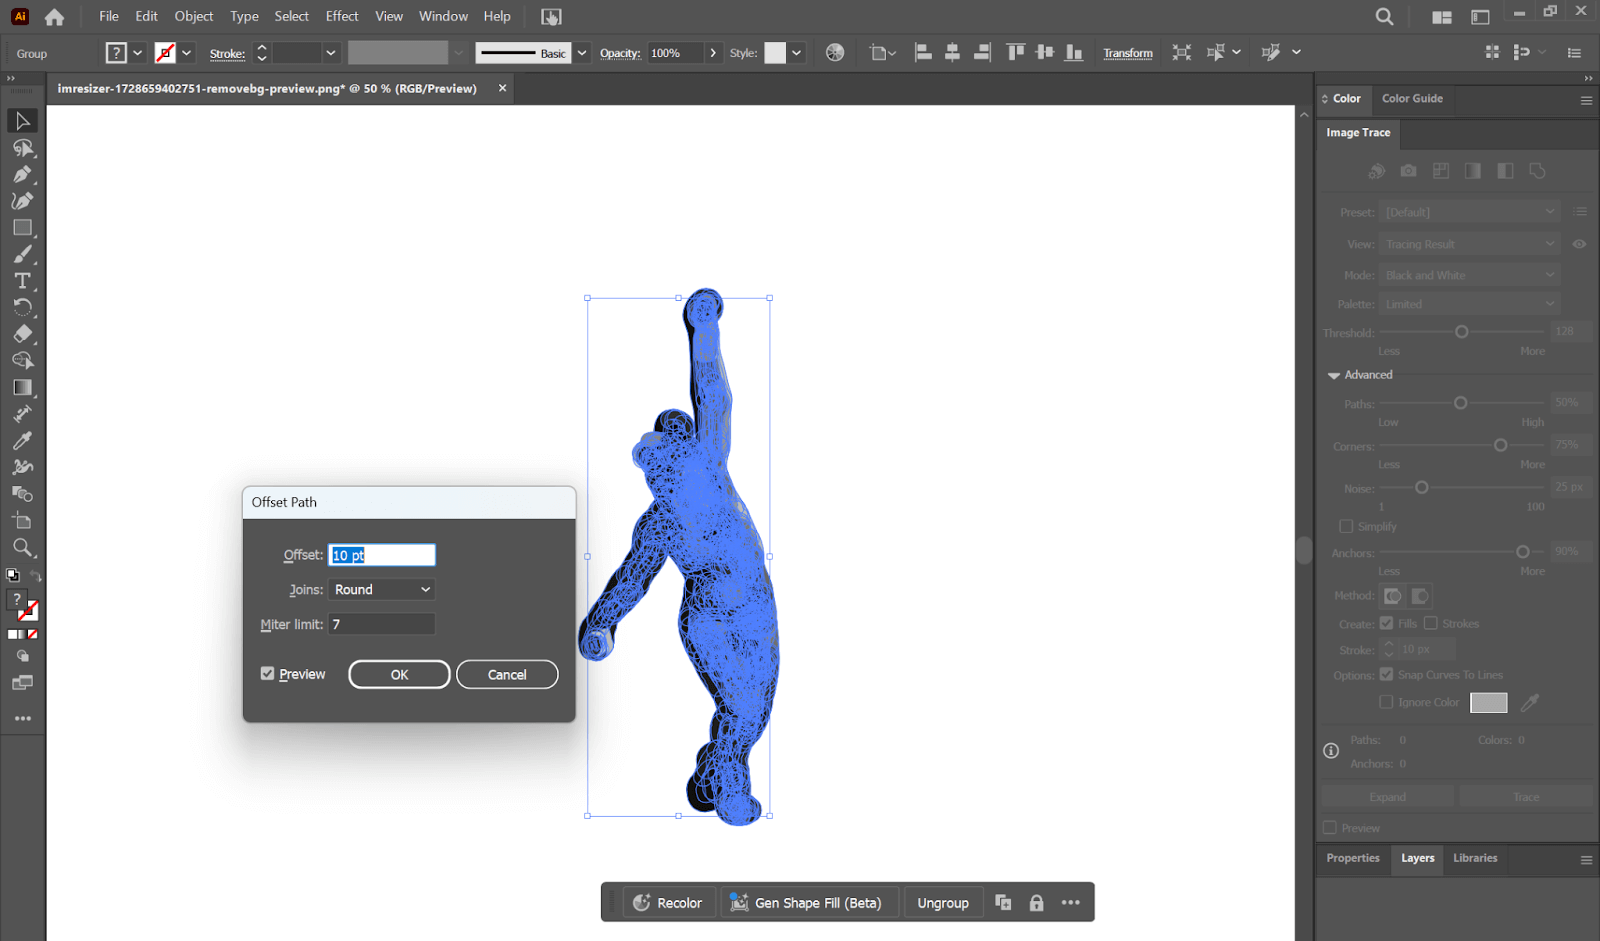
Step 5: Offset Path
Offset Path Selection: While having the expanded vector object selected, go to Object > Path > Offset Path.
- Offset Value Settings:
- Offset: Select the offset value. In most cases, it would be between 5-10 px.
- Joins: Select Round to have soft edges. Click OK
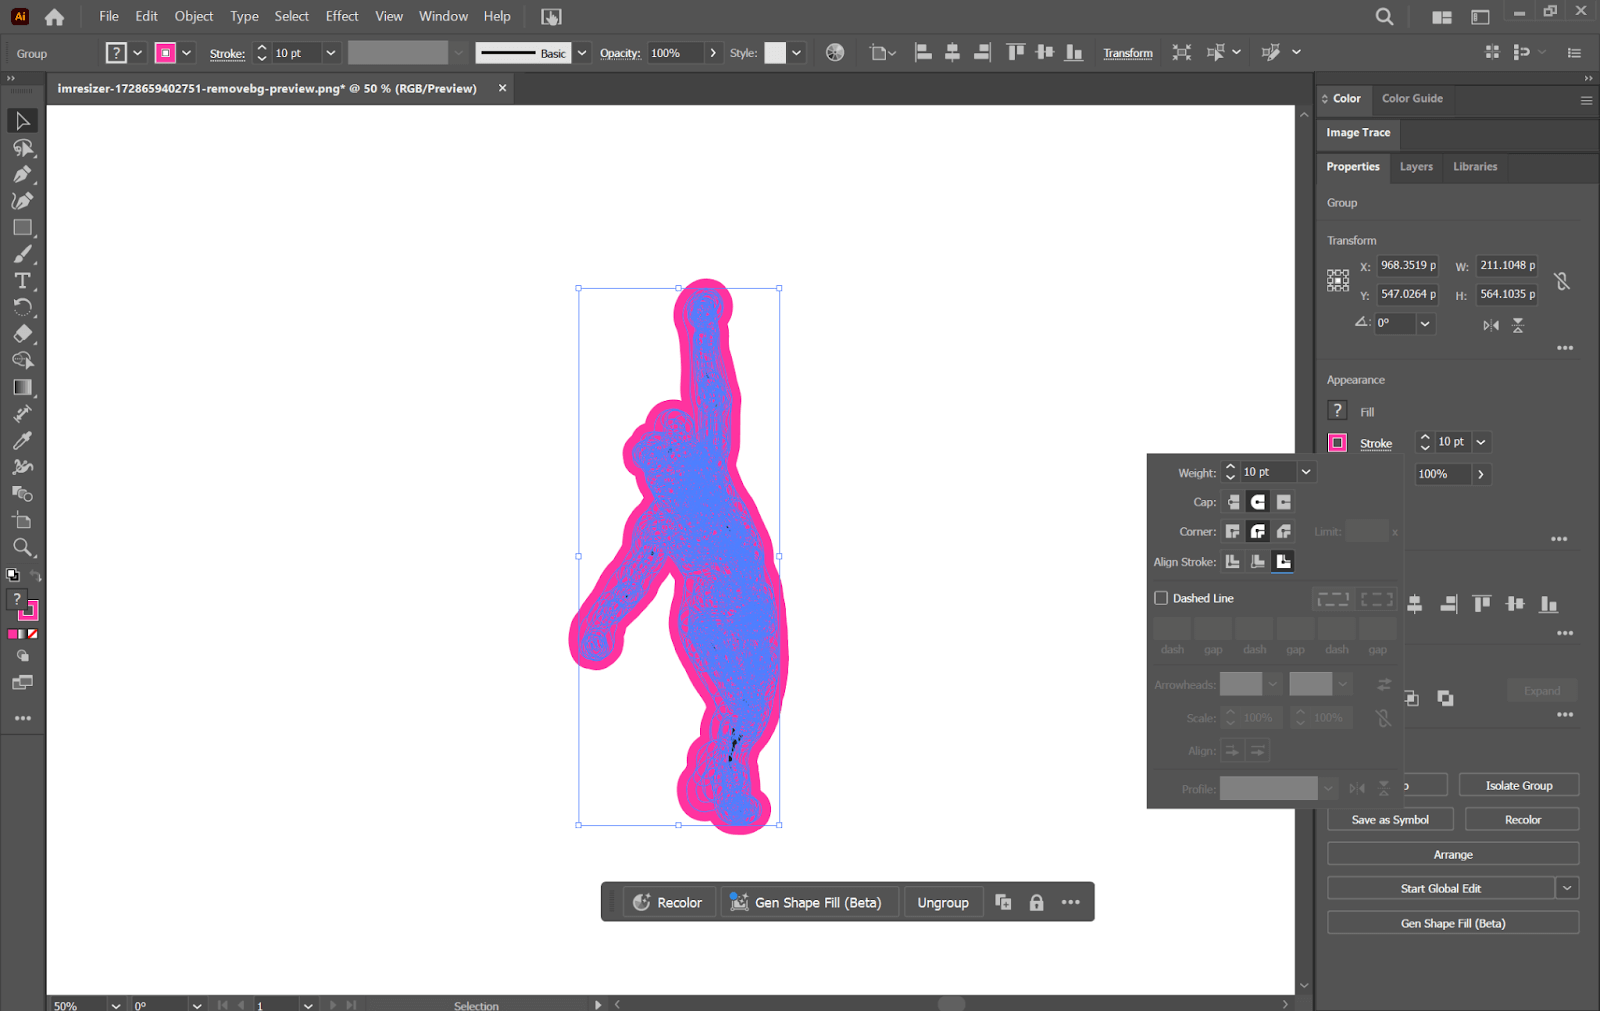
Step 6: Apply Stroke. Add Stroke
Having the expanded vector paths selected, go under Window> Appearance and open the Appearance panel.
- Stroke Color: Under the Appearance panel, click to highlight Stroke and choose any stroke color you’d like; for the purpose of this design, white is not necessary.
- Tweak Stroke Weight: Where needed, adjust the stroke width to bring view emphasis to the outline.
- Adjust Fill Color: Select ‘Fill’ and choose ‘None’ to retain just the stroke effect.
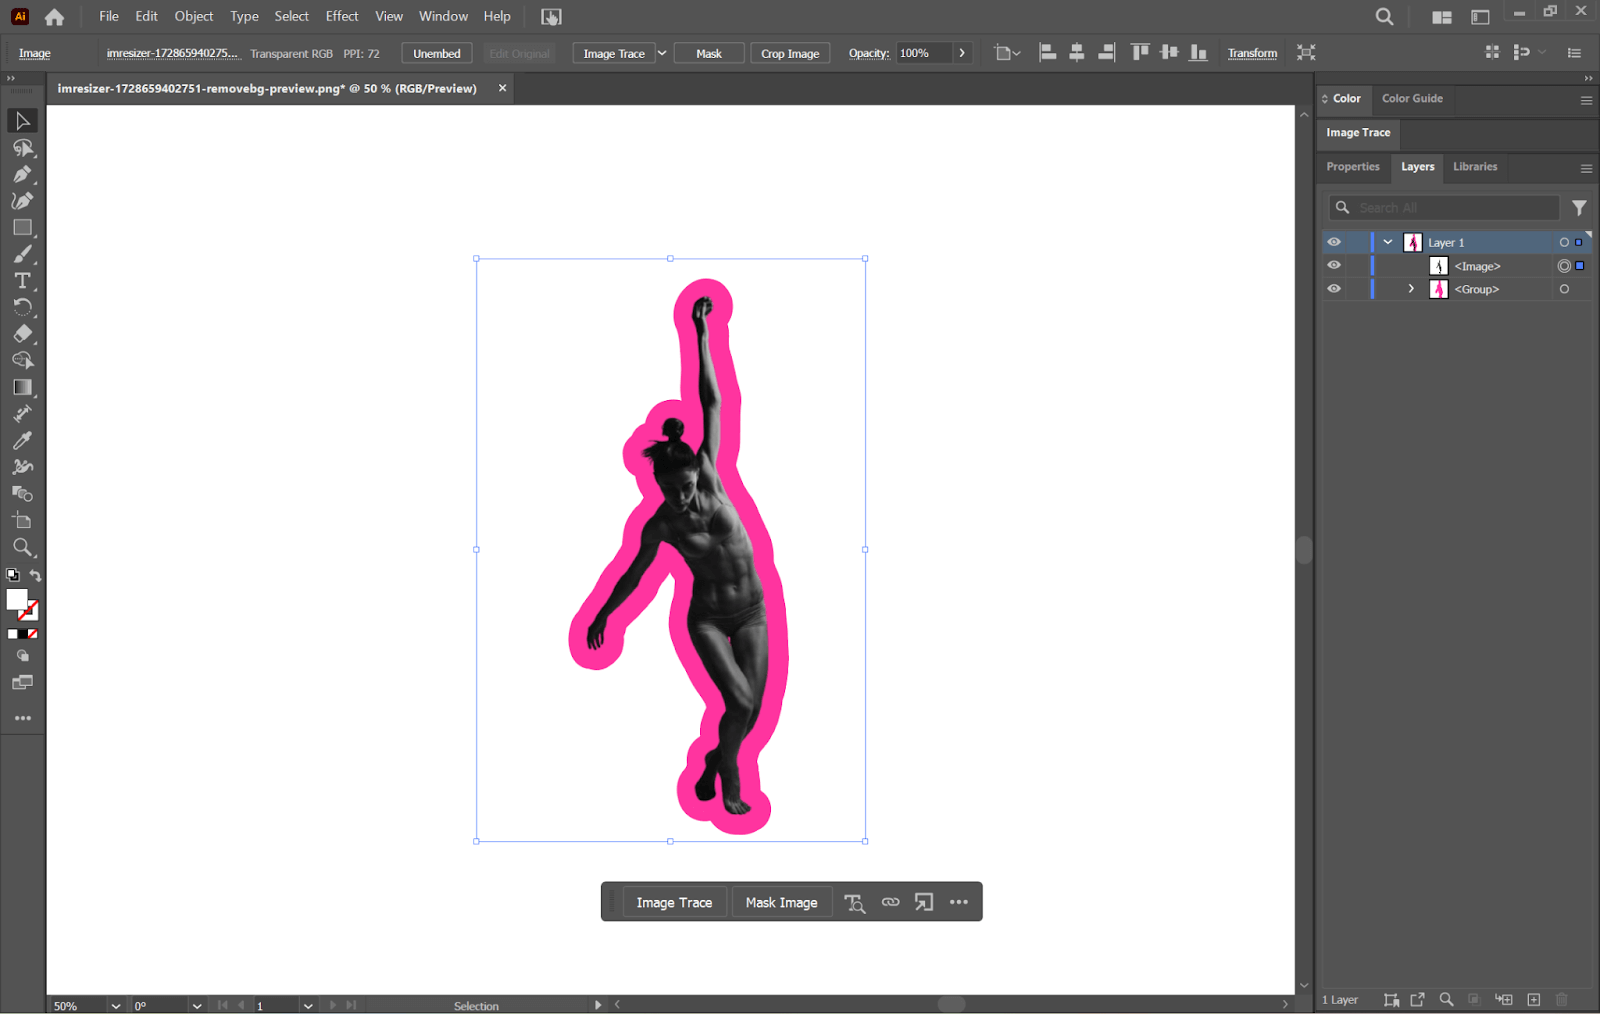
Step 7: Adjust Layer Order
In the Layer panel, the copied image should be on top of the original image. If the final effect is not visible, you can drag the copied image with the outline effect below the original image to see it.
Step 8: Finalizing the Design
Now, go back and adjust your outline effect if needed. If you find that it’s off, repeat the steps above to adjust the color, weight, or path offset of the outline until you achieve your desired effect.
How to Outline an Image Using Cellphone
If you want to outline an image directly on your phone, using third-party apps is the most straightforward method. Apps like Canva and InShot have mobile versions that make the process easy since they have features that enable you to outline the image. Below, we will guide you through outlining an image using InShot as an example.
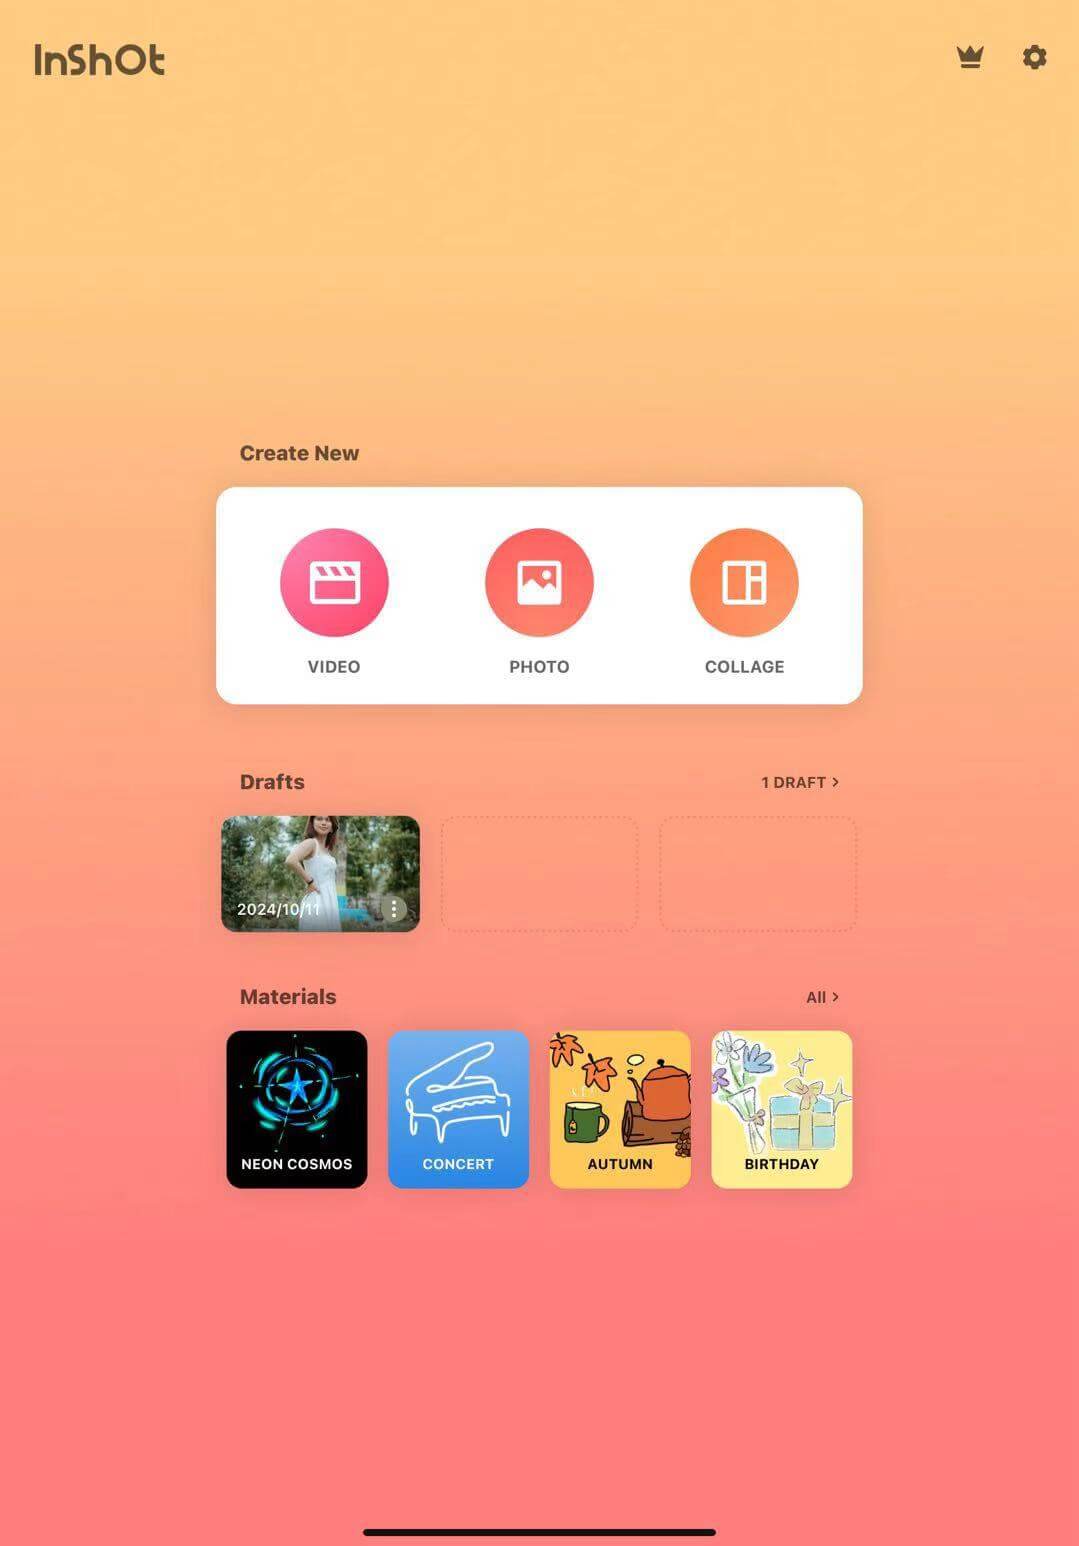
Step 1: Download and Open InShot
Download the InShot application from your App Store/Google Play, then open it. Tap Photo from the main screen.
Step 2: Import Your Image
Open the image you want to outline in your phone’s gallery and import it into this app.
Step 3: Background Remover
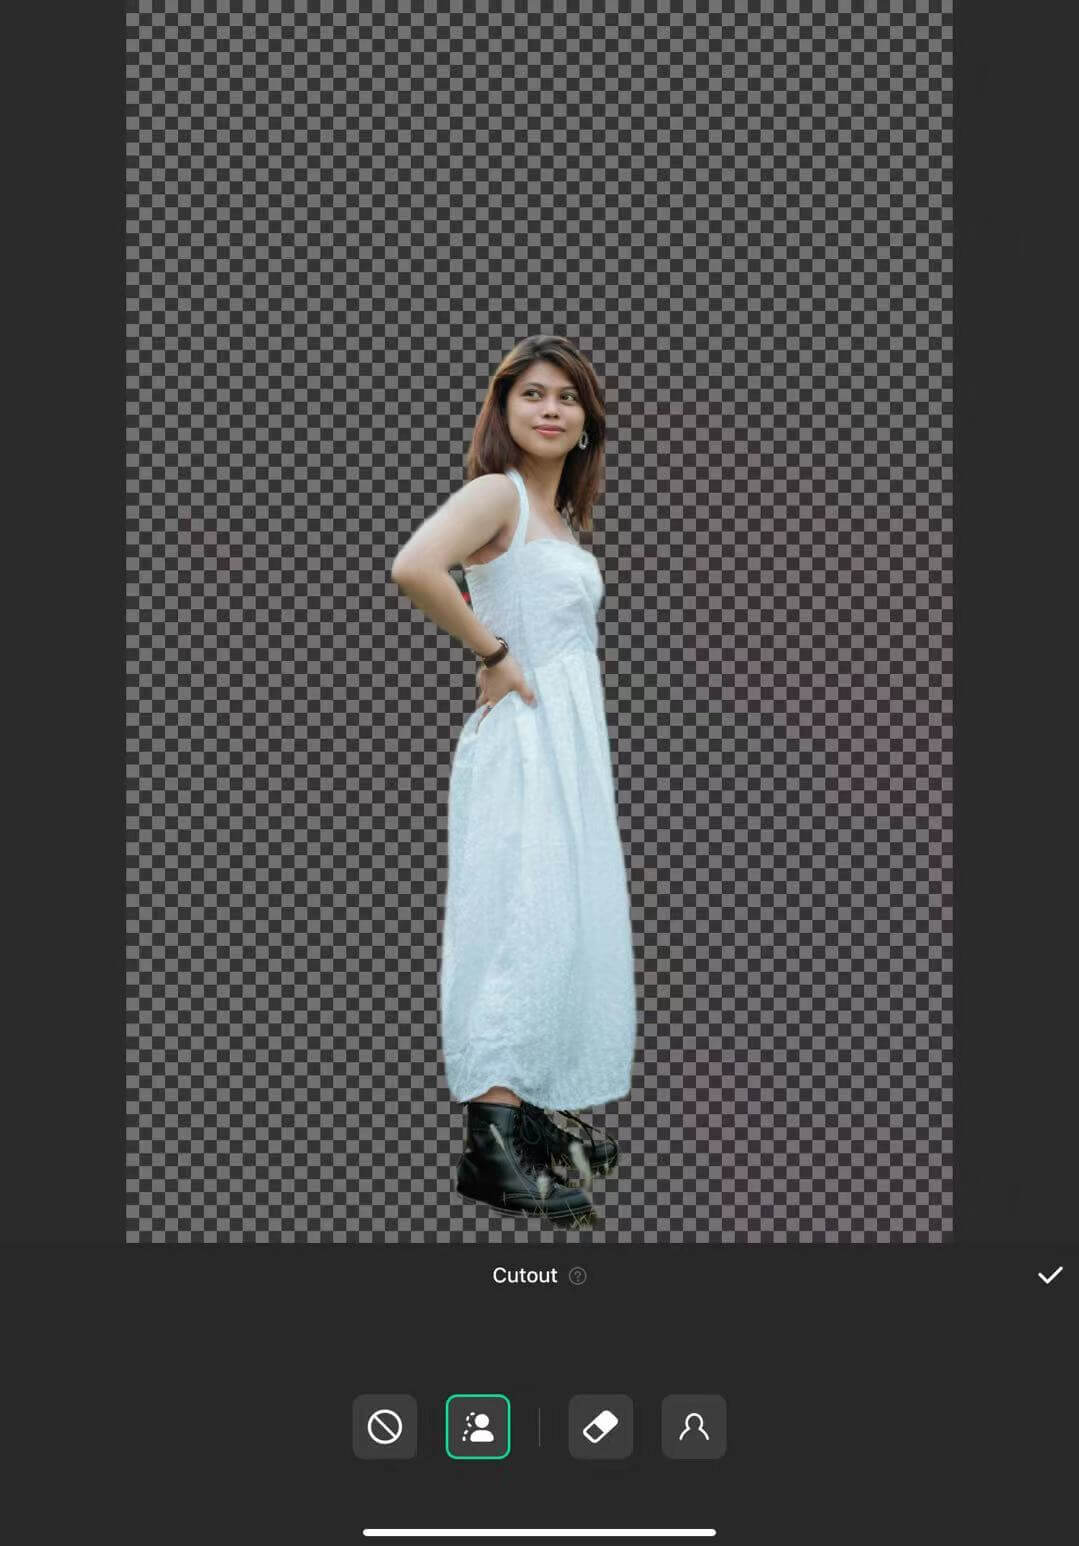
If you want an outline for the subject alone, tap the Cutout tool to remove the Background.
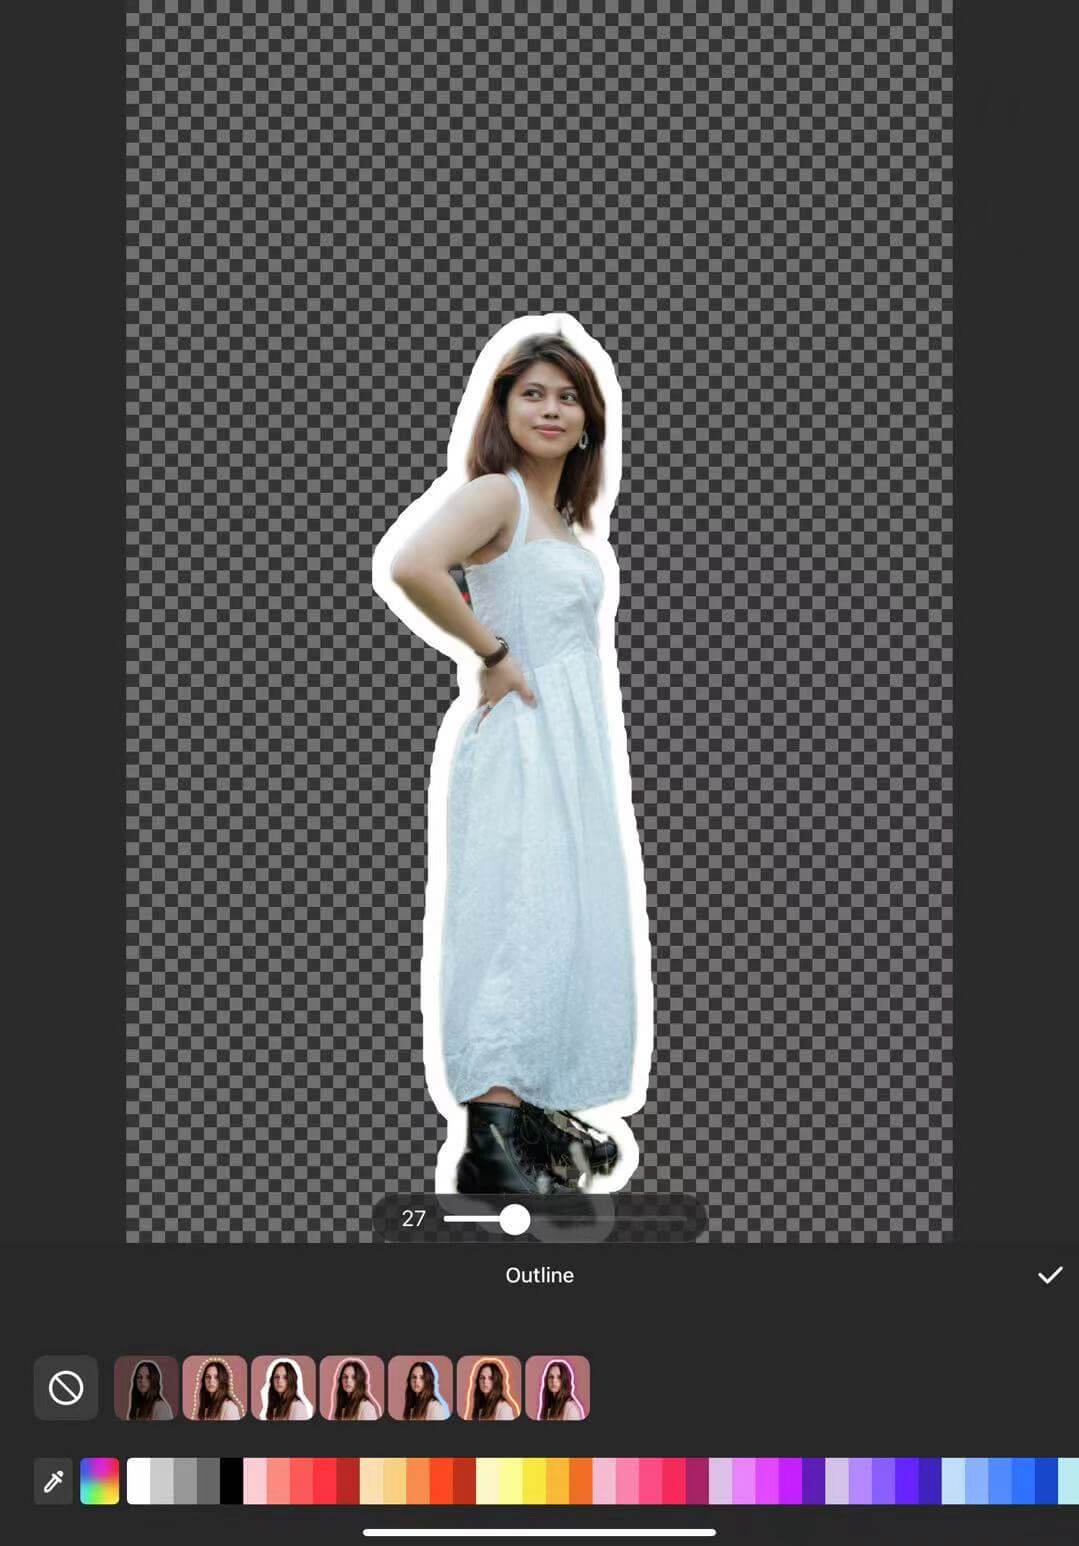
Step 4: Outline Tool
From aside, choose the Outline tool to enter the outline stickers. Choose one effect you like. Change the thickness and color to your preference.
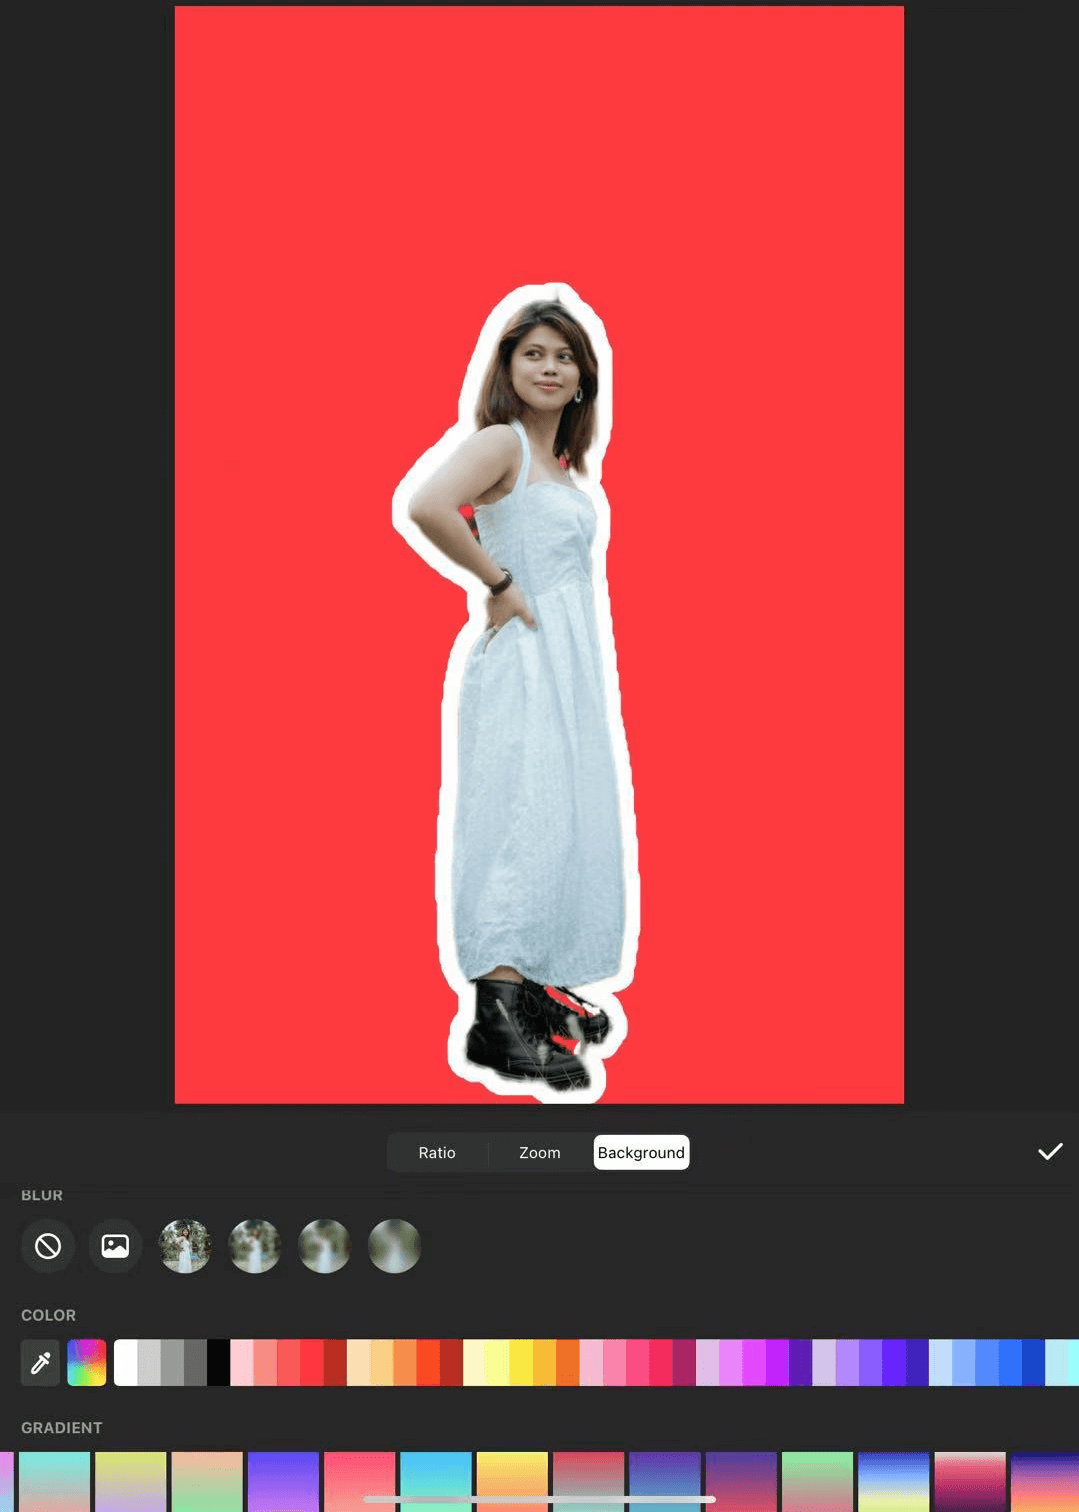
Step 5: Background Customization (Optional)
From here, you may want to refine it by adding a background (or editing). Head over to the Canvas and select Background. You can upload a new picture to use as your Background or use the preset colors and templates.
Step 6: Save Your Image
After you are satisfied, tap the Save button to download the image you outlined in your gallery.
What Can I Do with Pictures with an Outline
Outlining images not only enhances their look but also opens up an entire world of creative possibilities. Some strong applications when using outlined pictures are as follows:
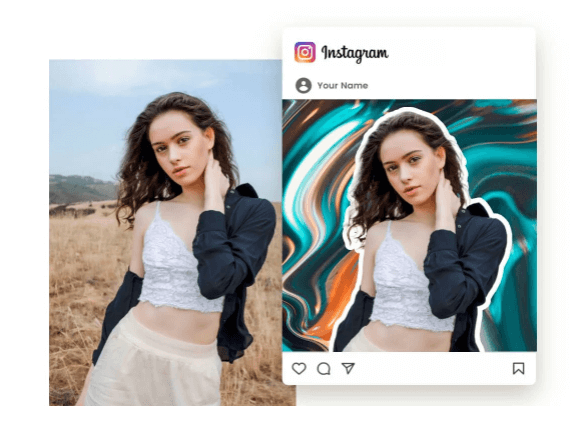
- Social Media Posts
Outlined images pop up on platforms such as Instagram and Facebook, helping your posts stick out on cluttered feeds.
- YouTube Thumbnails
A bold outline will make your thumbnails stand out and more clickable.

- Product Listings
Outlined images for e-commerce product listings make the products look more appealing and easily noticeable in online stores.
- Profile Pictures
An outlined profile picture might just give you an excellent online presence, adding a professional touch to your social media profiles.
- Meme and Stickers
Create humorous and creative memes or stickers by outlining images; add humor to your text.
- Promotional Materials
With outlined images, make your promotional materials, such as flyers, brochures, and advertisements, visually appealing to attract attention.
- Art Projects
Outlined images can serve as templates for drawing or painting. This gives you clear boundaries within which to work during a project.
- Slides and Presentations
Adding outlined images to presentations helps drive key points across to the audience and keeps them enthralled.
Conclusion
Image outlining can be an interesting way to make your design pop or just make it fun and engage audiences no matter where you put the images. Each of these options, online tools, apps, or software programs such as Photoshop and Illustrator, has slightly different benefits. Take the outlined images and give them a try in social media posts, promotional pieces, or art projects for some really interesting content pieces. Try these techniques to push your designs to the next level!