Are you looking for a method to take a New Zealand passport photo correctly? Are you wondering if the photo meets all the requirements?
Lucky you! In this article, we will walk you through all the steps to take and edit a passport photo that is suitable for use in a New Zealand passport application.
Scroll down to read about the NZ passport photo technical requirements, including size and dimensions, background, lighting, standing position, and lighting. More than that, you will learn about how to take a qualified photo to apply for or renew a new NZ passport.
Let’s get started!
New Zealand Passport Photo Requirements
To speed up your process of taking a digital photo for your New Zealand passport, we’ve covered the necessary information in this thorough and easy-to-read guide.
Read all you need to know before taking the photo in the right way. Don’t worry, we’ve included some tips to ensure you succeed in the New Zealand passport photo-taking journey.

Size and Dimensions
The portrait you’re using for your New Zealand passport photo should be one with a 4:3 aspect ratio (the photo height-to-width ratio) or 3:4 on a smartphone.
Ensure your photo is digital (scans of physical photos are not accepted), and the dimensions should be between 900 and 4500 pixels wide, and 1200 and 6000 pixels high.
Save the photo in either .jpg or .jpeg format, and keep the size between 250KB and 5MB.
Background and Lighting
Same as the photo needed for any other paperwork, the background of your passport photo should be clean. It’s important to note that “clean” doesn’t mean black and white. Your photo must be in color.
Remove any objects to make sure that no shadows on the background. Taking the photo in a well-lit place will highly increase the likelihood of success.
Facial Expression and Accessories
Remember that we’re taking a passport photo, so no large smile or exaggerated expressions should be on your face.
Wear a neutral expression on your face. Open your eyes and keep your face in full view. You might have to take a few more photos to choose from in case you blinked your eyes when taking the photo.
You should not wear any jewelry, hats, headband, or glasses. Jewelry and glasses will cause glare and distortion, while hats and headband will cover parts of your face.
If you must wear a headband or glasses for medical or religious reasons, prepare a document that can help you explain that to the department.
Age of the Photo
To make sure that you will be recognized by the system and the officers, the photo must be taken within the last 6 months.
If you have had facial surgery that changed your look, you have to update the photo to prove that it’s the same person.
We’ve talked so much about the technical requirements that you may find it overwhelming. You don’t have to remember all this. Save this infographic that we made for you.
Preparing for the Photo
Now let’s look at more details before starting to take your photo.
Clothing
As we mentioned earlier, you’re not allowed to wear a hat or a hairband as it may cover parts of your face. When choosing your clothes, keep in mind that the clothes should not distract from your face.
Avoid wearing clothes with patterns or a turtleneck. A turtleneck covers your neck or jawline, which makes it difficult to capture your facial features.
Also, any revealing clothes such as a sleeveless top are not a good choice as it reveals your shoulders.
The color of your clothes should be plain and contrast with the background. Neutral and solid colors are preferred. For instance, black shirts and white background would be fine.
Glasses
This is worth to be emphasized because there’re specific guidelines that must be followed. First, sunglasses are not acceptable.
Second, ask your doctor for a document for verification if you must wear your glasses for medical reasons.
Glasses can cause glare and reflections. When you wear prescription glasses, double-check that they are not thick-framed and there is no glare on the lenses.
Head and Face
When taking the photo, your head should not turn to the side. Keep your head right in the center and include your shoulders and upper chest in the photo.
Your face, including the forehead and chin, should be visible. Do not wear heavy makeup as it may change your facial features in the photo.
Taking the Photo
Ready to take the photo that you are willing to keep for the next few years on your New Zealand passport?
Scroll down to find out how!
Ask Someone to Take the Photo for You
The photo you use for your New Zealand passport should be a portrait rather than a selfie.
When taking a selfie, people tend to wear various expressions and take the photo from different angles. This will significantly affect the photo quality if you need it for the passport.
That means you need someone else’s help to take the photo for you. You can ask for a photographer’s help in your local city. An experienced photographer knows anything about how to take a good New Zealand passport photo.
You can also ask your friend to help you. Follow the steps and tips in this guide and you will be able to have a qualified passport photo.
Camera Setup
We recommend you use a digital camera or smartphone to take the photo. If you’re using an iPhone, it must be an iPhone 5 model or newer. If you’re using a Samsung, use a Samsung s7 or newer model. Set the camera’s aspect ratio to 4:3 or 3:4 on your smartphone.
Distance
Stand 0.5 meters in front of your background and ask your friend to stand 1.5 meters away from you, to help maintain a proper distance between the camera and your face.
To make sure that your face is in the center of the photo, your friend should hold the phone at your eye level.
Ensuring Clarity
Having a clear photo for your passport application is not easy.
Double-check that there is no blur and no shadows behind you. Take a few more photos while adjusting the background and your standing position to ensure that you meet all the technical requirements.
Photo Editing Tips
First and foremost, note that you should not use a filter to digitally alter your face. Forget about any photo editing apps. Here’re two ways to get the perfect photo: using your photo to adjust it manually, or using an online tool to save your time.
Using a Phone
If you are using your phone to edit the photo, follow these steps:
- Press the edit button on the top right corner.
- Press the crop button.
- Select the aspect ratio button to choose 3:4.
- Press the crop button. Drag any corner of the frame to crop the photo. Your shoulders should be included.
- Save your photo after editing.
Using an Online Tool
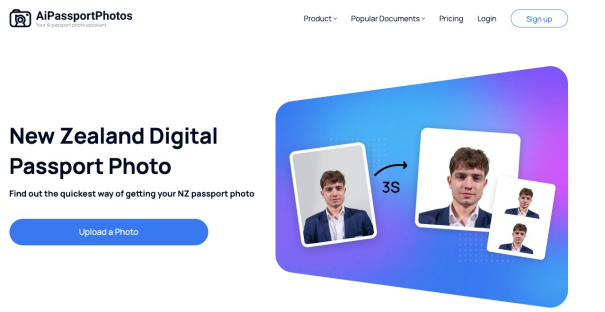
If you need an image editing tool to help you process the photo automatically, try the free online tool AiPassportPhotos which has a special feature designed for New Zealand passport photos.

AiPassportPhotos features an advanced algorithm that enables you to get your online passport photos at home in seconds. Here are simple steps of how to use it for free: Here’s simple steps of how to use it for free:
- Upload your photo.
- Crop size automatically.
- Save printable template.
- Cut it out and use it.
Above all, ensure your passport photo looks natural and resembles your current appearance. Double-check the New Zealand Passports website for the complete list of photo requirements before submitting your application.
Verify Your Passport Photo Online
You can verify if your passport photo meets New Zealand’s guidelines by using their online photo checker.
When you upload your photo into the tool, you will be notified if the photo is suitable for your passport application. If not, you will see the reasons.
Remember to double-check everything, including the size, format, and quality of your photo before submitting.
Go to the site to try for yourself, and keep the unique reference number after you upload the photo for future use.
Get Your New Zealand Passport Photo Right the First Time
Get familiar with the requirements to take a perfect photo for your New Zealand passport. Don’t forget to check your clothes and accessories to ensure your face is visible.
Take a photo of yourself using a tripod or ask for help from others within 6 months before you need to use your passport.
Do use a trusted tool such as AiPassportPhotos to help you edit the photo automatically. With these tips, you’re sure to get your passport photo right the first time.
Frequently Asked Questions
What are the specific requirements for New Zealand passport photos?
These are the four key points you need to remember about the requirements for New Zealand passport photos:
- 4:3 aspect ratio.
- .jpg or .jpeg format.
- Dimensions between 900 and 4500 pixels wide, and 1200 and 6000 pixels high.
- The file size must be between 250KB and 5MB.
How can I ensure the correct background for an NZ passport photo?
Avoid shadows and sharp light on the background, and try to use a neutral background color.Also, remove any objects that may get into the photo. You can download our checklists in this guide instead of remembering all these.
Are there any restrictions on facial expressions in New Zealand passport photos?
Yes, there are some restrictions on facial expressions in New Zealand passport photos. Keep a neutral expression on your face, and make sure that your mouth is closed and your eyes are open.
What are some easy-to-use photo maker apps for NZ passports?
As for easy-to-use photo maker apps for NZ passport, visit this website: https://www.aipassportphotos.com/en-nz/new-zealand-digital-passport-photo.
You will find out how to use the tool to edit the photo without adjusting the ratios manually. With its simple interface, you will get your New Zealand passport photos right the first time.