Putting text behind the images gives us a hierarchical sense and visual impact. We use it for poster making, social media posts and advertisement creation to make the work more attractive to viewers and increase the interest of the entire design. In this article, we will introduce many ways and tools to realize the text behind image effects. Read on to learn more.
What Is Text Behind Image Effect
Text behind image effect means to put text behind the people/objects, such that the area of the image presented for visual displays includes the text. This is not a straightforward superposition of pictures and words but, by an ingenious design, makes the text and the picture content mutually relate and simulate each other.
Why Put Text Behind Image
In design, by embedding the text in the photo effect, the text and photo will combine not only to retain the primary content of the photo but also to enhance the design’s uniqueness and attractiveness. So, why choose this design method? The following key reasons can well explain its advantages.
- Enhances Visual Appeal: The overlaying relationship between text and image design gives a special visual effect to the design, and consequently, the design looks more visually attractive and more personal.
- Focuses Attention: That text partially hidden by an image elicits a feeling of curiosity and a desire to see and look, which drives a person to pay more attention to the retrieval and understanding of the hidden text.
- Social media post: Embedding the text on the back of the image immediately grabs users’ attention with an unusual visual layout and, hence, results in an increased number of users’ interactivity with the content, i.e., liking, commenting and sharing, and ultimately, contributes to boosting the role of both individual or brand in social media.
How to Add Text Behind Image
Having learned the advantages of overlaying text on top of an image, you would naturally want to know how to get the design effect. Actually, with the assistance of some useful tools and platforms, this aim can be easily realized. Next, we will introduce several reliable text behind image editors. Let’s take a look.
Rexanwong
Rexanwong is a free online text-behind-image editor that is user-friendly and versatile. Leveraging an easy-to-use interface, it is possible for users of all skill levels to easily create compelling designs. Over 150,000 designs have been generated using the tool thus far, which demonstrates its popularity.
Moreover, Rexanwong offers public source code that can be directly accessed and/or contributed to from the user side. After design completion, users can also easily share their design work with a single click, facilitating the sharing of creativity.
How to Use:
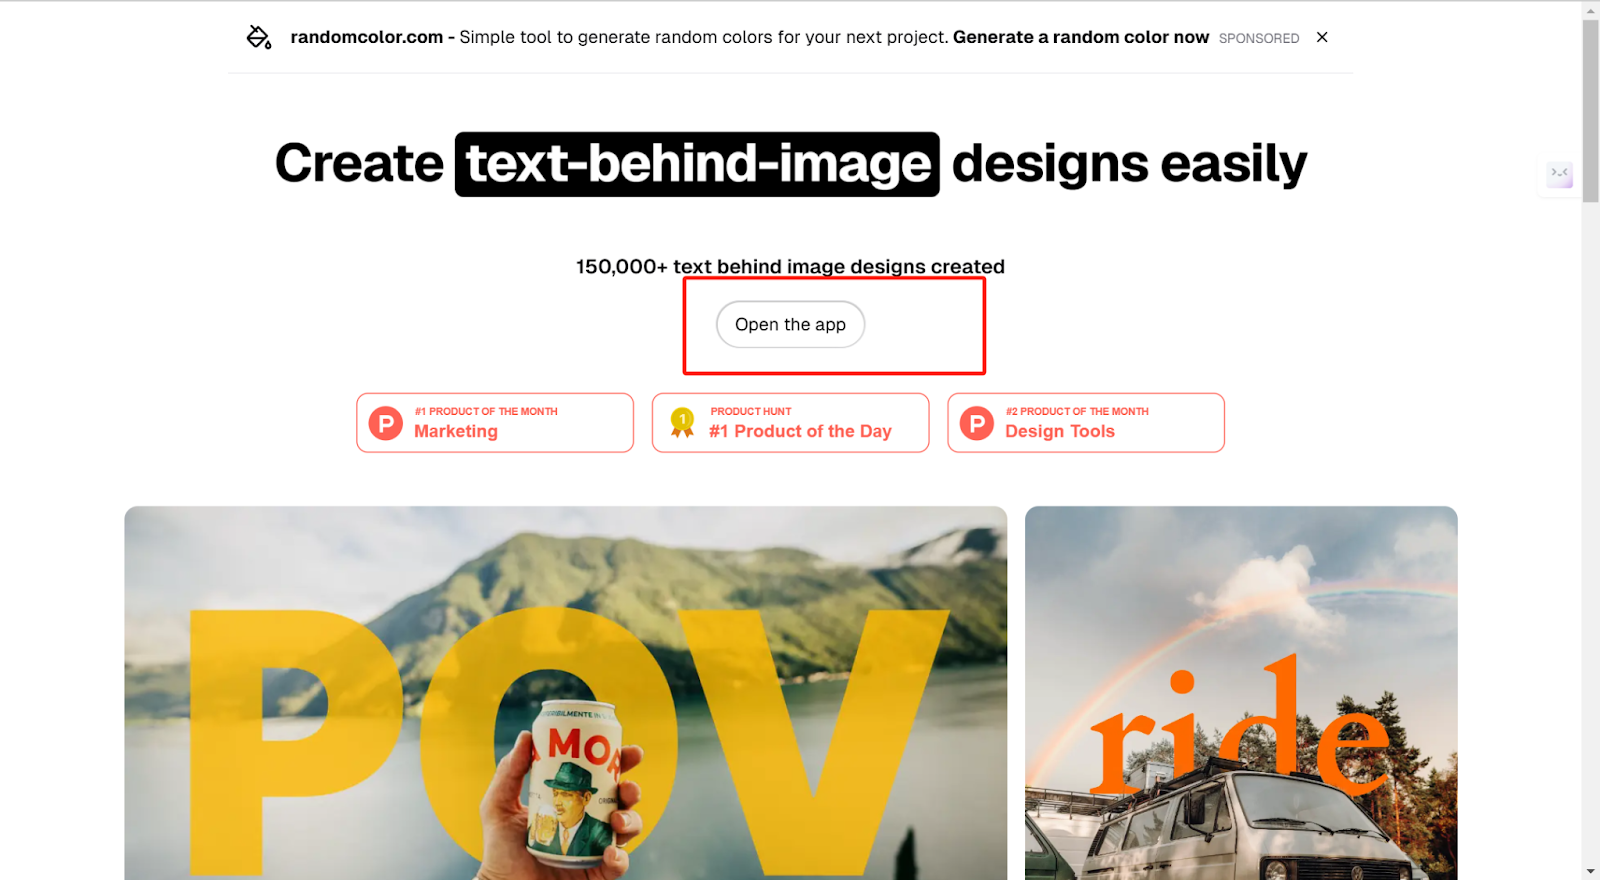
- Click on the Open the app button to sign in your Google account.
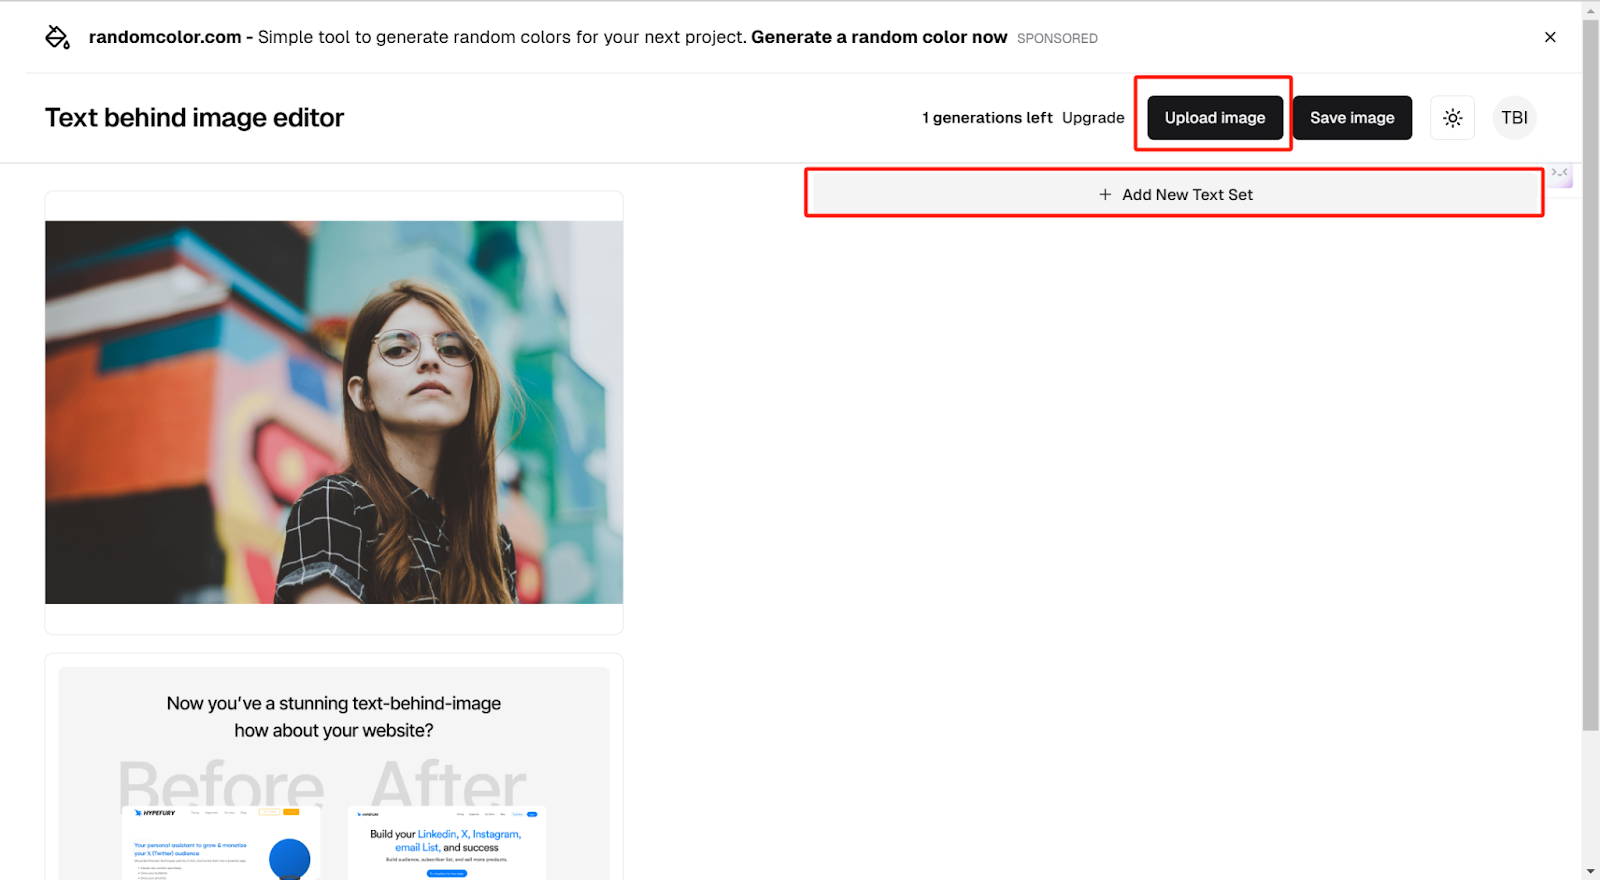
- Click on the Upload image to import the photo that you want to put the word behind
the image. And click on the New text set, then, edit the text that you want to add.
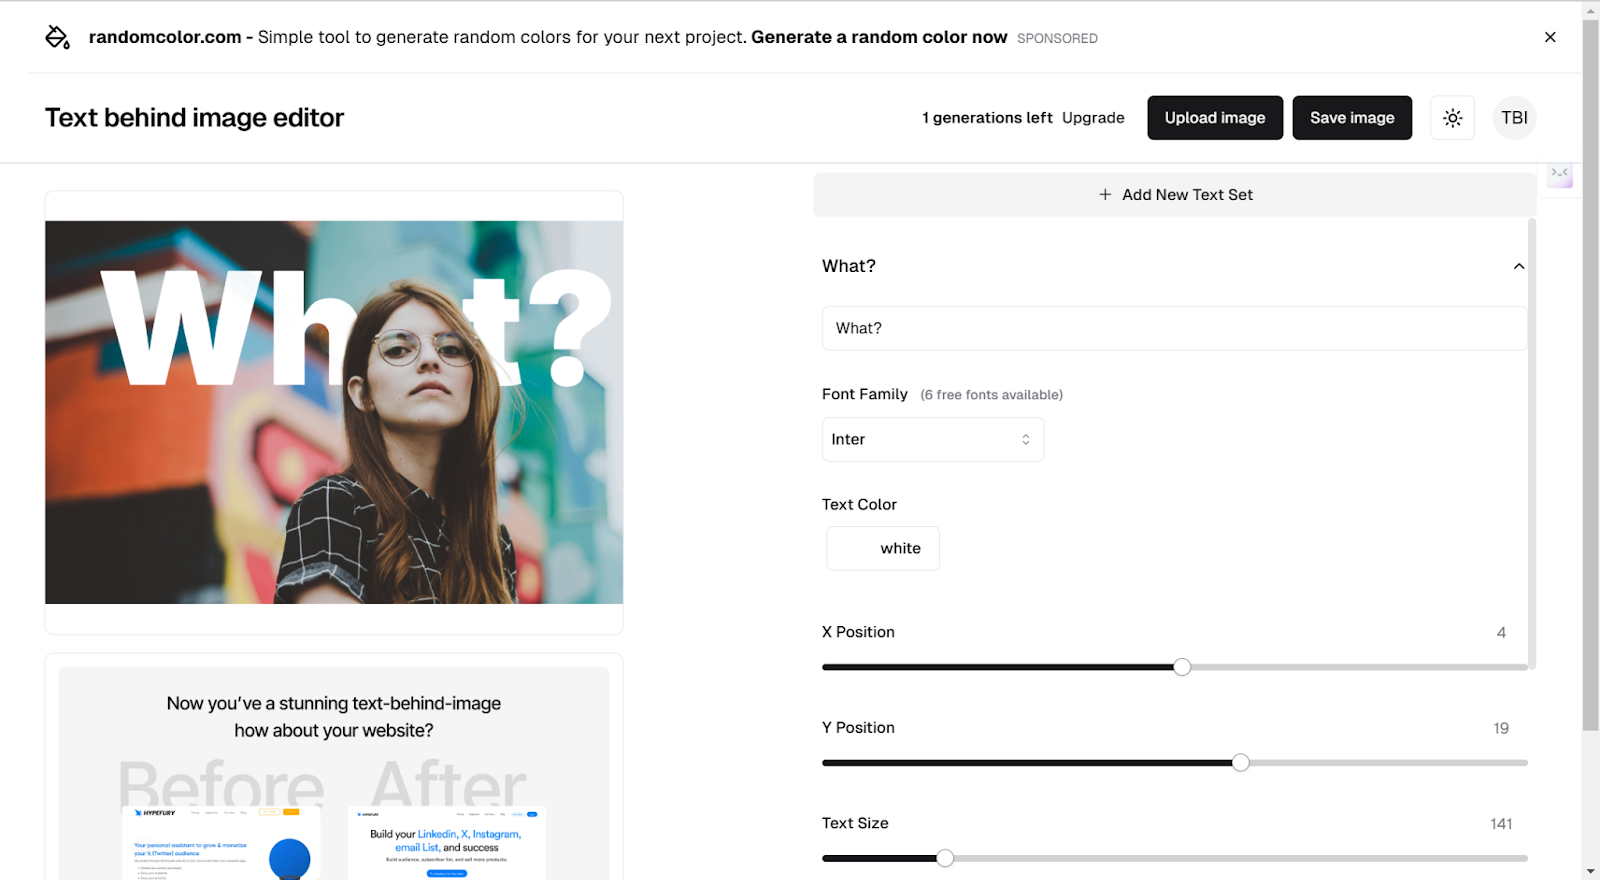
- You can change the font family, text color, position, and other parameters.
- After that, download and save the picture.
Canva
Canva is a well-known online design tool capable of providing strong and easy-to-administer tools. Concerning text behind image effect, Canva offers a comprehensive and varied font selection, from contemporary and clean sans-serif fonts to artistic and decorative fonts, to meet users’ requirements for a variety of text styles. Text smoothly combined with the image, achieving the visual effect of text behind the image with just drag and drop operation and layer management and generating a layered and eye-catching design.
Meanwhile, Canva also supports all kinds of detailed adjustments to text and images, such as color, transparency, size, position, etc. Fine design optimization can be carried out based on creative ideas to develop high-quality, individual, and novel design works.
How to Use:
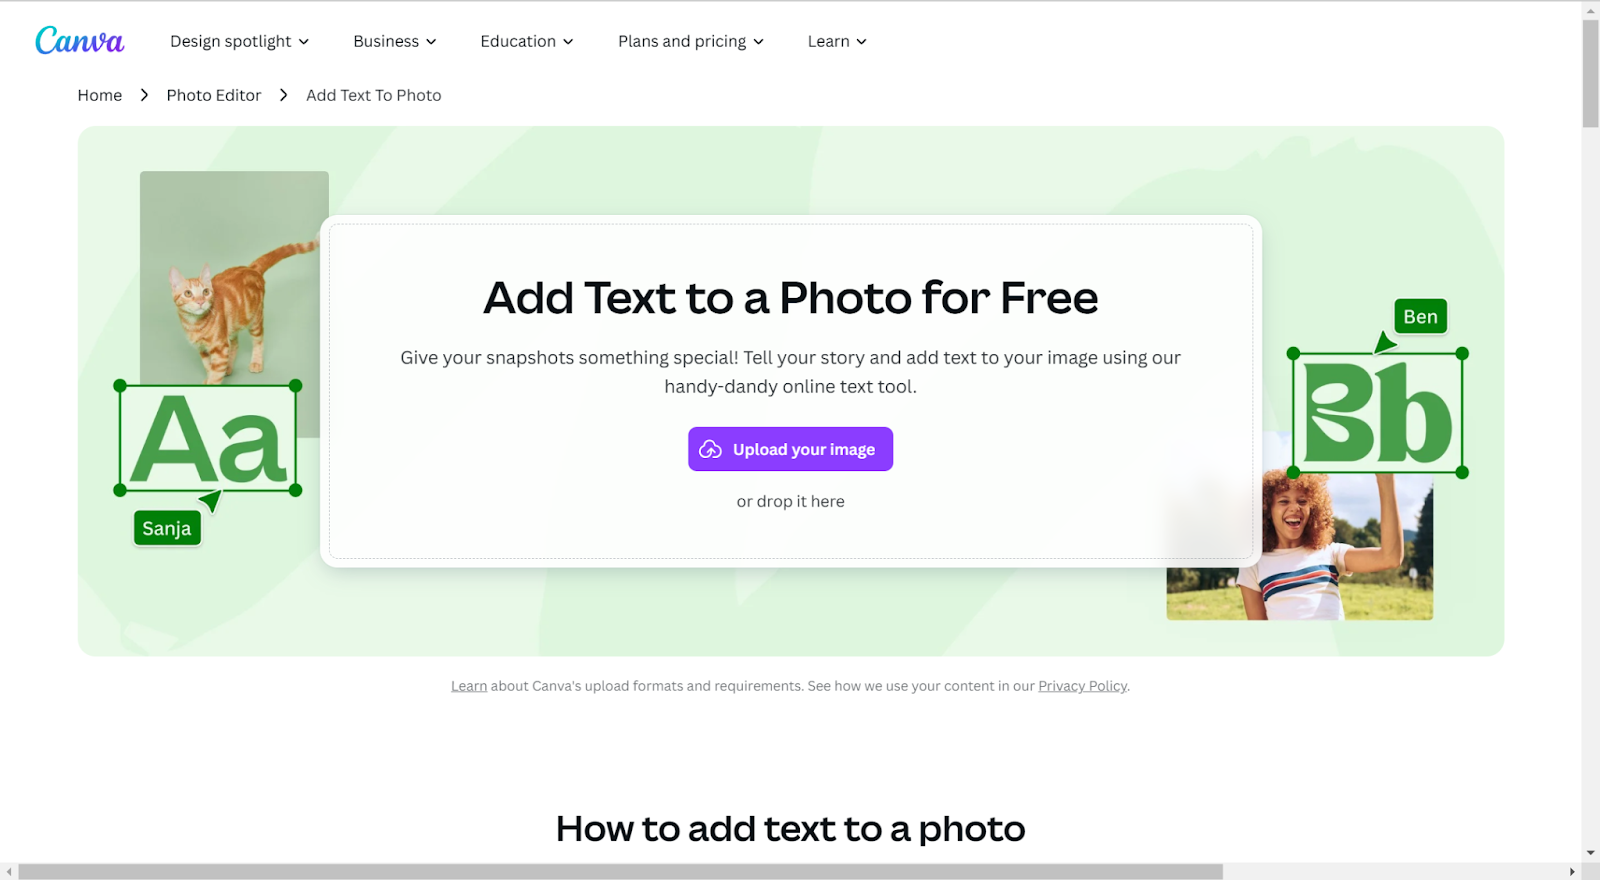
- Click on the Upload your image to upload the picture or you can drag and drop it to the area.
- On the platform, you can add text or choose from various templates.
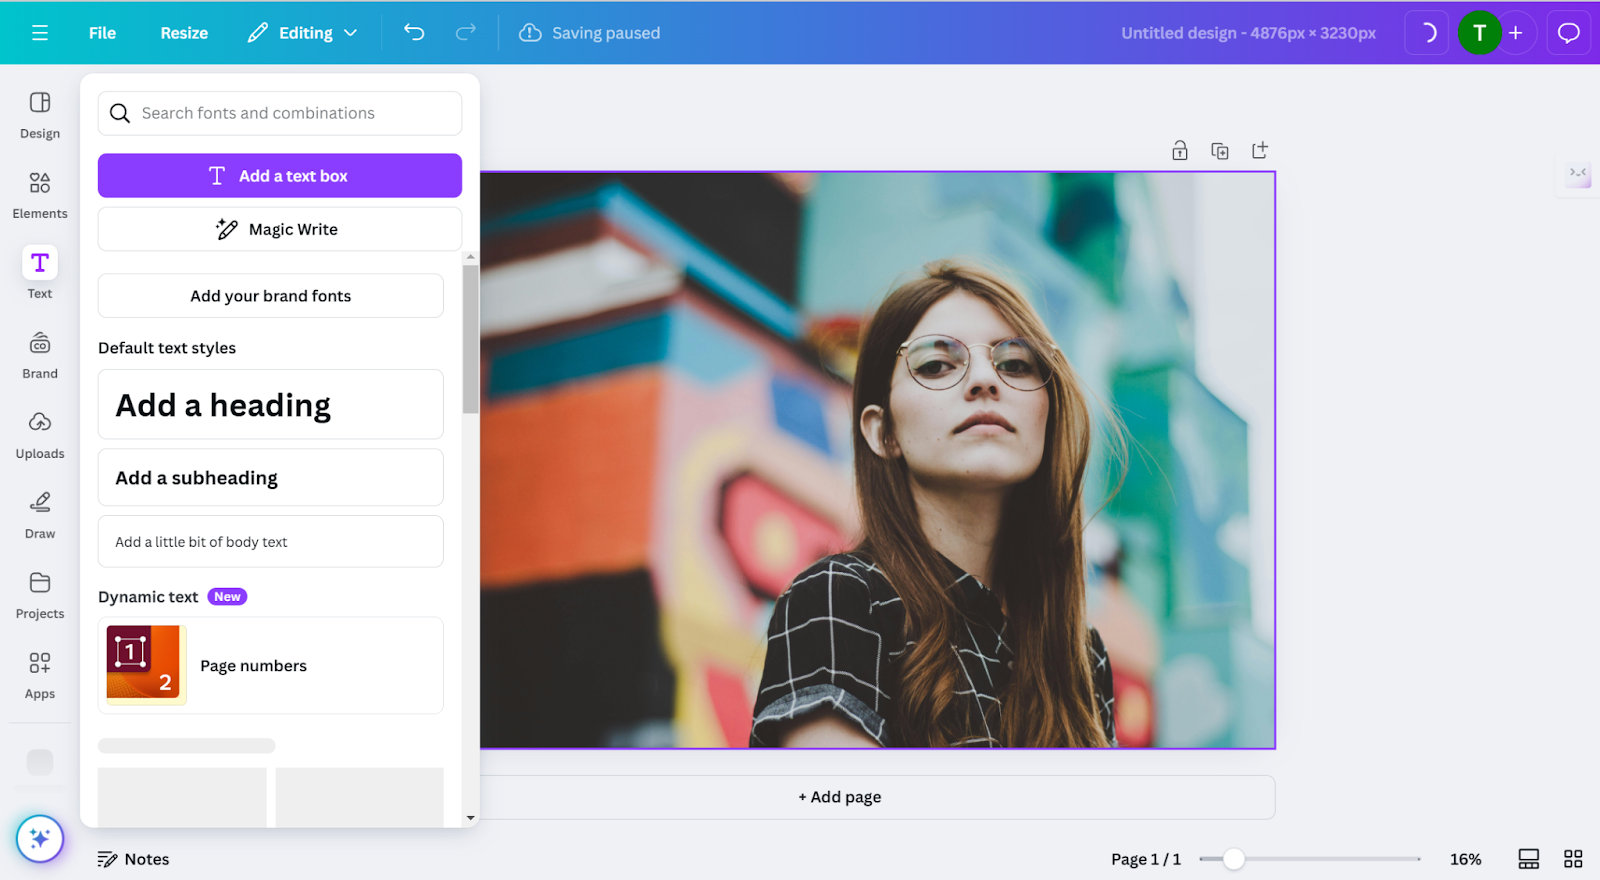
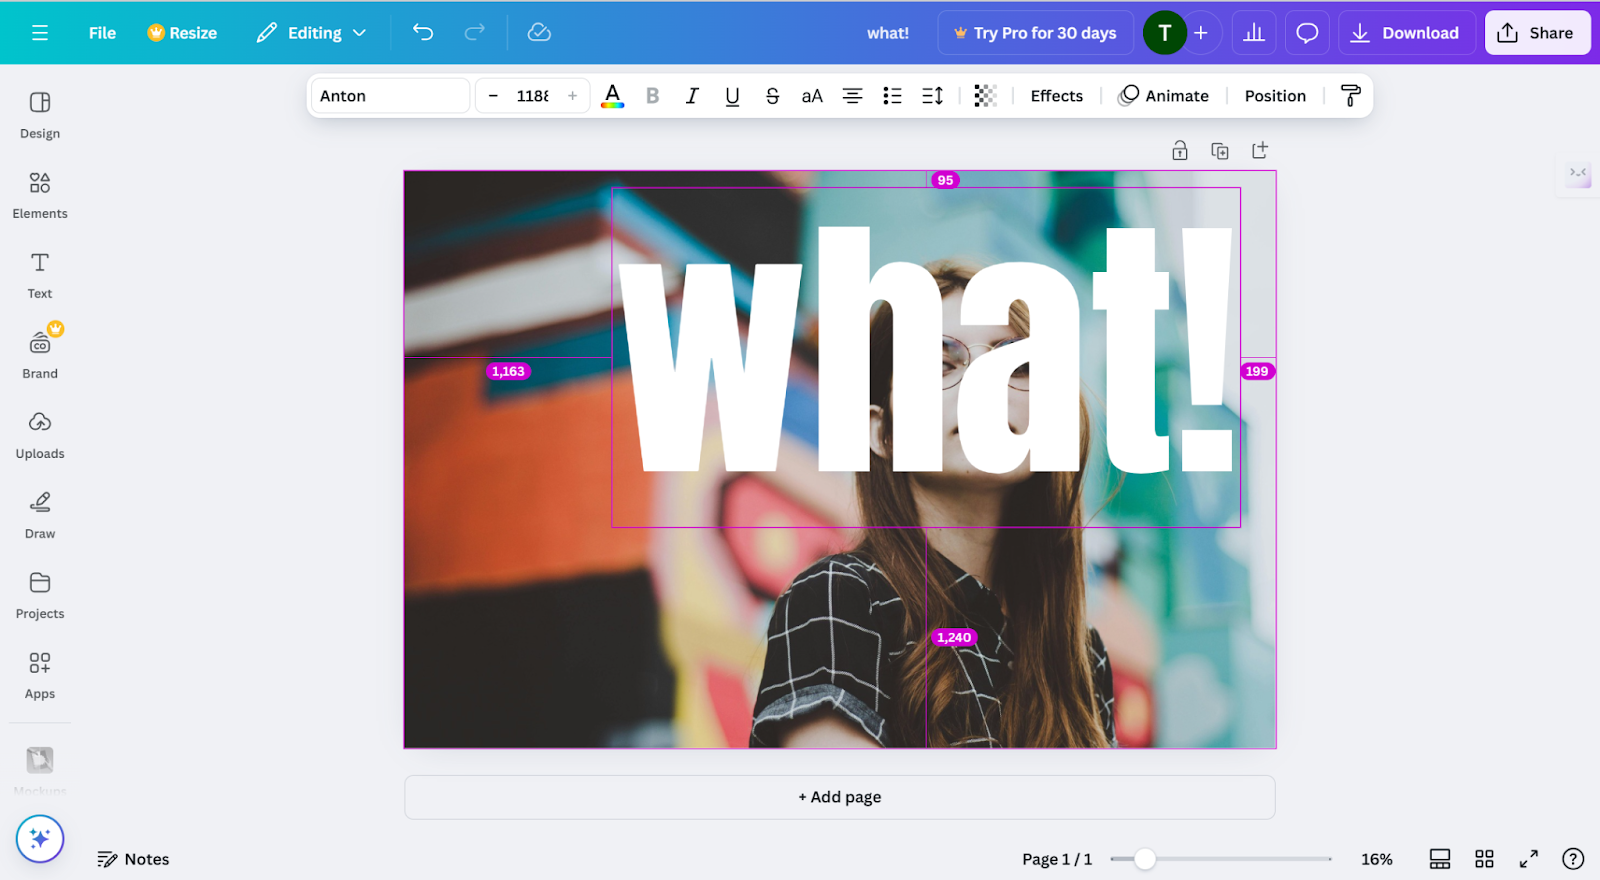
- Adjust the position of the added text and its size, font, color, etc.
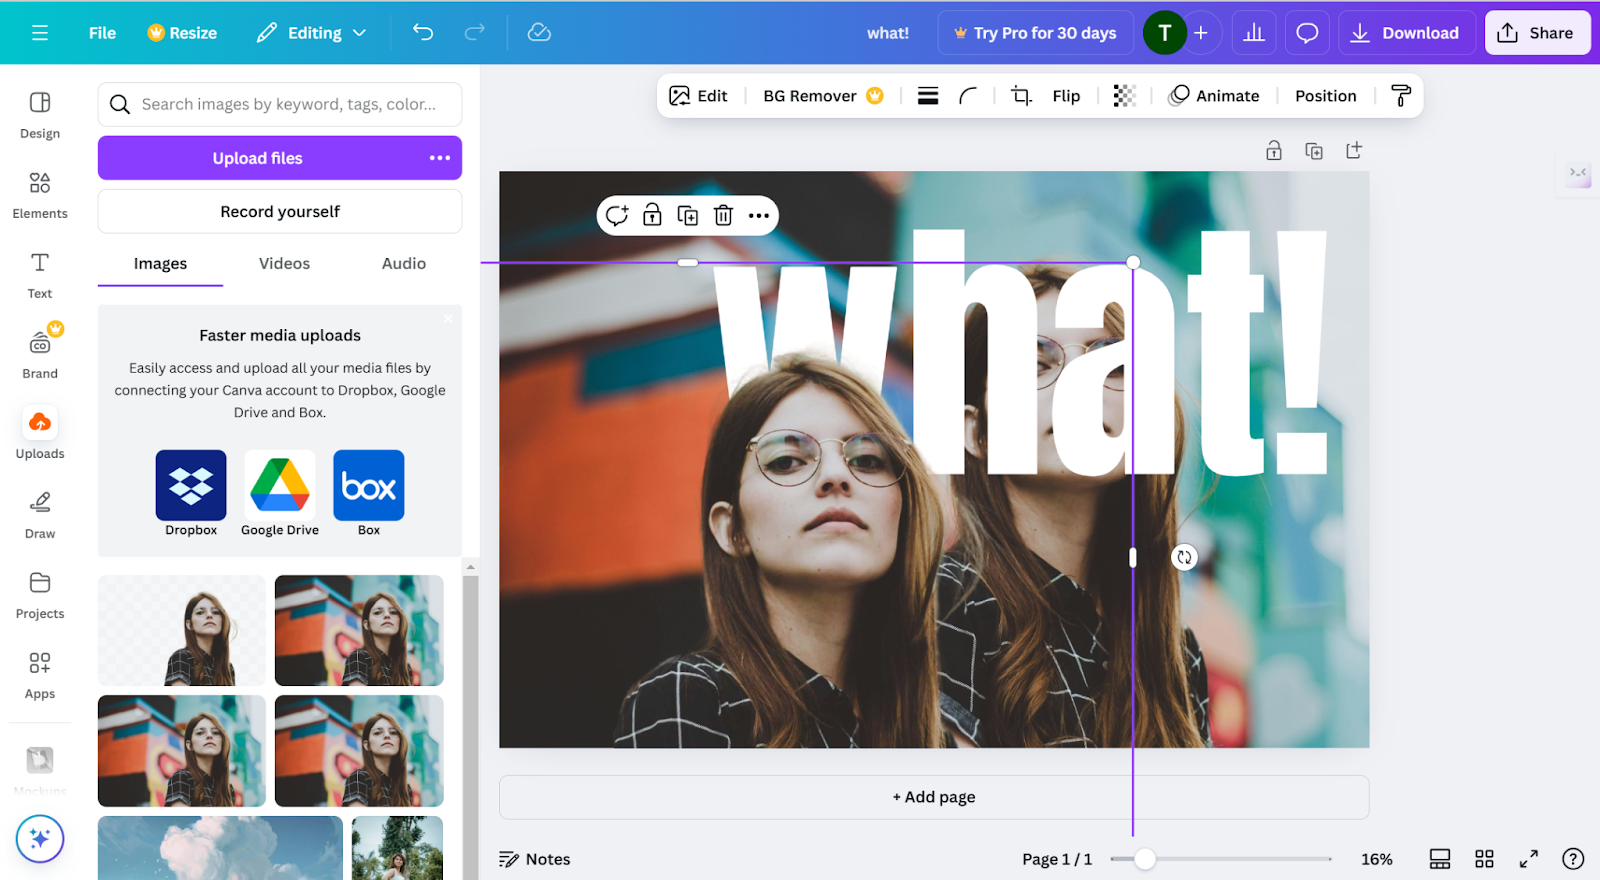
- Upload a duplicated image with background removed. You can use Canva’s BG remover (it is not free), or you can use a free tool like AiPassportPhotos Background Remover to cut out the background.
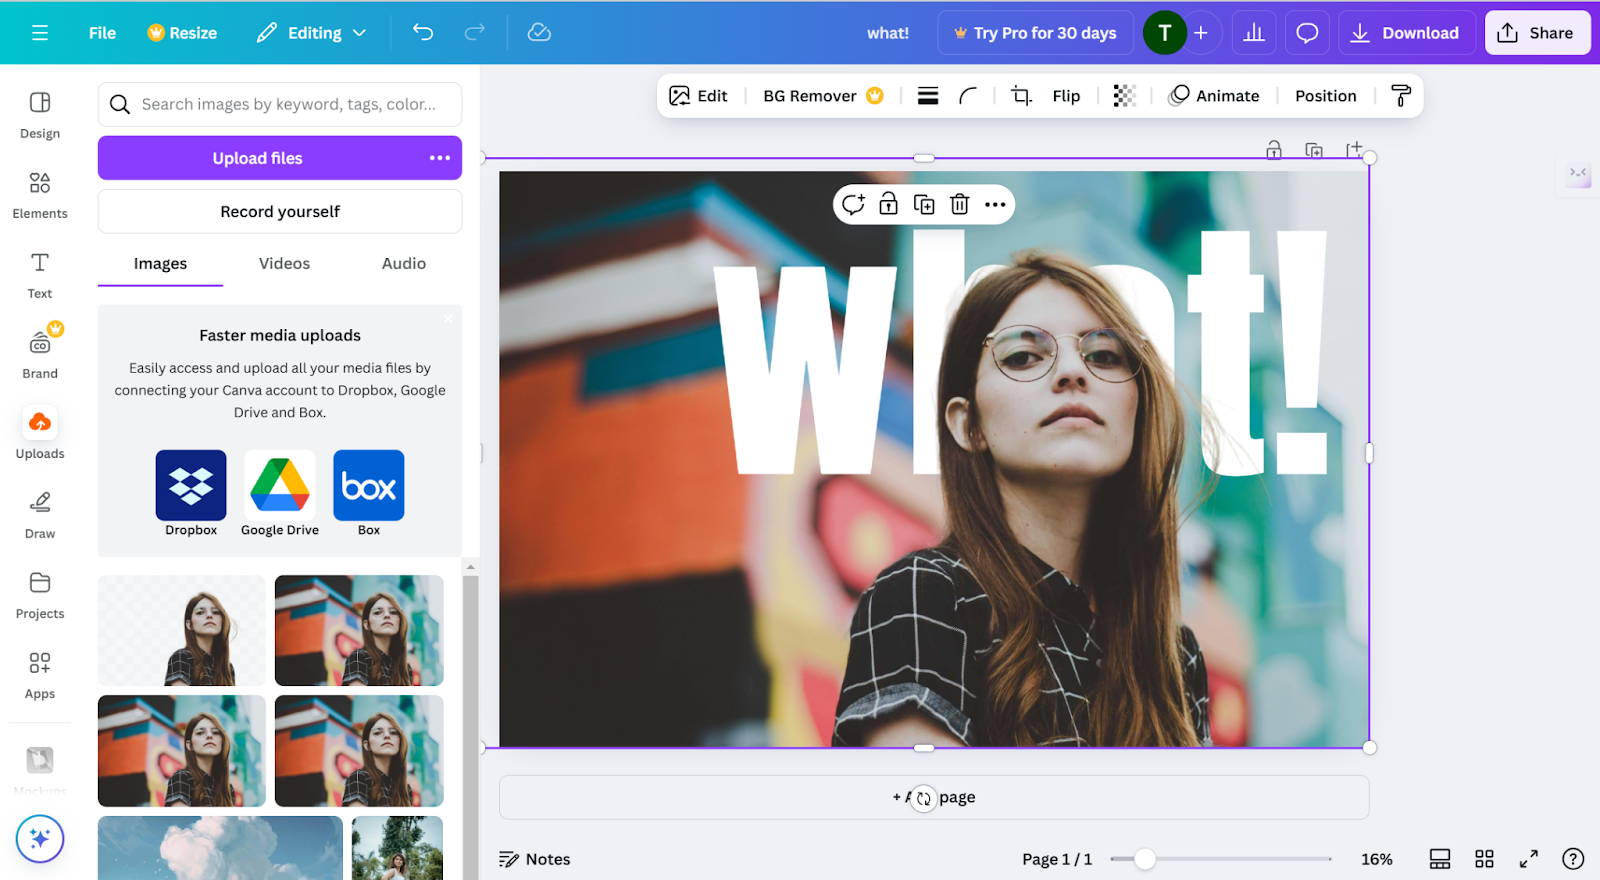
- Put the background removed image in front of the text by right clicking it, to make the presentation like text behind the image.
- If you are satisfied, download the picture to your computer, or you can share it directly with your friends from social media.
FlexClip
FlexClip provides a rich AI Image Generator capable of producing first-class images only by specifying a textual description. It provides artistic styles such as 3D, cartoon, and realistic effects and satisfies different purposes such as avatars, illustrations, and product photos.
It can not directly add text behind image online, so you need to enter your text prompts to describe what you want to generate. Nonetheless, two credits are required for one generation, and all of them depend on your description, so the outcome is not always good.
How to Use:
- Enter a detailed description of the image you want to create, e.g., a text of “I Love You” behind the two couples marrying spot.
- Choose your preferred art style and aspect ratio, then let the AI process your input.
- Once the image is generated, download it in high quality or share it directly.
Watermarkly
As the name suggests, Watermarkly offers an intuitive online tool to add text to images for free. While primarily designed for watermarking, its versatile features make it suitable for creating text-behind-image effects.
Providing up to 926 fonts, 90+ colors, and 39 effects, you can tailor text style for perfect integration with your image. Further tools such as multiline text, logo embedding, and position change give the designer possibilities for different designs. The output is kept clean following export, free of extraneous logos or text from the app, resulting in high-quality results.
How to Use:
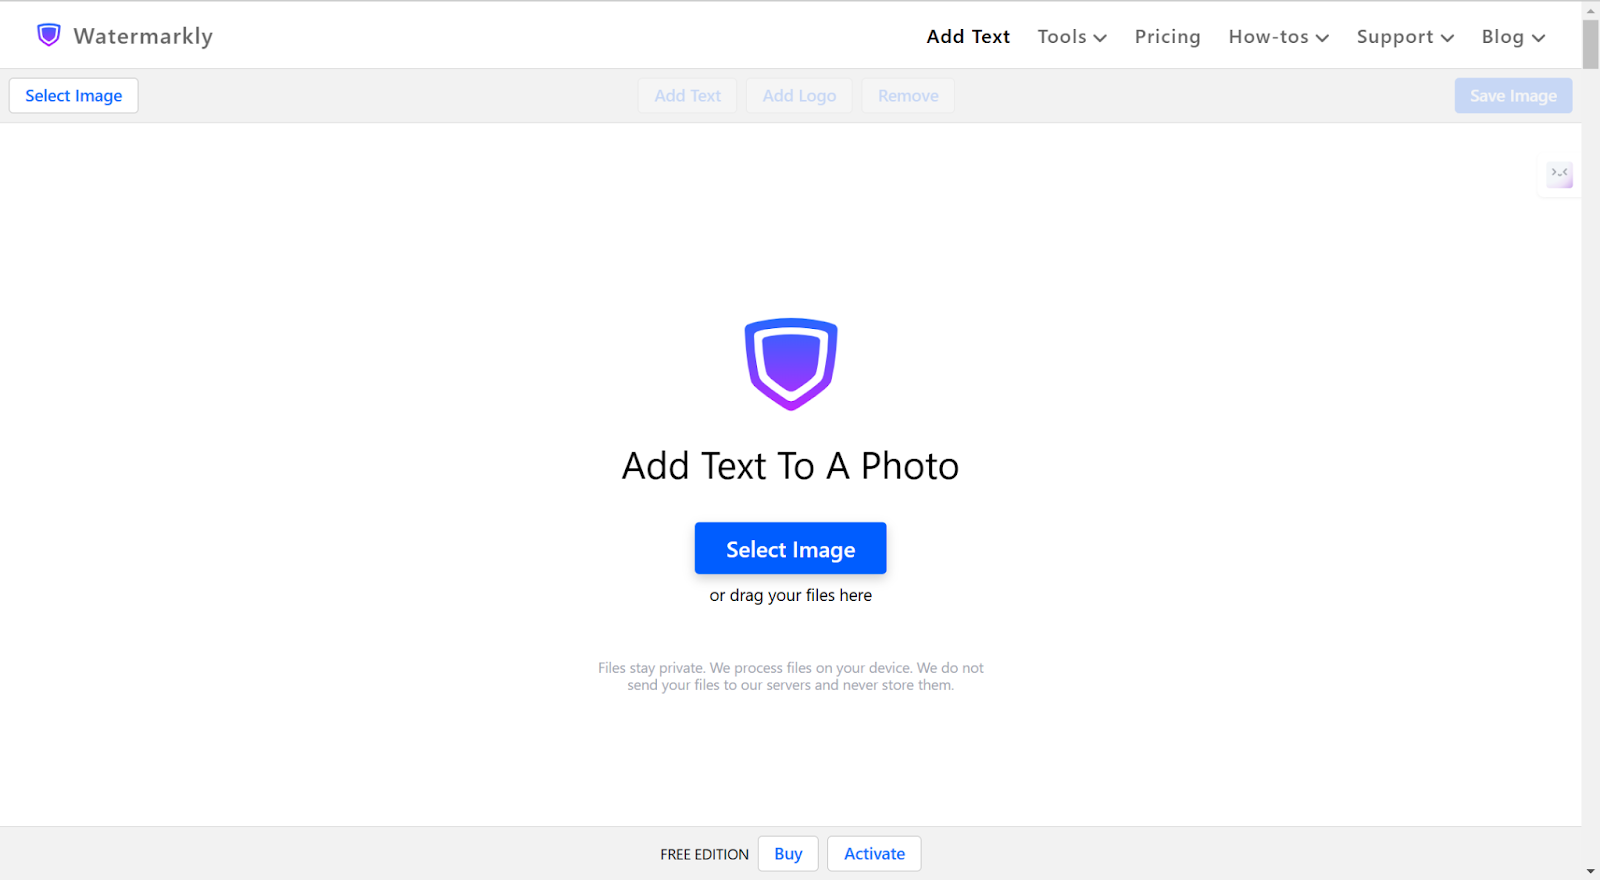
- Click on the Select Image to upload your picture.
- You can add text or add a logo by clicking the two respective buttons.
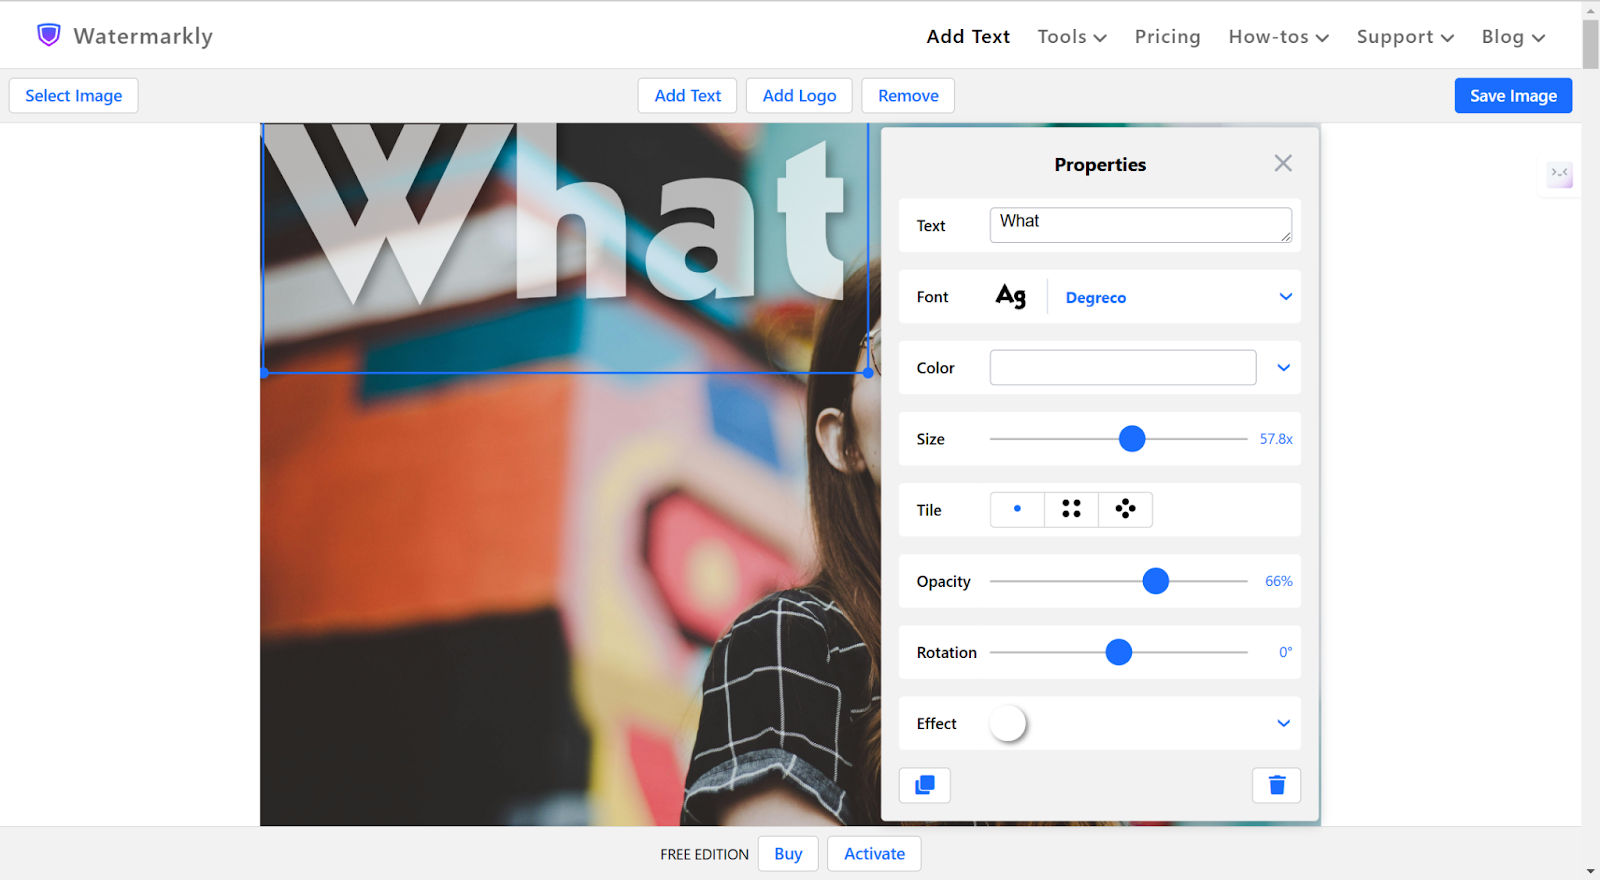
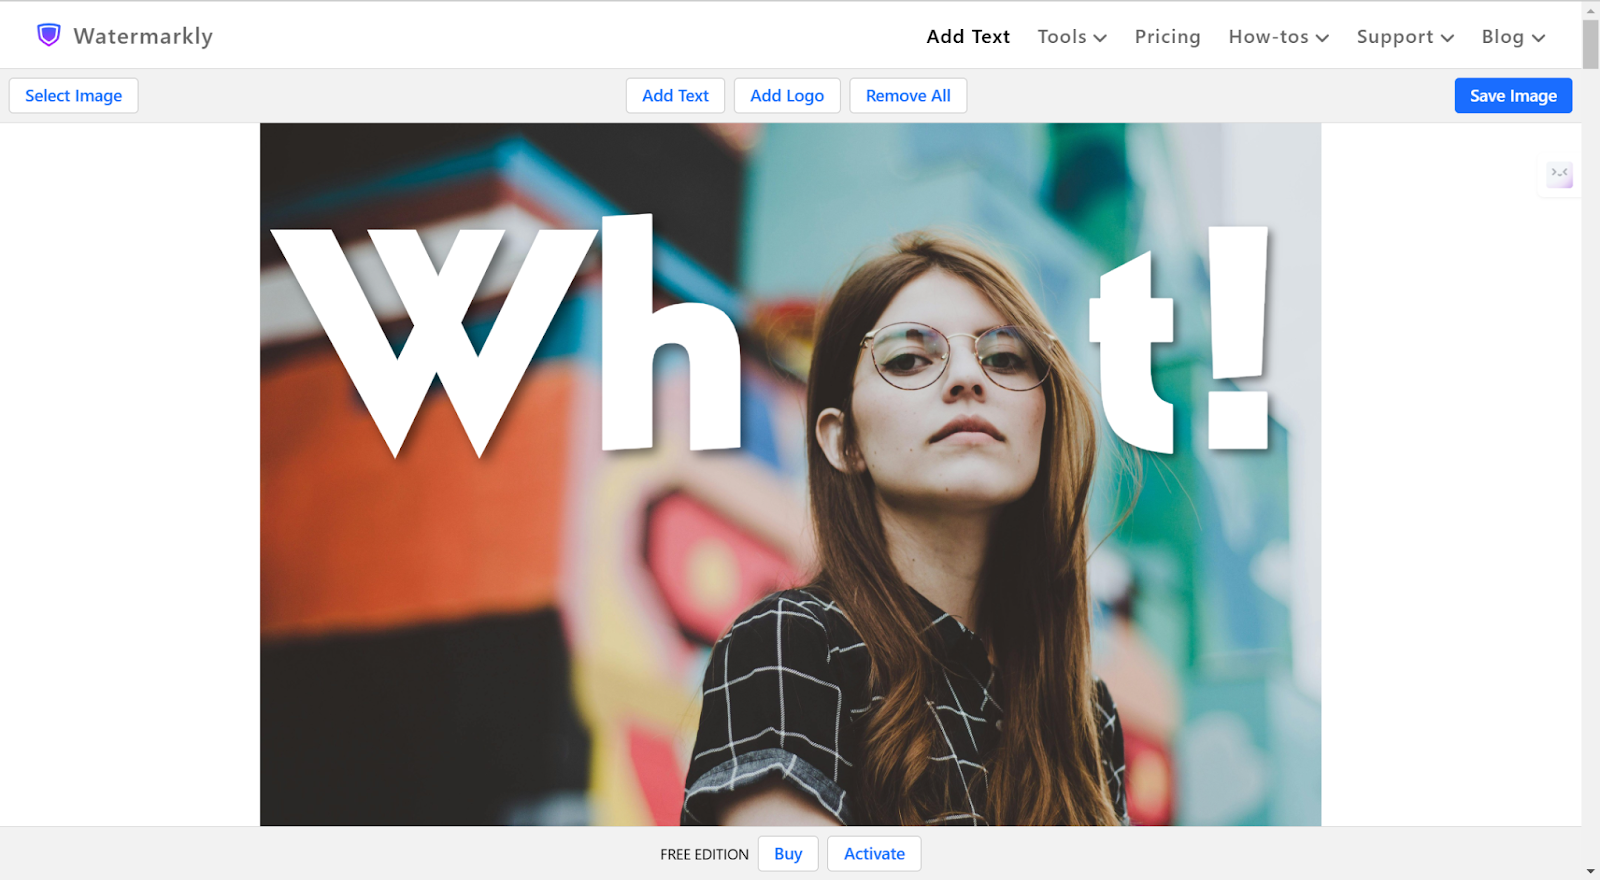
- Originally, it cannot put the text behind the image like Rexanwong and Canva. Because it does not have the layer feature. But, you can add two text boxes of words to achieve this effect, as long as you put them in the right position.
- After you add the words, in the parameter settings, change the settings with font, size, position, etc.
Photoroom
Photoroom is a flexible and easy-to-use online photo editing tool that can add text behind photos easily, providing a novel and creative approach to photo design. This feature lets you place text behind parts of the image, creating a layered effect where the text appears subtly integrated with the photo. You can freely adjust the font, size, color, and opacities of the text in your graphic design, making it ideal for social media, branding, and individual projects.
Using Photoroom, image enhancement can be done instantly by repositioning the text so that it remains in line with the image but looks polished i.e. The tool also includes background removal, image retouching, and many other tools, so it is perfect for content creators and businesses who want to visually enhance their content effortlessly.
How to Use:
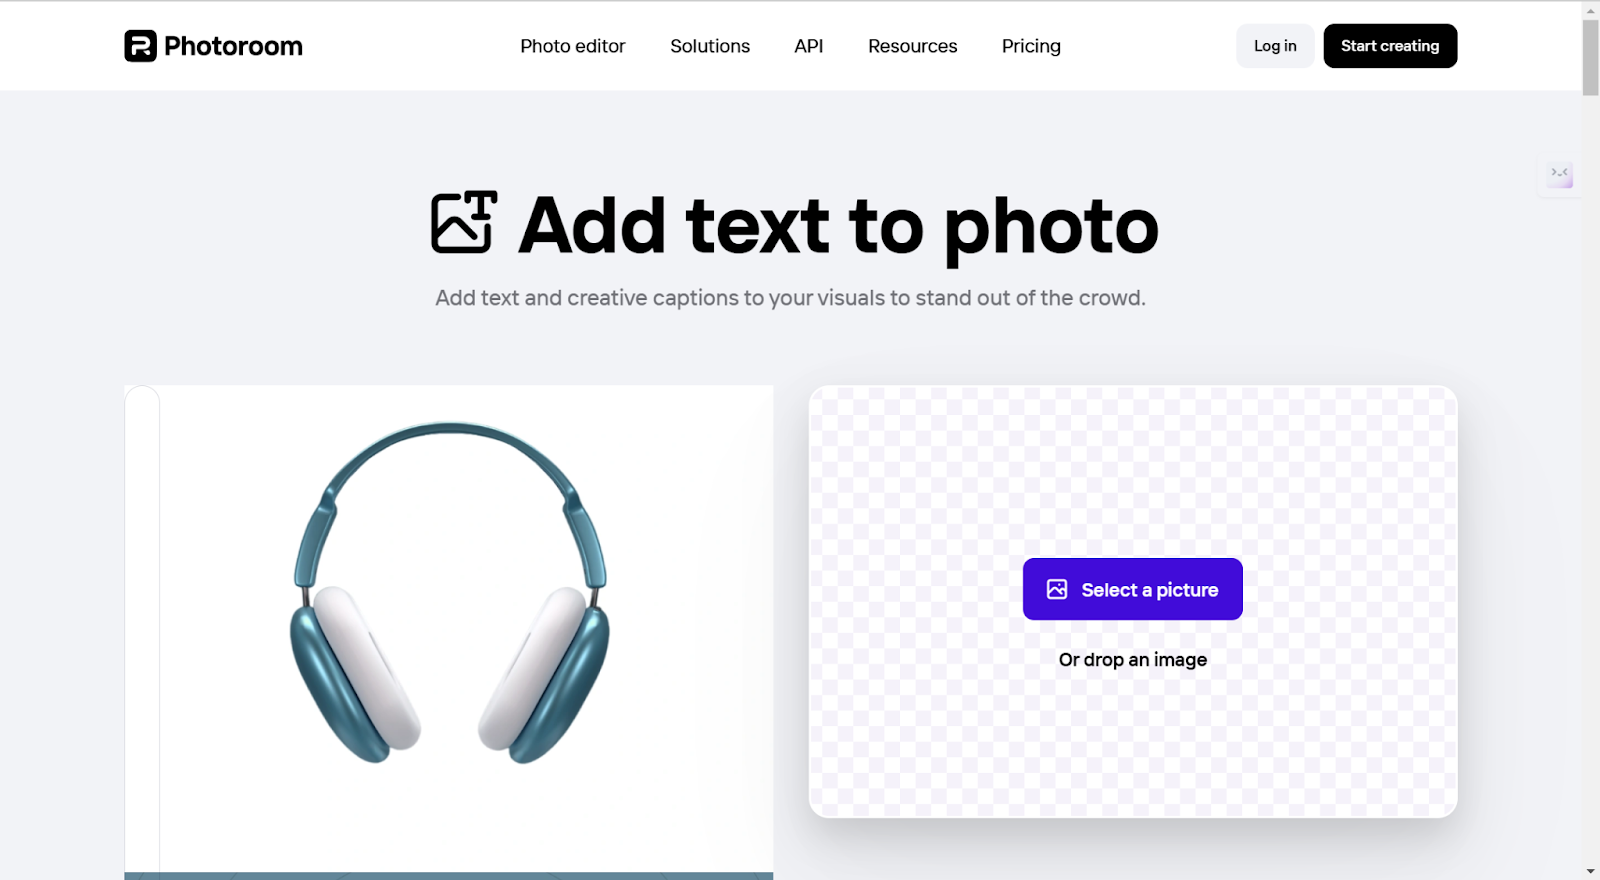
- Upload your picture it will automatically remove the background and change it to white.
- Choose from various styles or just enter plain words.
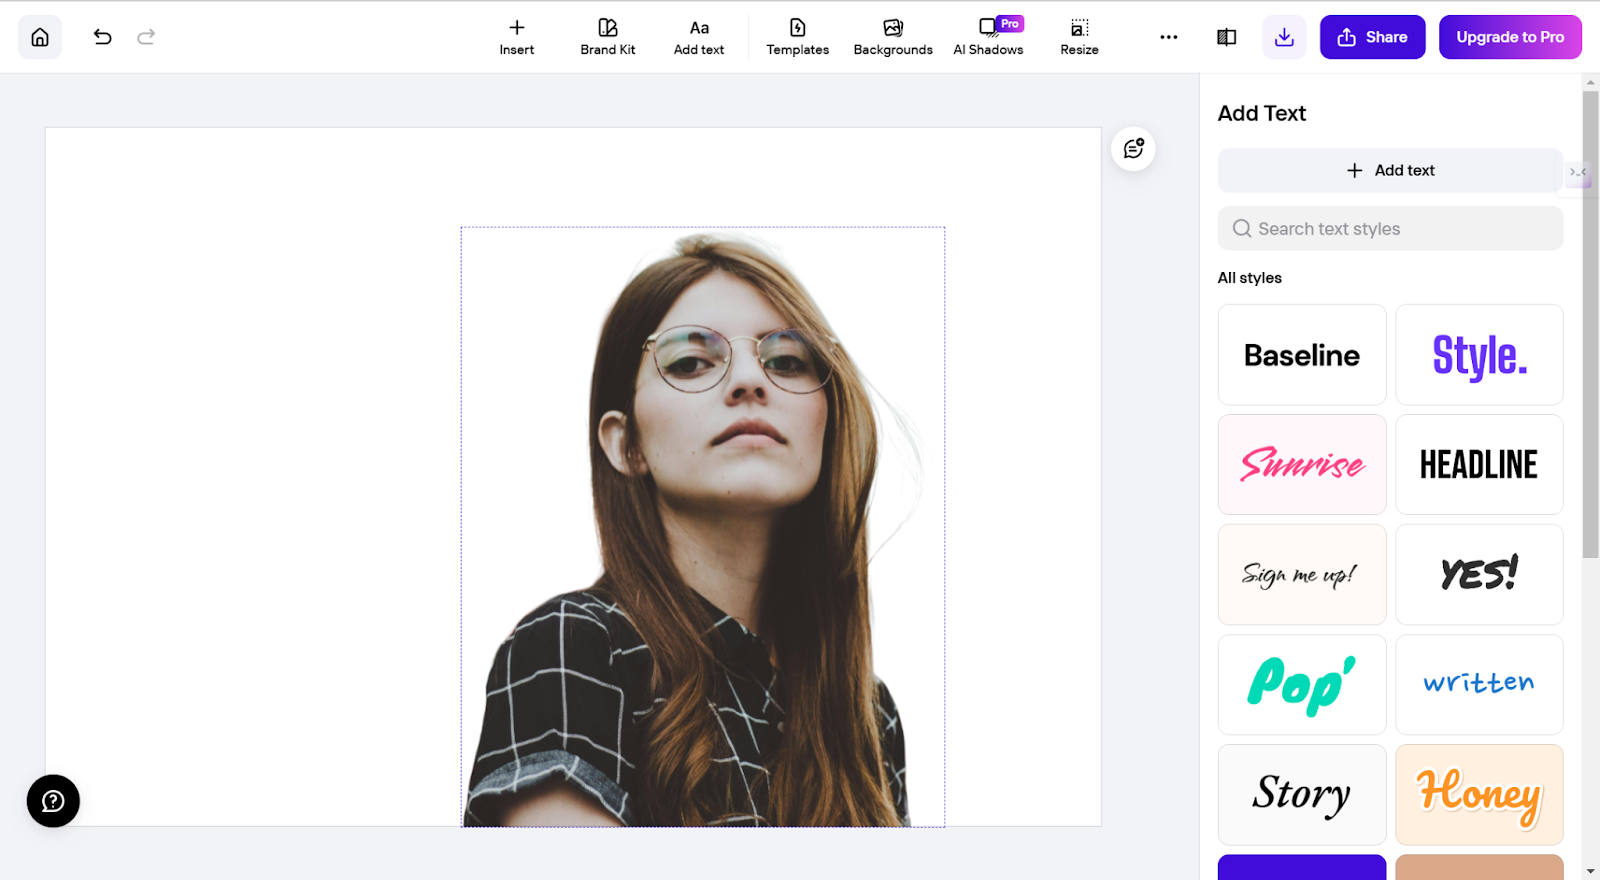
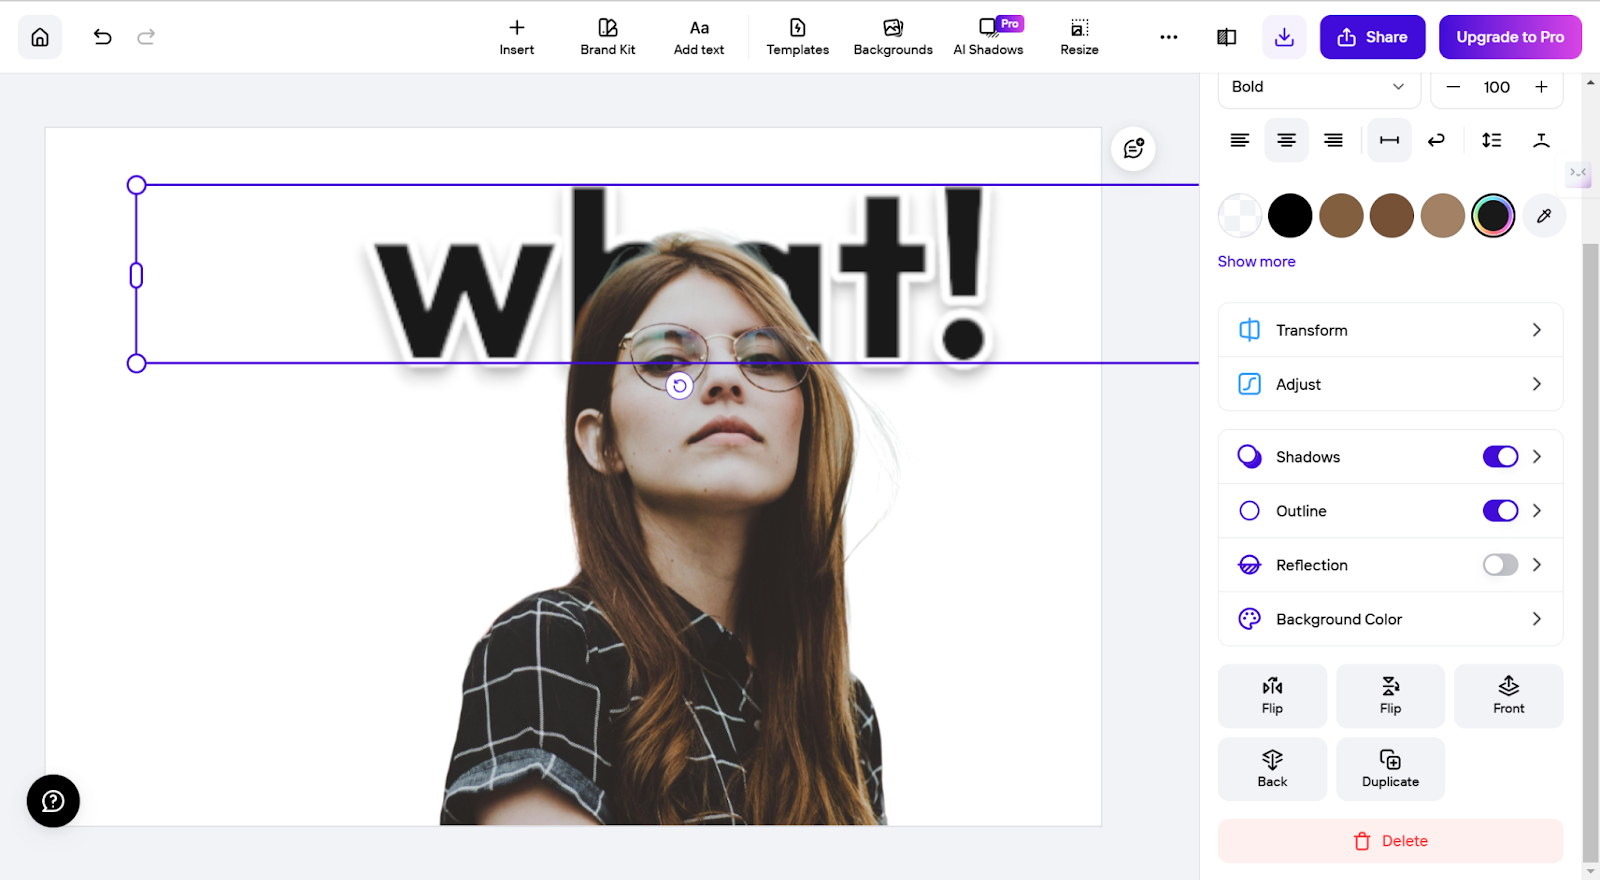
- Adjust the color, size, font, and more in the control panel. Click Back to put the text behind the image. Make it the proper position to look better.
- After that, you can download the picture.
How to Place Text Behind Image With Powerpoint
In PowerPoint, placing text behind an image is a great way to create a visually appealing design that integrates both elements seamlessly. Follow these simple steps to achieve this effect:
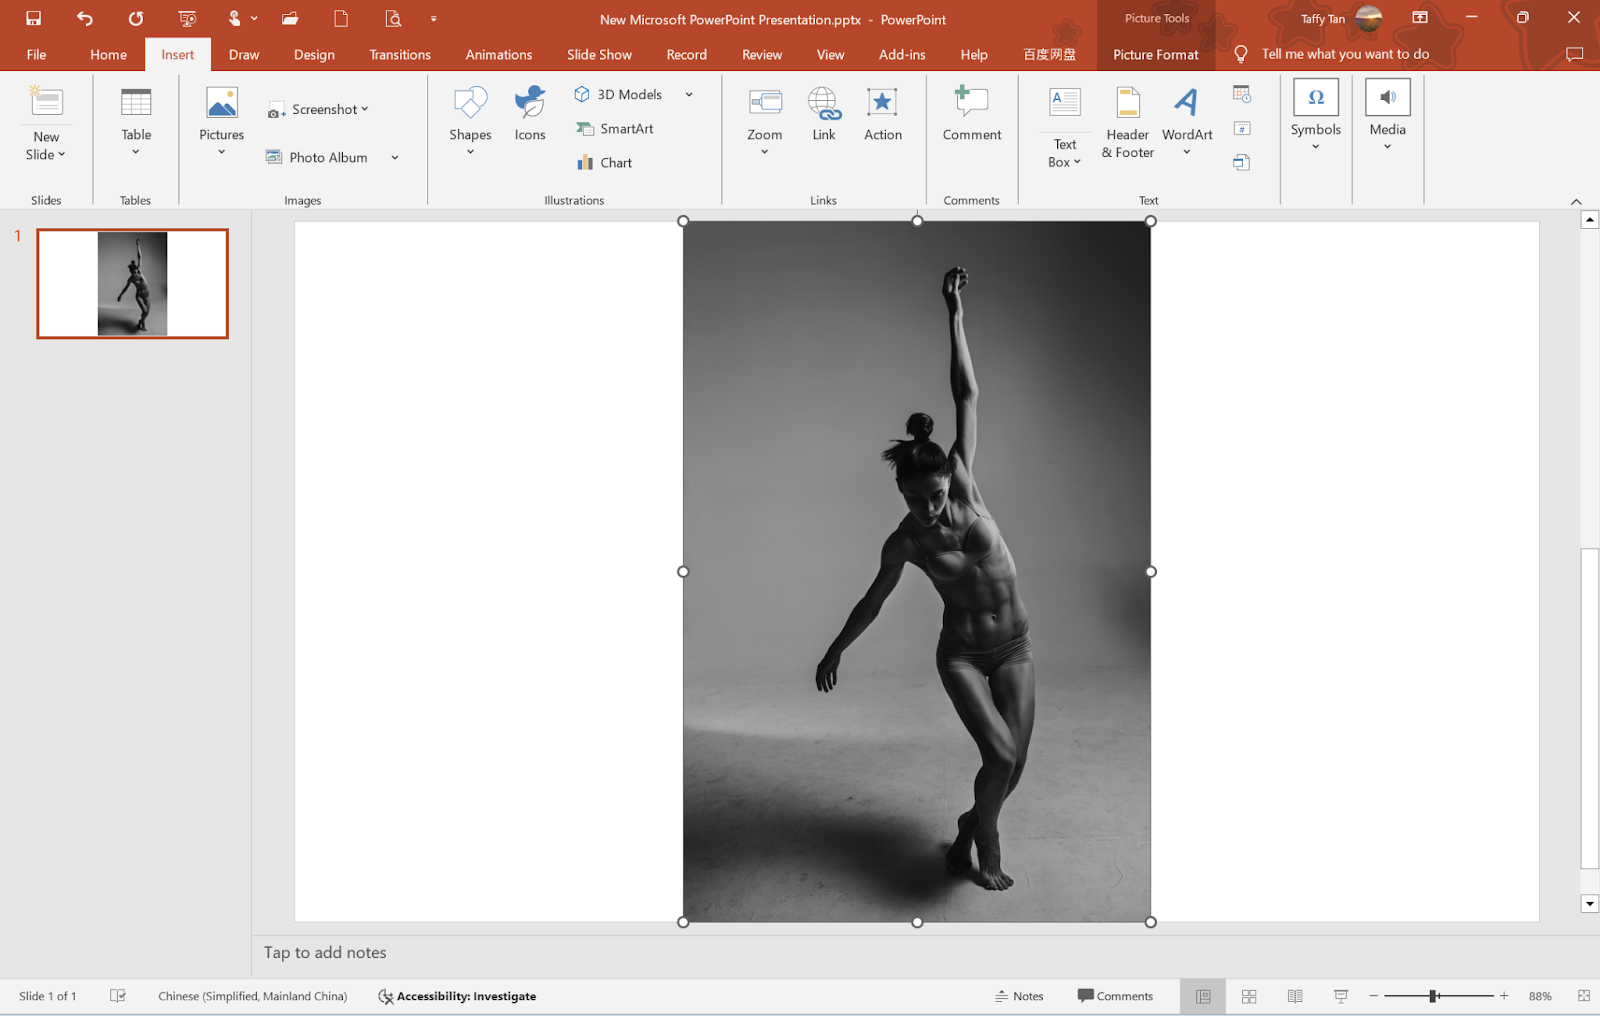
Step 1: Insert Your Image
Choose an image with marked contrast between the foreground (subject) and background, high resolution. Insert this image into your slide. You can scale it to the size you need to full screen, make it smaller, etc.
Step 2: Add Text
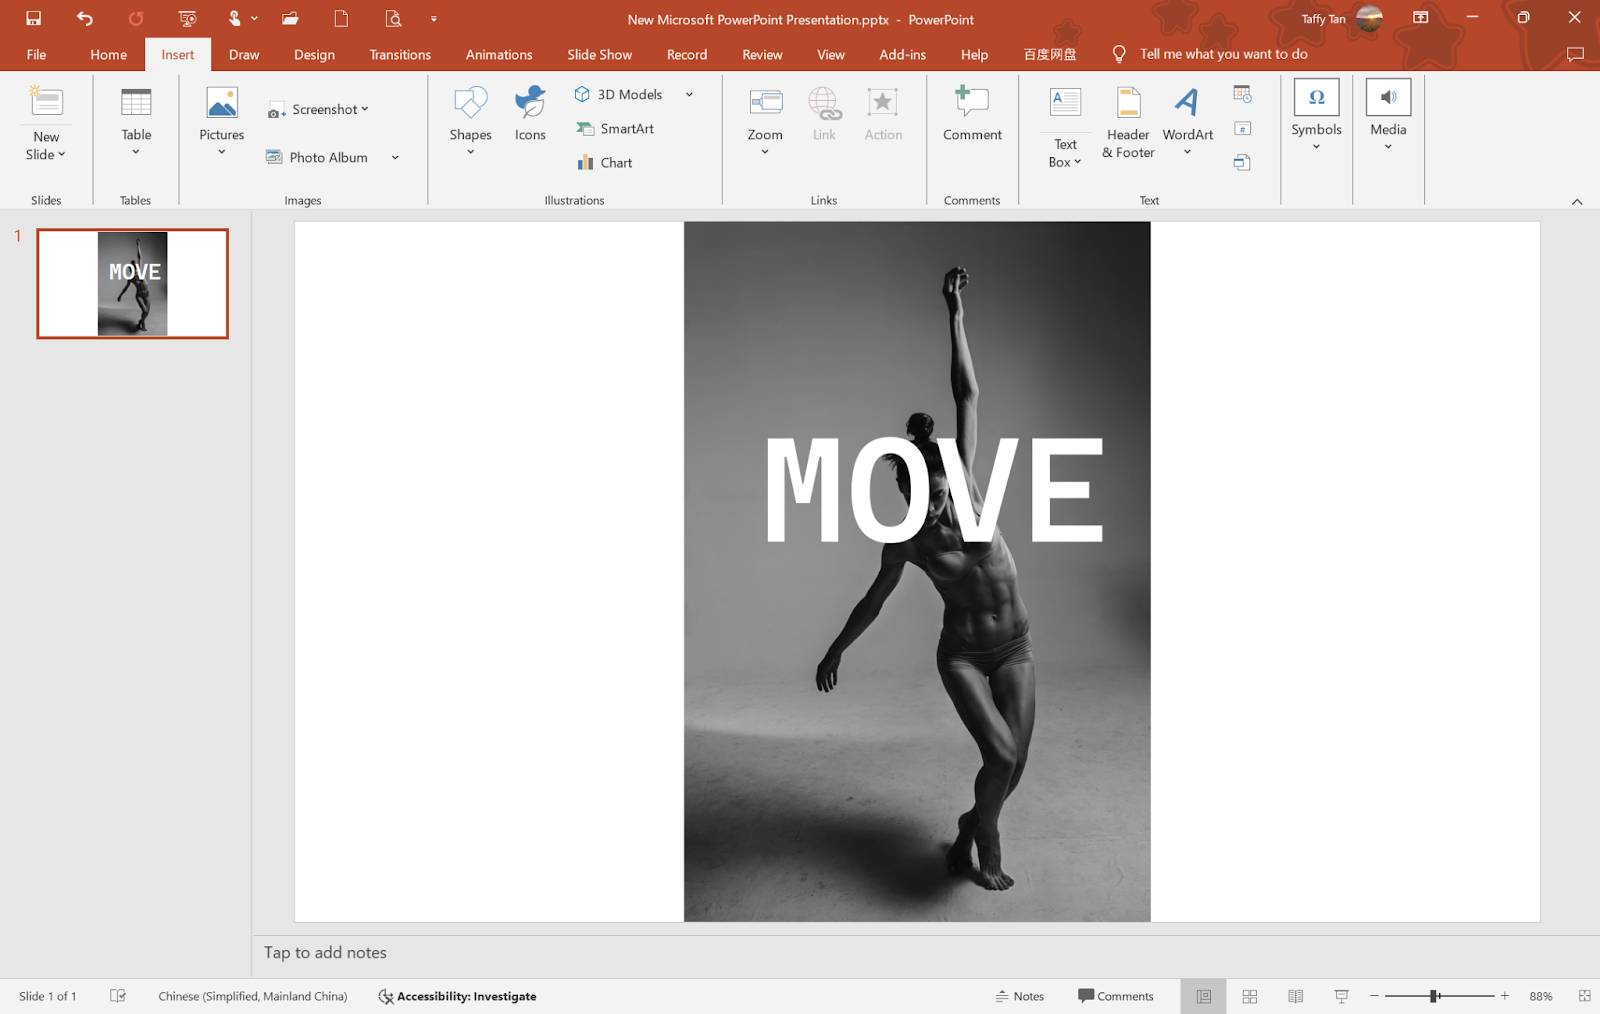
Place an empty text box then enter the words you wish to appear behind the image. Restricting the text to a few characters will achieve a clean and impactful aesthetic.
Place the text over the image, with the text overlapping the regions where you want the text to be ‘behind’ the image.
Step 3: Duplicate the Image & Remove the Background
To create the effect of text behind the image, duplicate the image you’ve just added.
Place the duplicate image on top of the text.
Now, select the duplicate image. Go to the Picture Format tab, then click on the Remove Background button.
PowerPoint will automatically recognise the background.
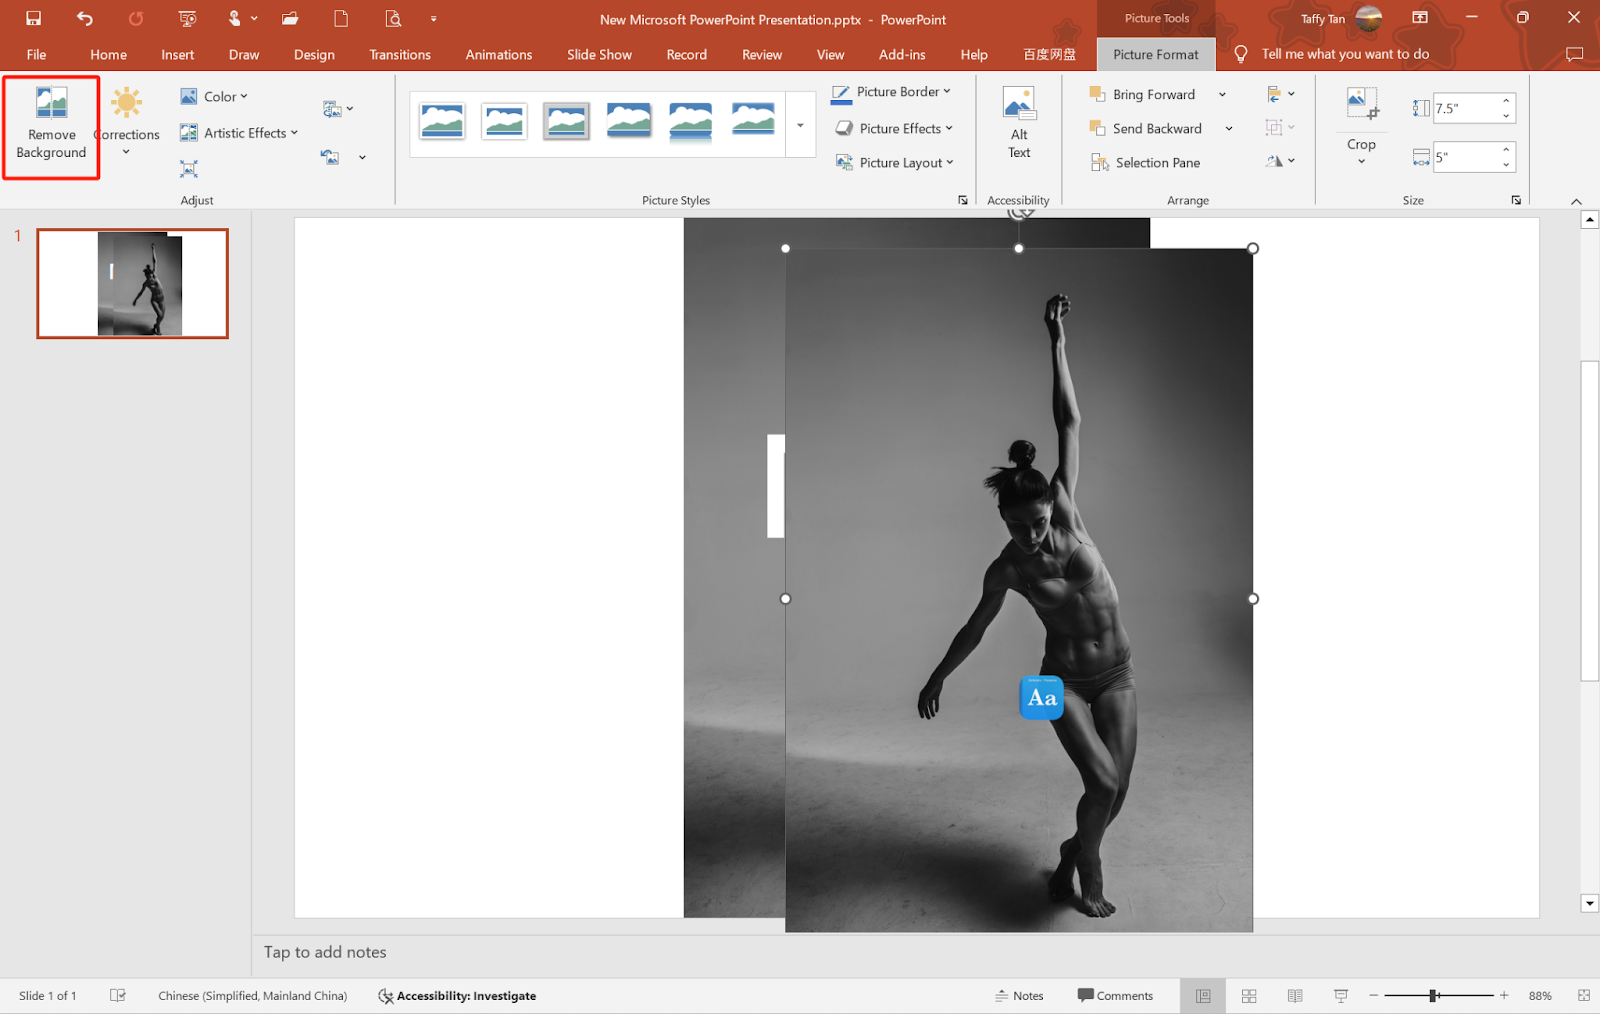
Step 4: Refine Background Removal
There will be an instance where the area in the image of background will be detected in purple and be deleted.
When that occurs, use the Mark Areas to Keep feature. Just drag the pen tool over the areas of the image that you wish to preserve, such as the finger in the image that should remain visible. Once you’re satisfied, click Keep Changes.
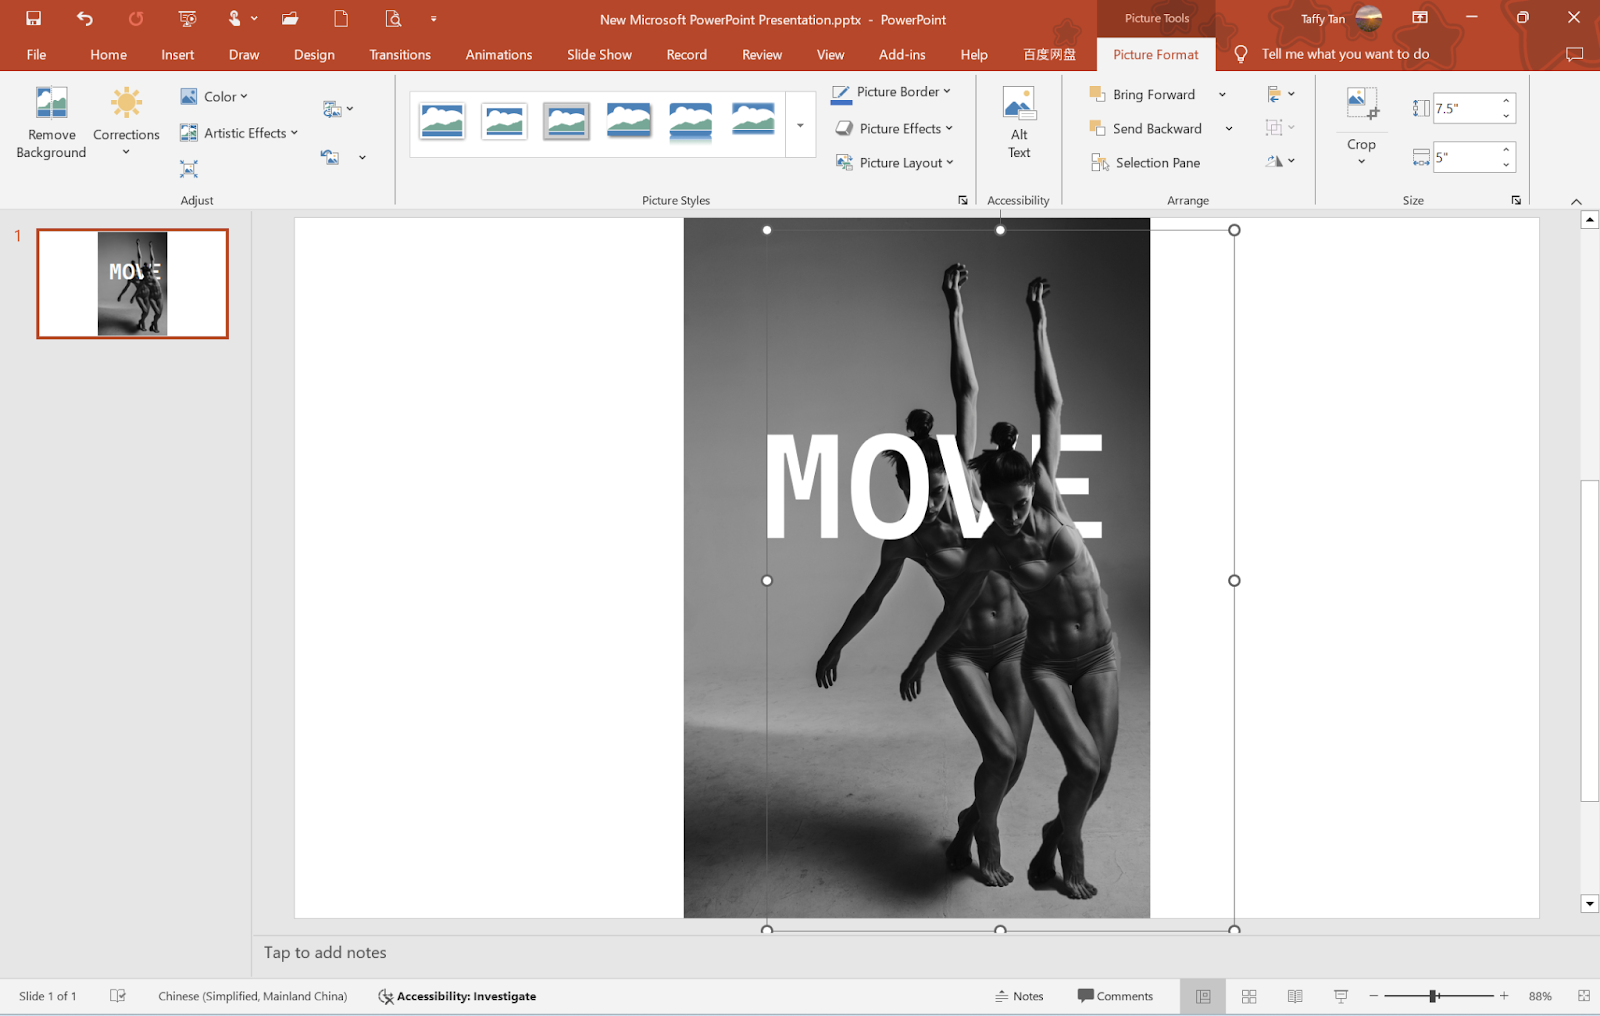
Step 5: Final Adjustments
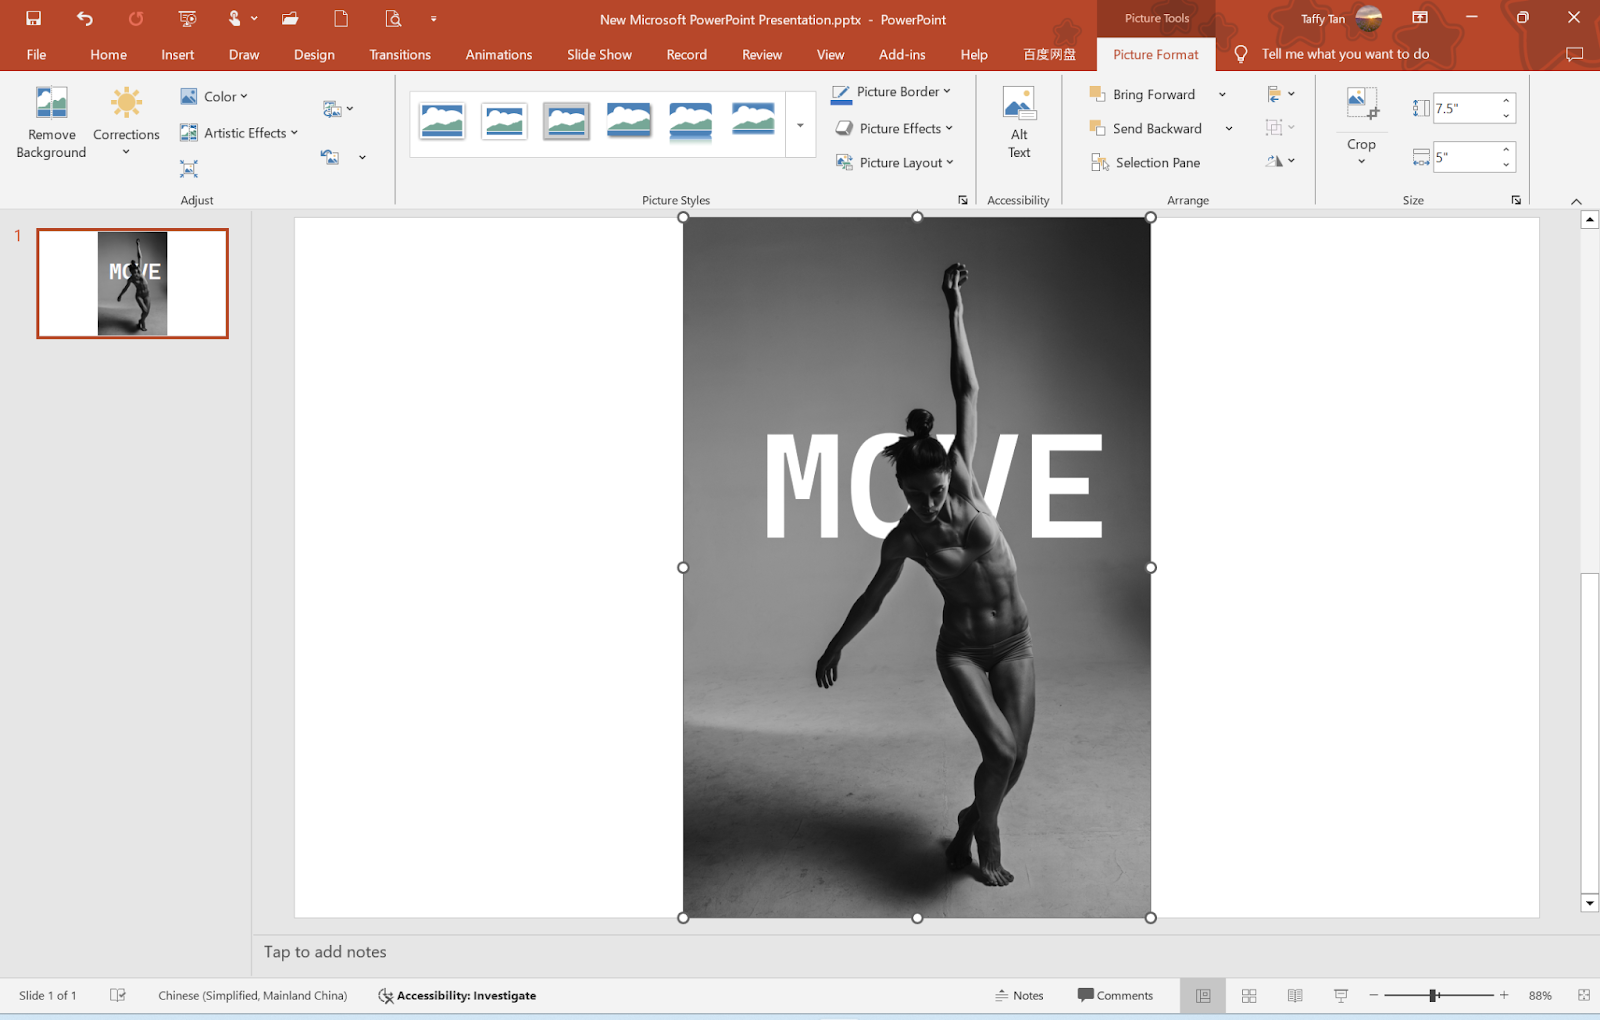
Put the background removed image on the top of the words and in full of the original image. You can now adjust the transparency, size, and position of the image to perfect the layering. The output is a visually attractive slide with your text discreetly superimposed below the image.
How to Put Text Behind Image With Photoshop
By using Photoshop, a very sophisticated graphic design application, you can make professional image manipulations, such as putting text behind an image. In this approach, with the help of layers, selection tools, and masking, You can complete the effect. Following are the procedures to attach text after a picture in Photoshop:
Step 1: Upload Your Image & Add Text
Launch Photoshop and open your image by dragging and dropping it into the program. Next, use the Text tool to add your desired text. Select a font and color to harmonize both with the image and the design as a whole. You now have a text layer that sits on top of the image.
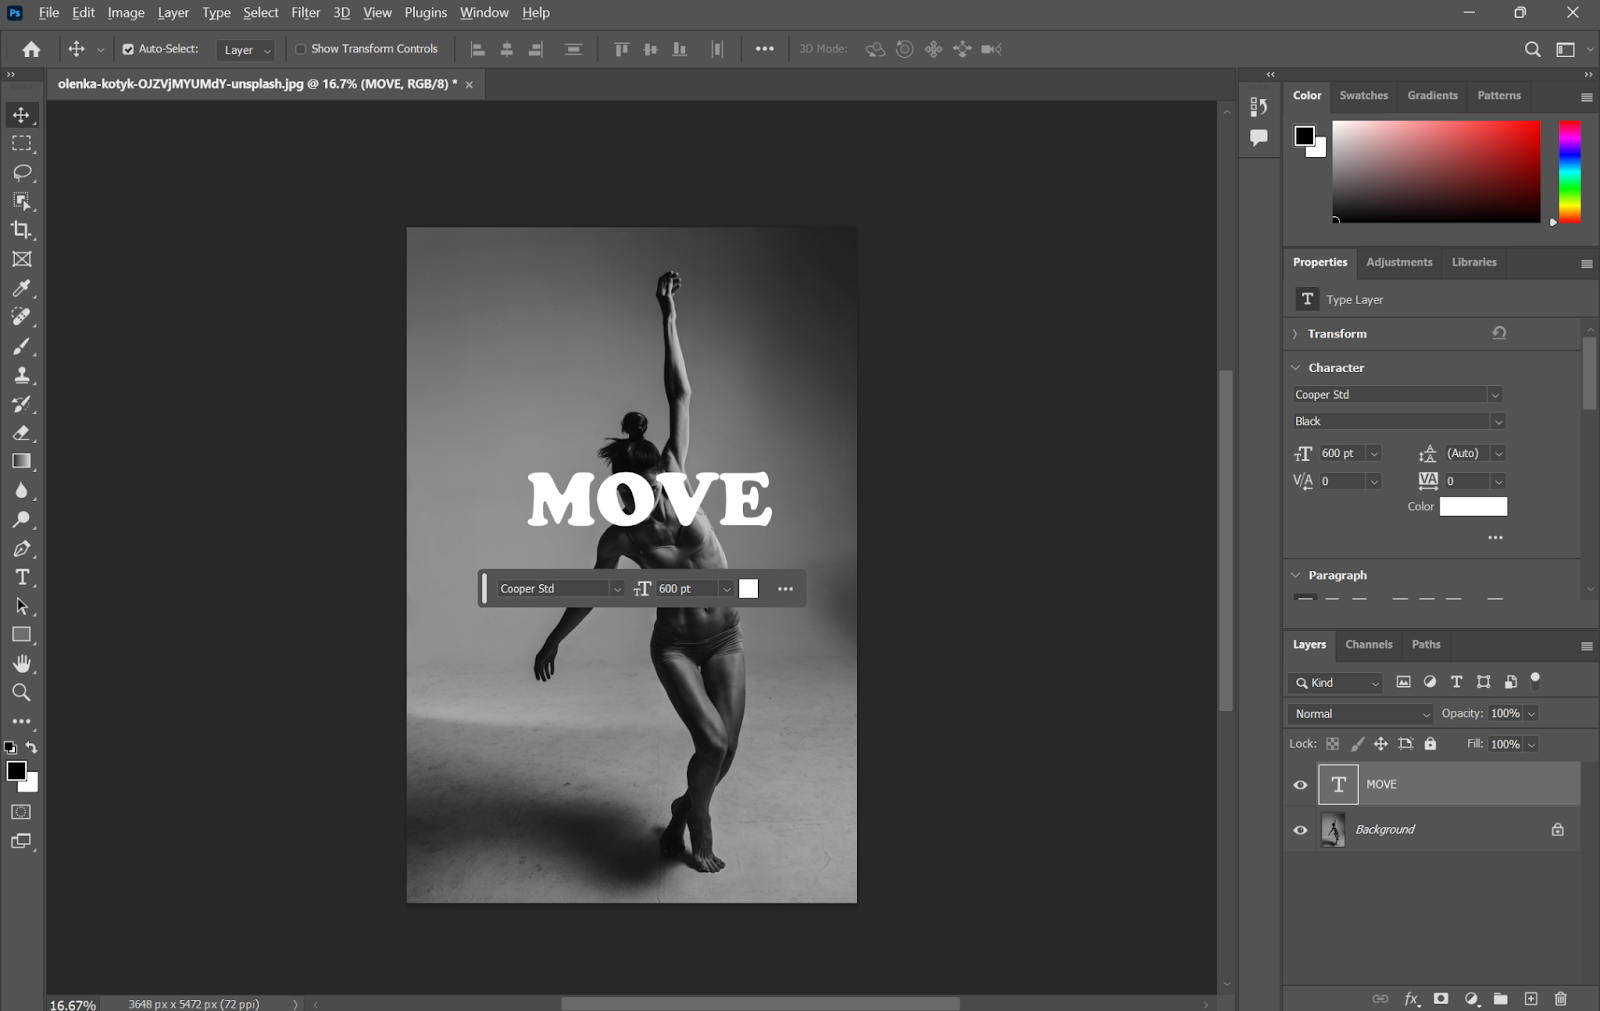
Step 2: Duplicate the Layer and Select the Main Object of the Image
Duplicate the layer.
To delimit the subject, go to the background layer and select the main figure by using the Lasso Tool or go to Selection Subject. Photoshop will automatically employ AI to identify and isolate the main attention of the photo, i.e., a human, an object.
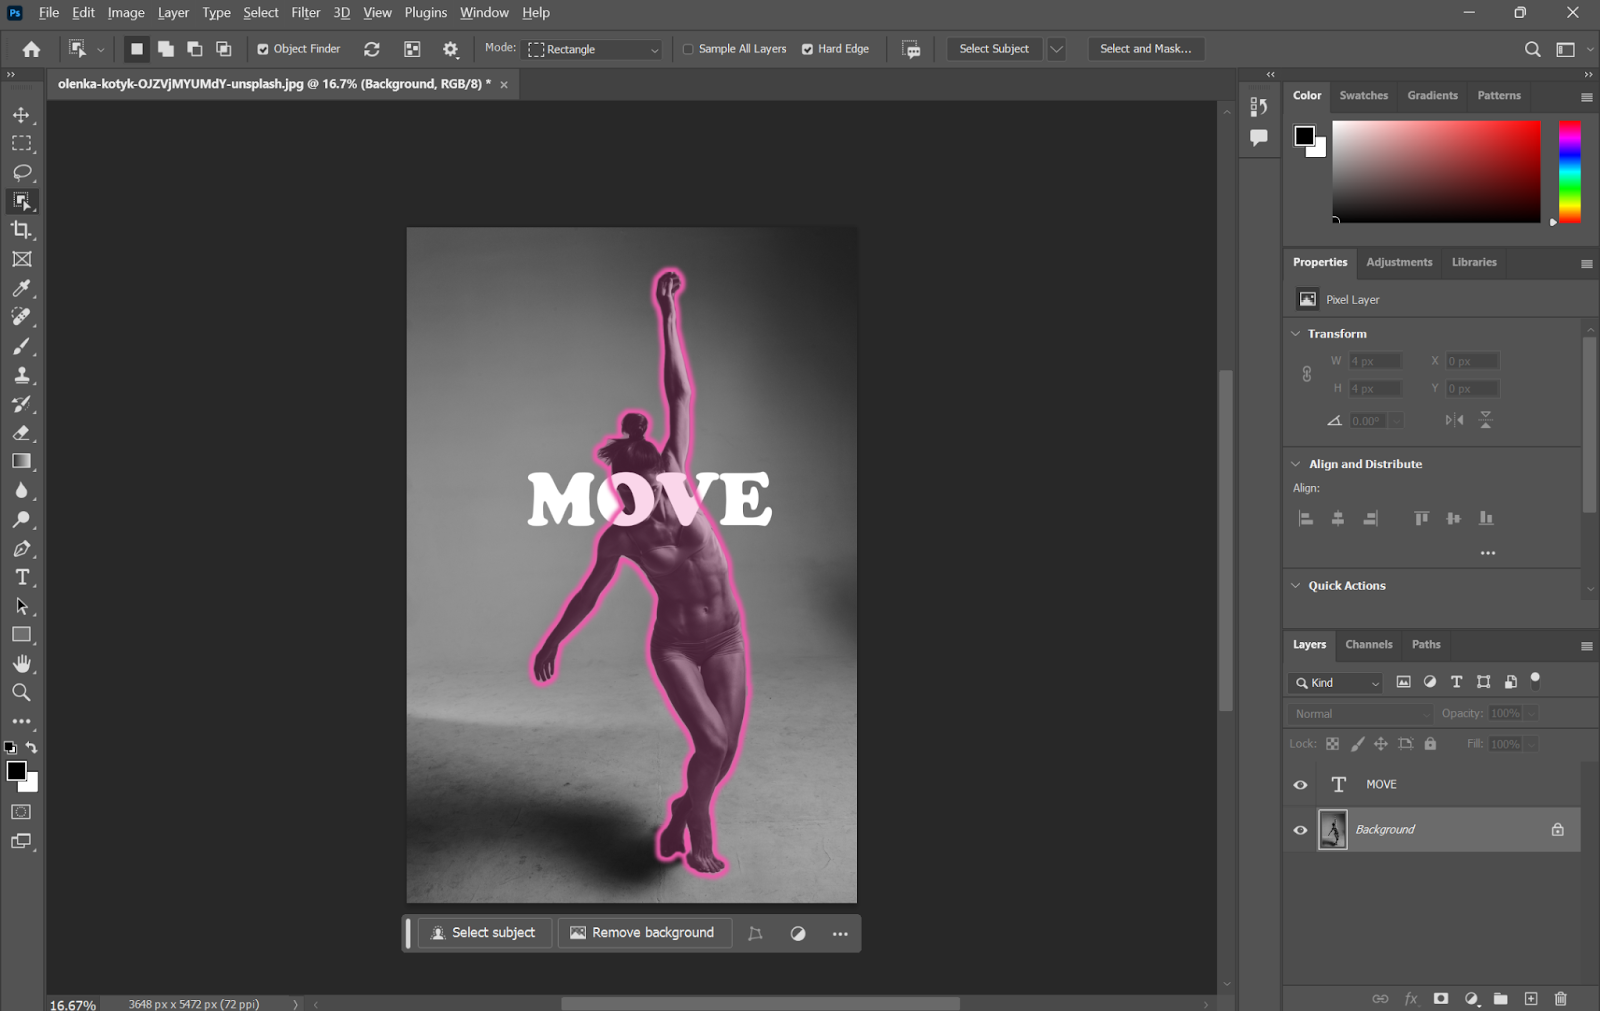
Step 3: Fine-Tune the Selection
Press the Q key to enter Quick Mask mode. In this mode, the red rectangle indicates unselected areas of the image. Use the Brush tool to paint with white to reveal areas or with black to conceal portions of the image. Press Q again to return to the regular selection mode once you’re satisfied with your adjustments.
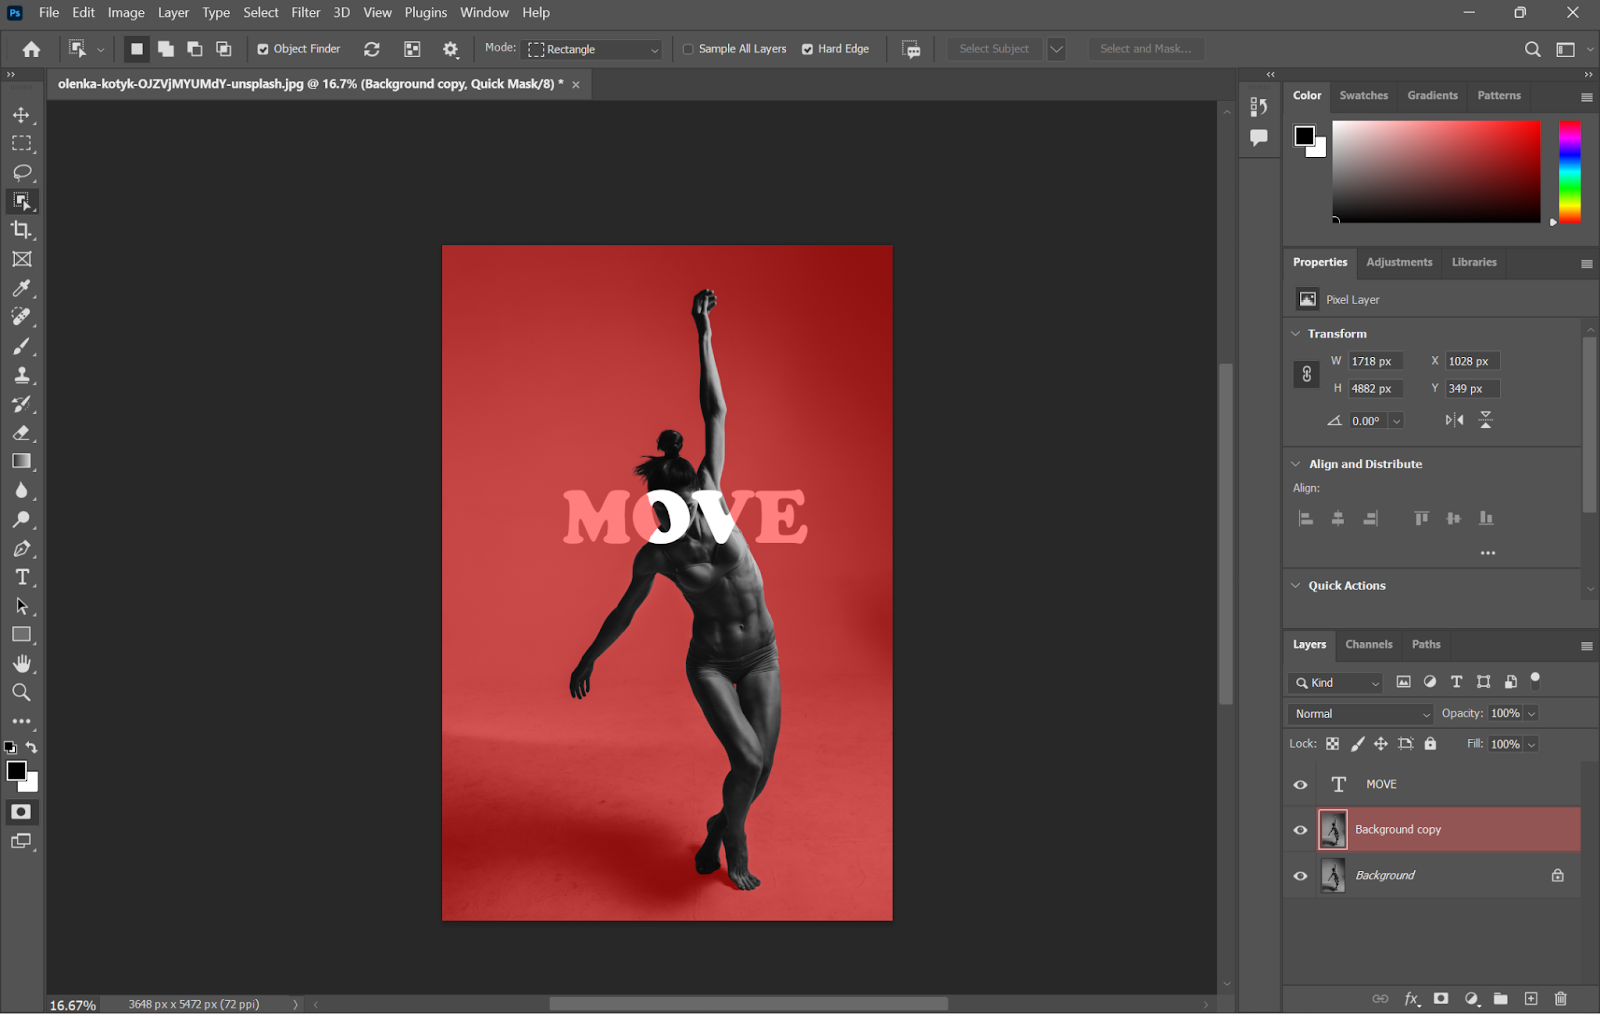
Step 4: Create Layer Mask
From the right bottom, click the Layer Mask to create the mask for this layer. So that this layer will conceal the background.
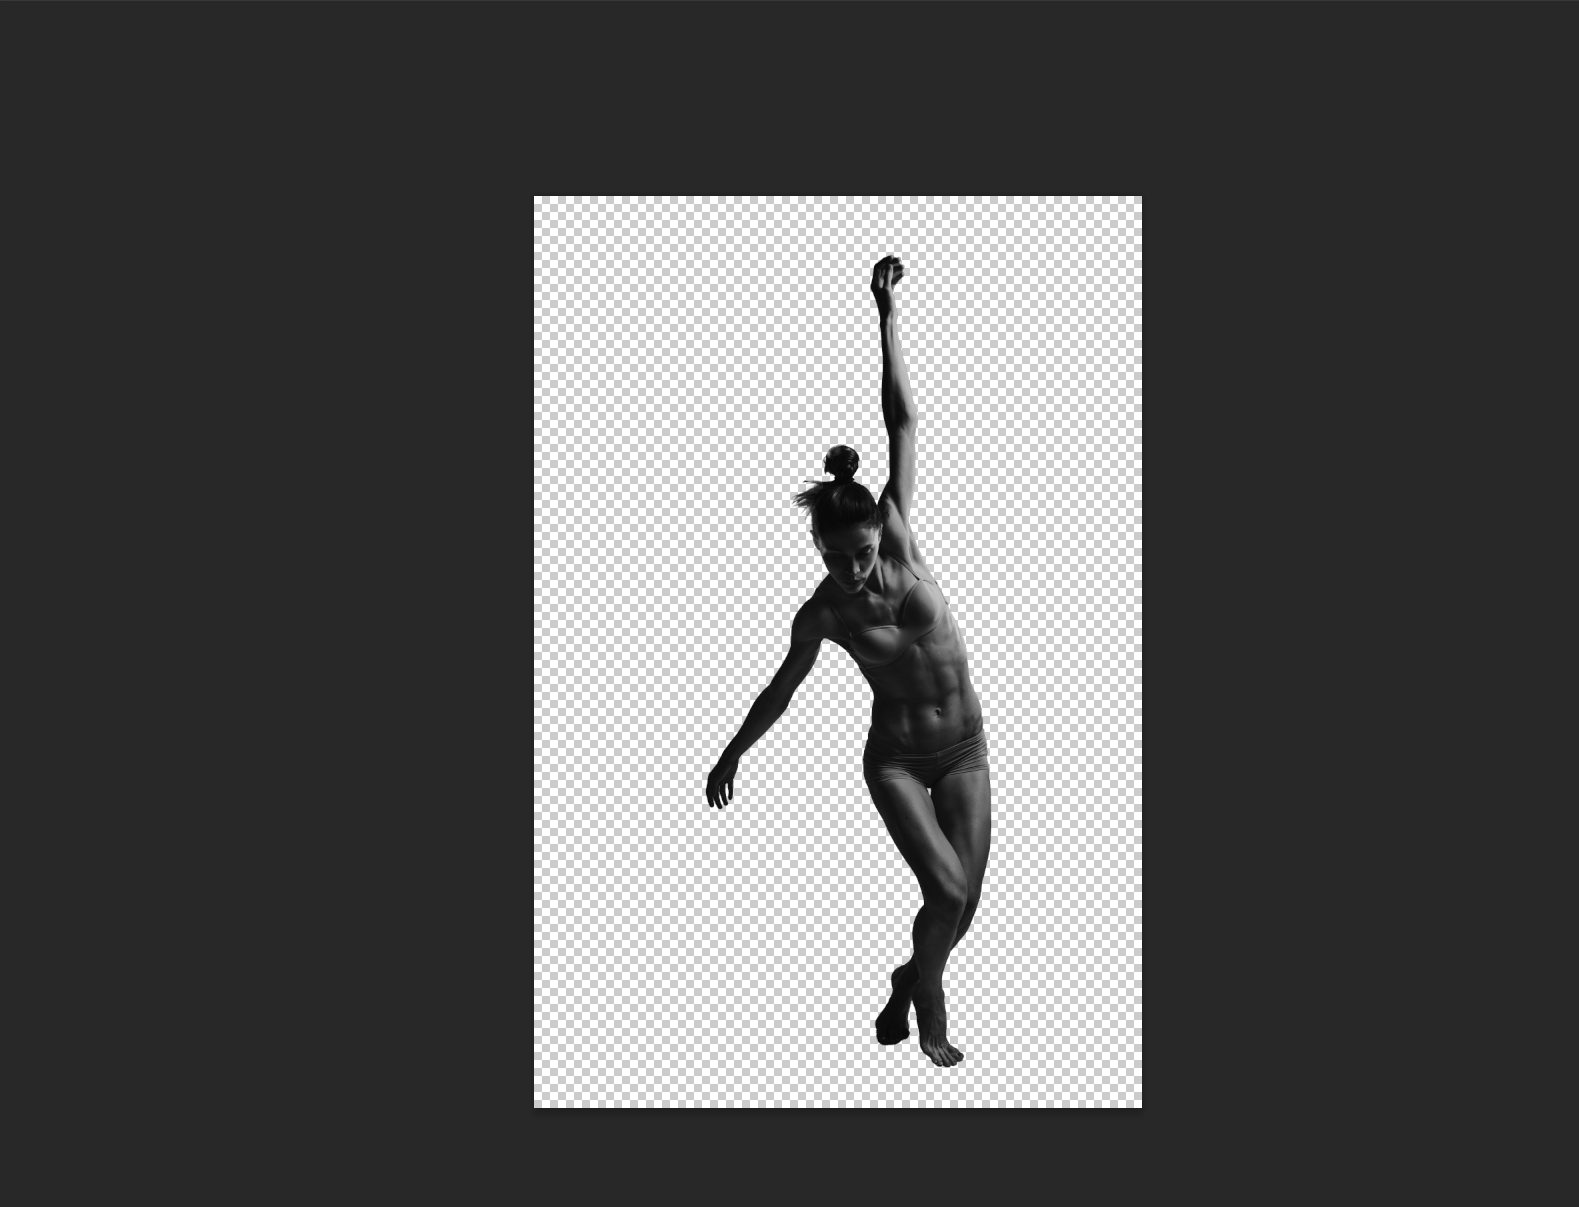
Step 4: Place the Text
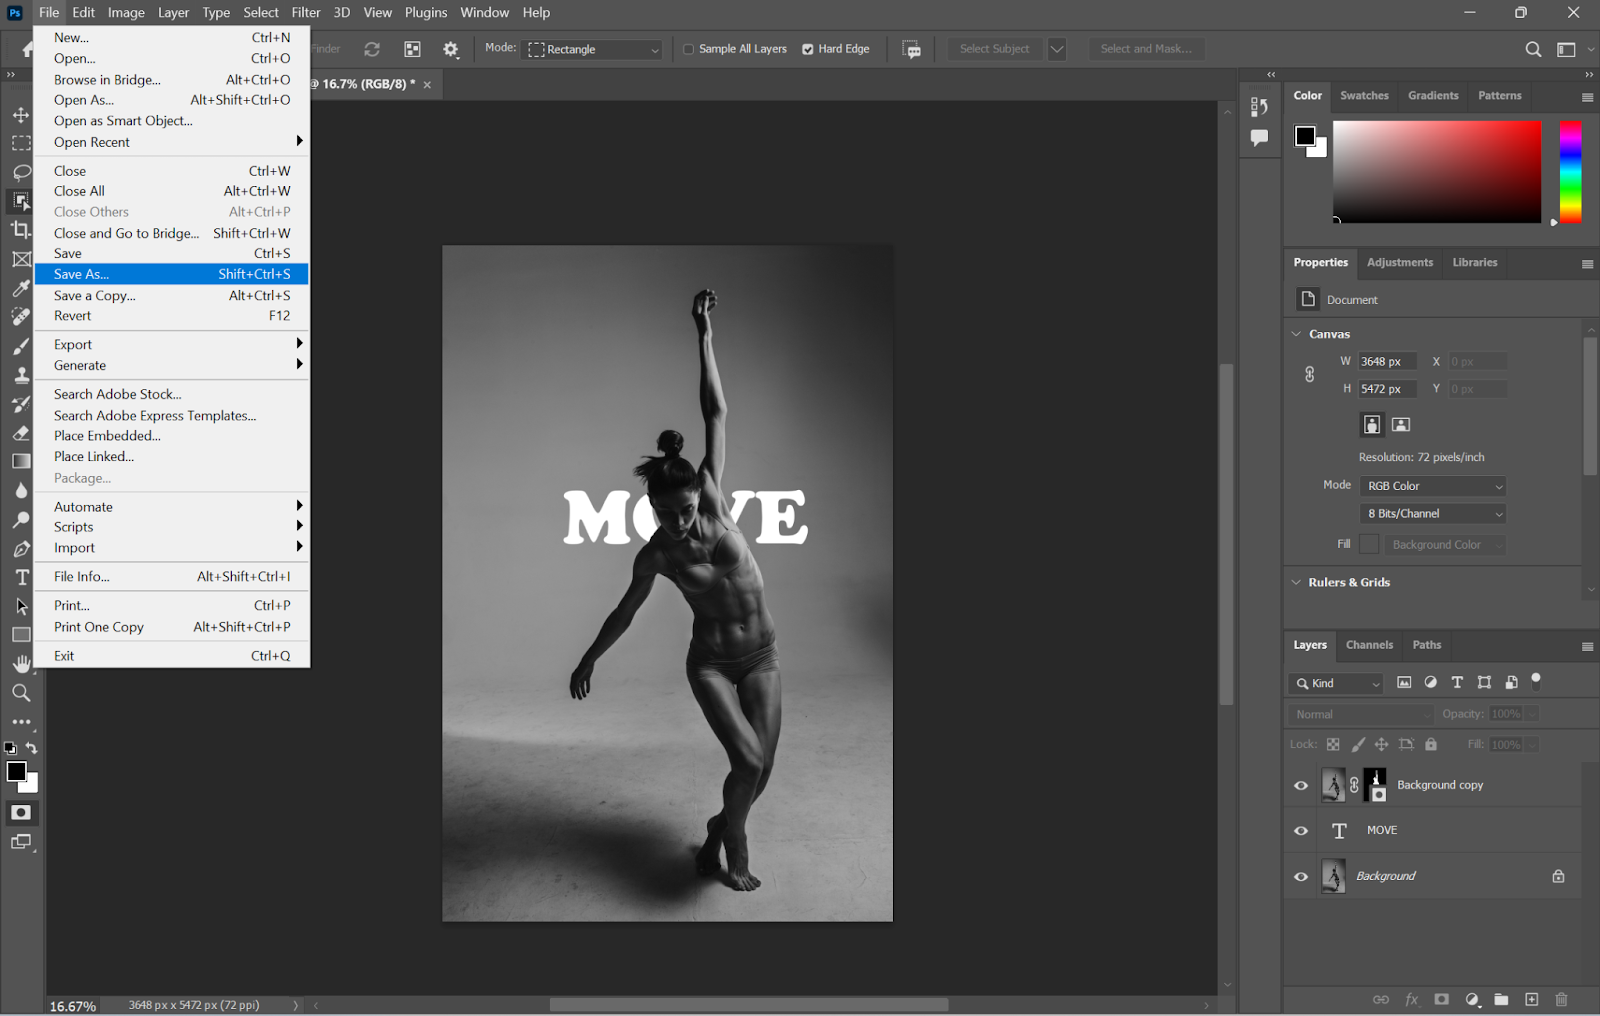
Adjust the order of the layers. Make the text layer behind the mask layer to let the mask layer block the partial words of the text to achieve the text behind the image effect.
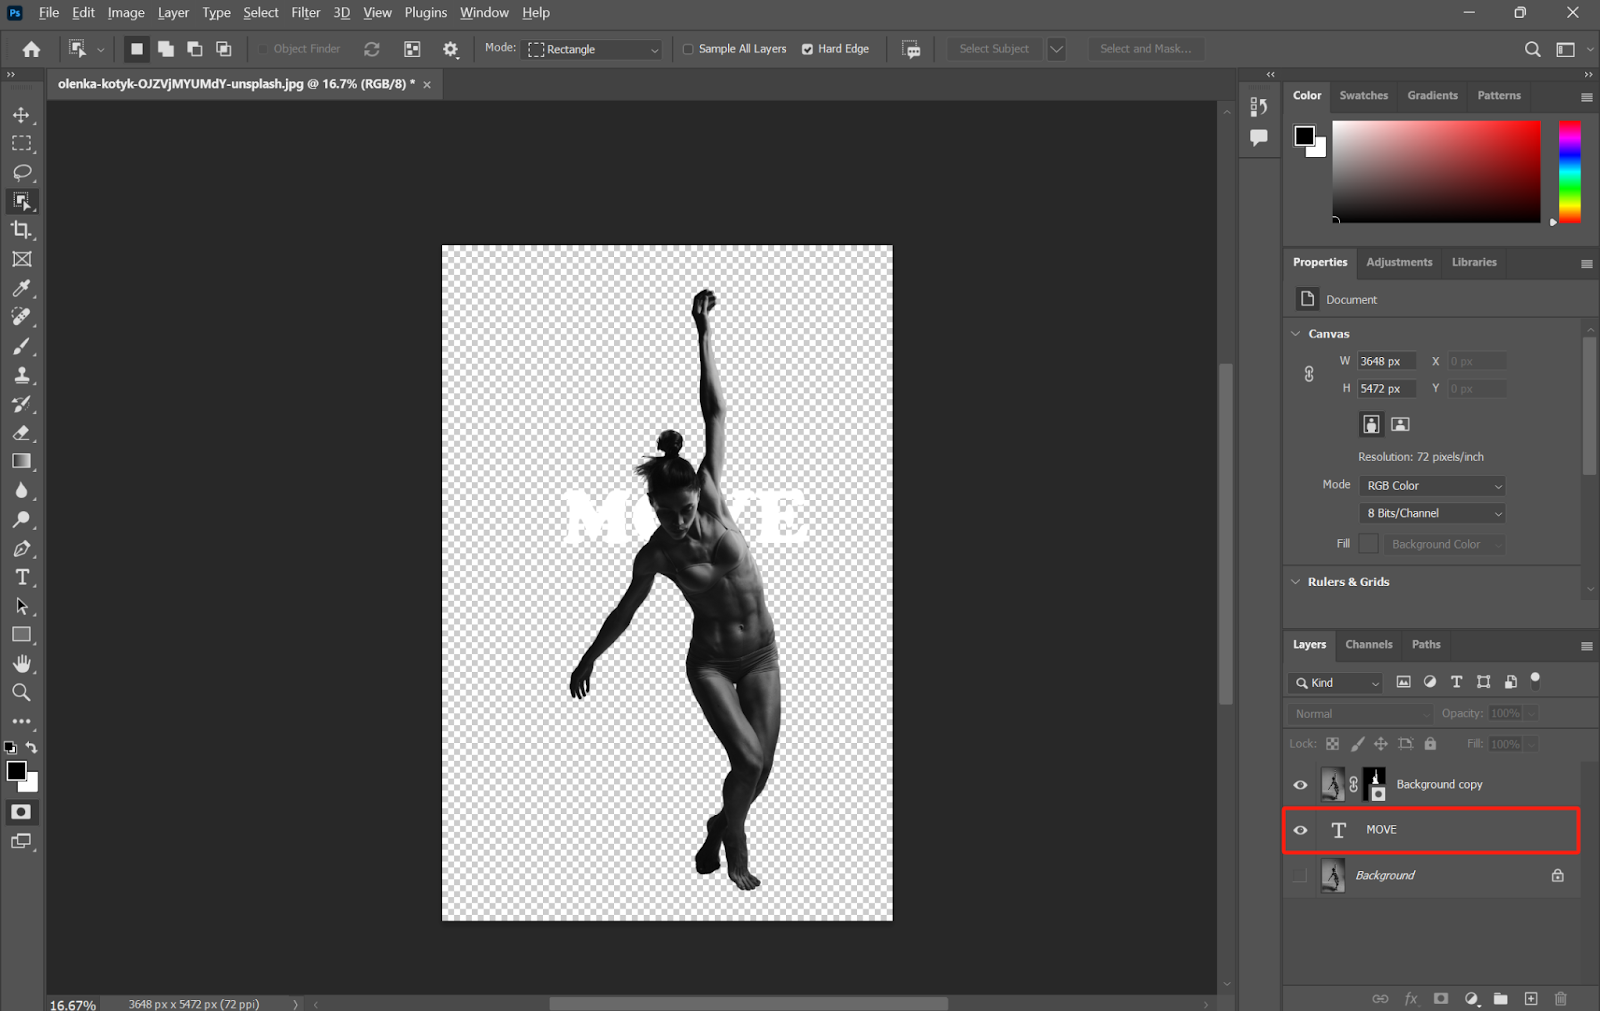
Step 5: Save the Picture
Reveal all the layers to show the final results. You can also use other tools to make the picture better. After that save the picture on your computer.
Conclusion
Start using tools like Canva, PowerPoint, or Photoshop to easily place text behind images. Whether for social media, presentations, or poster designs, this technique enhances your creative impact. Start designing now and create visually stunning content with this powerful effect!